Handmade Resin diary cover
Making something that really reflects your personality feels really special. Instead of having a regular store-bought diary cover, I decided to create my own using resin, as I've recently learned how to make it online.
I wanted something unique, stylish and durable that would make my diary stand out.
Resin crafting is fascinating and this project felt like a perfect opportunity to experiment. With just a few ingredients I was able to transform a simple diary to a cute art.
In this post I'll share the steps I took in making it and the materials I used.
- Epoxy resin
- Hardener
Silicone mold (diary cover size) - Color pigments or mica powder
- Dried flowers, Gold foil for decoration
- Mixing cups and sticks
- Gloves and mask (for safety)
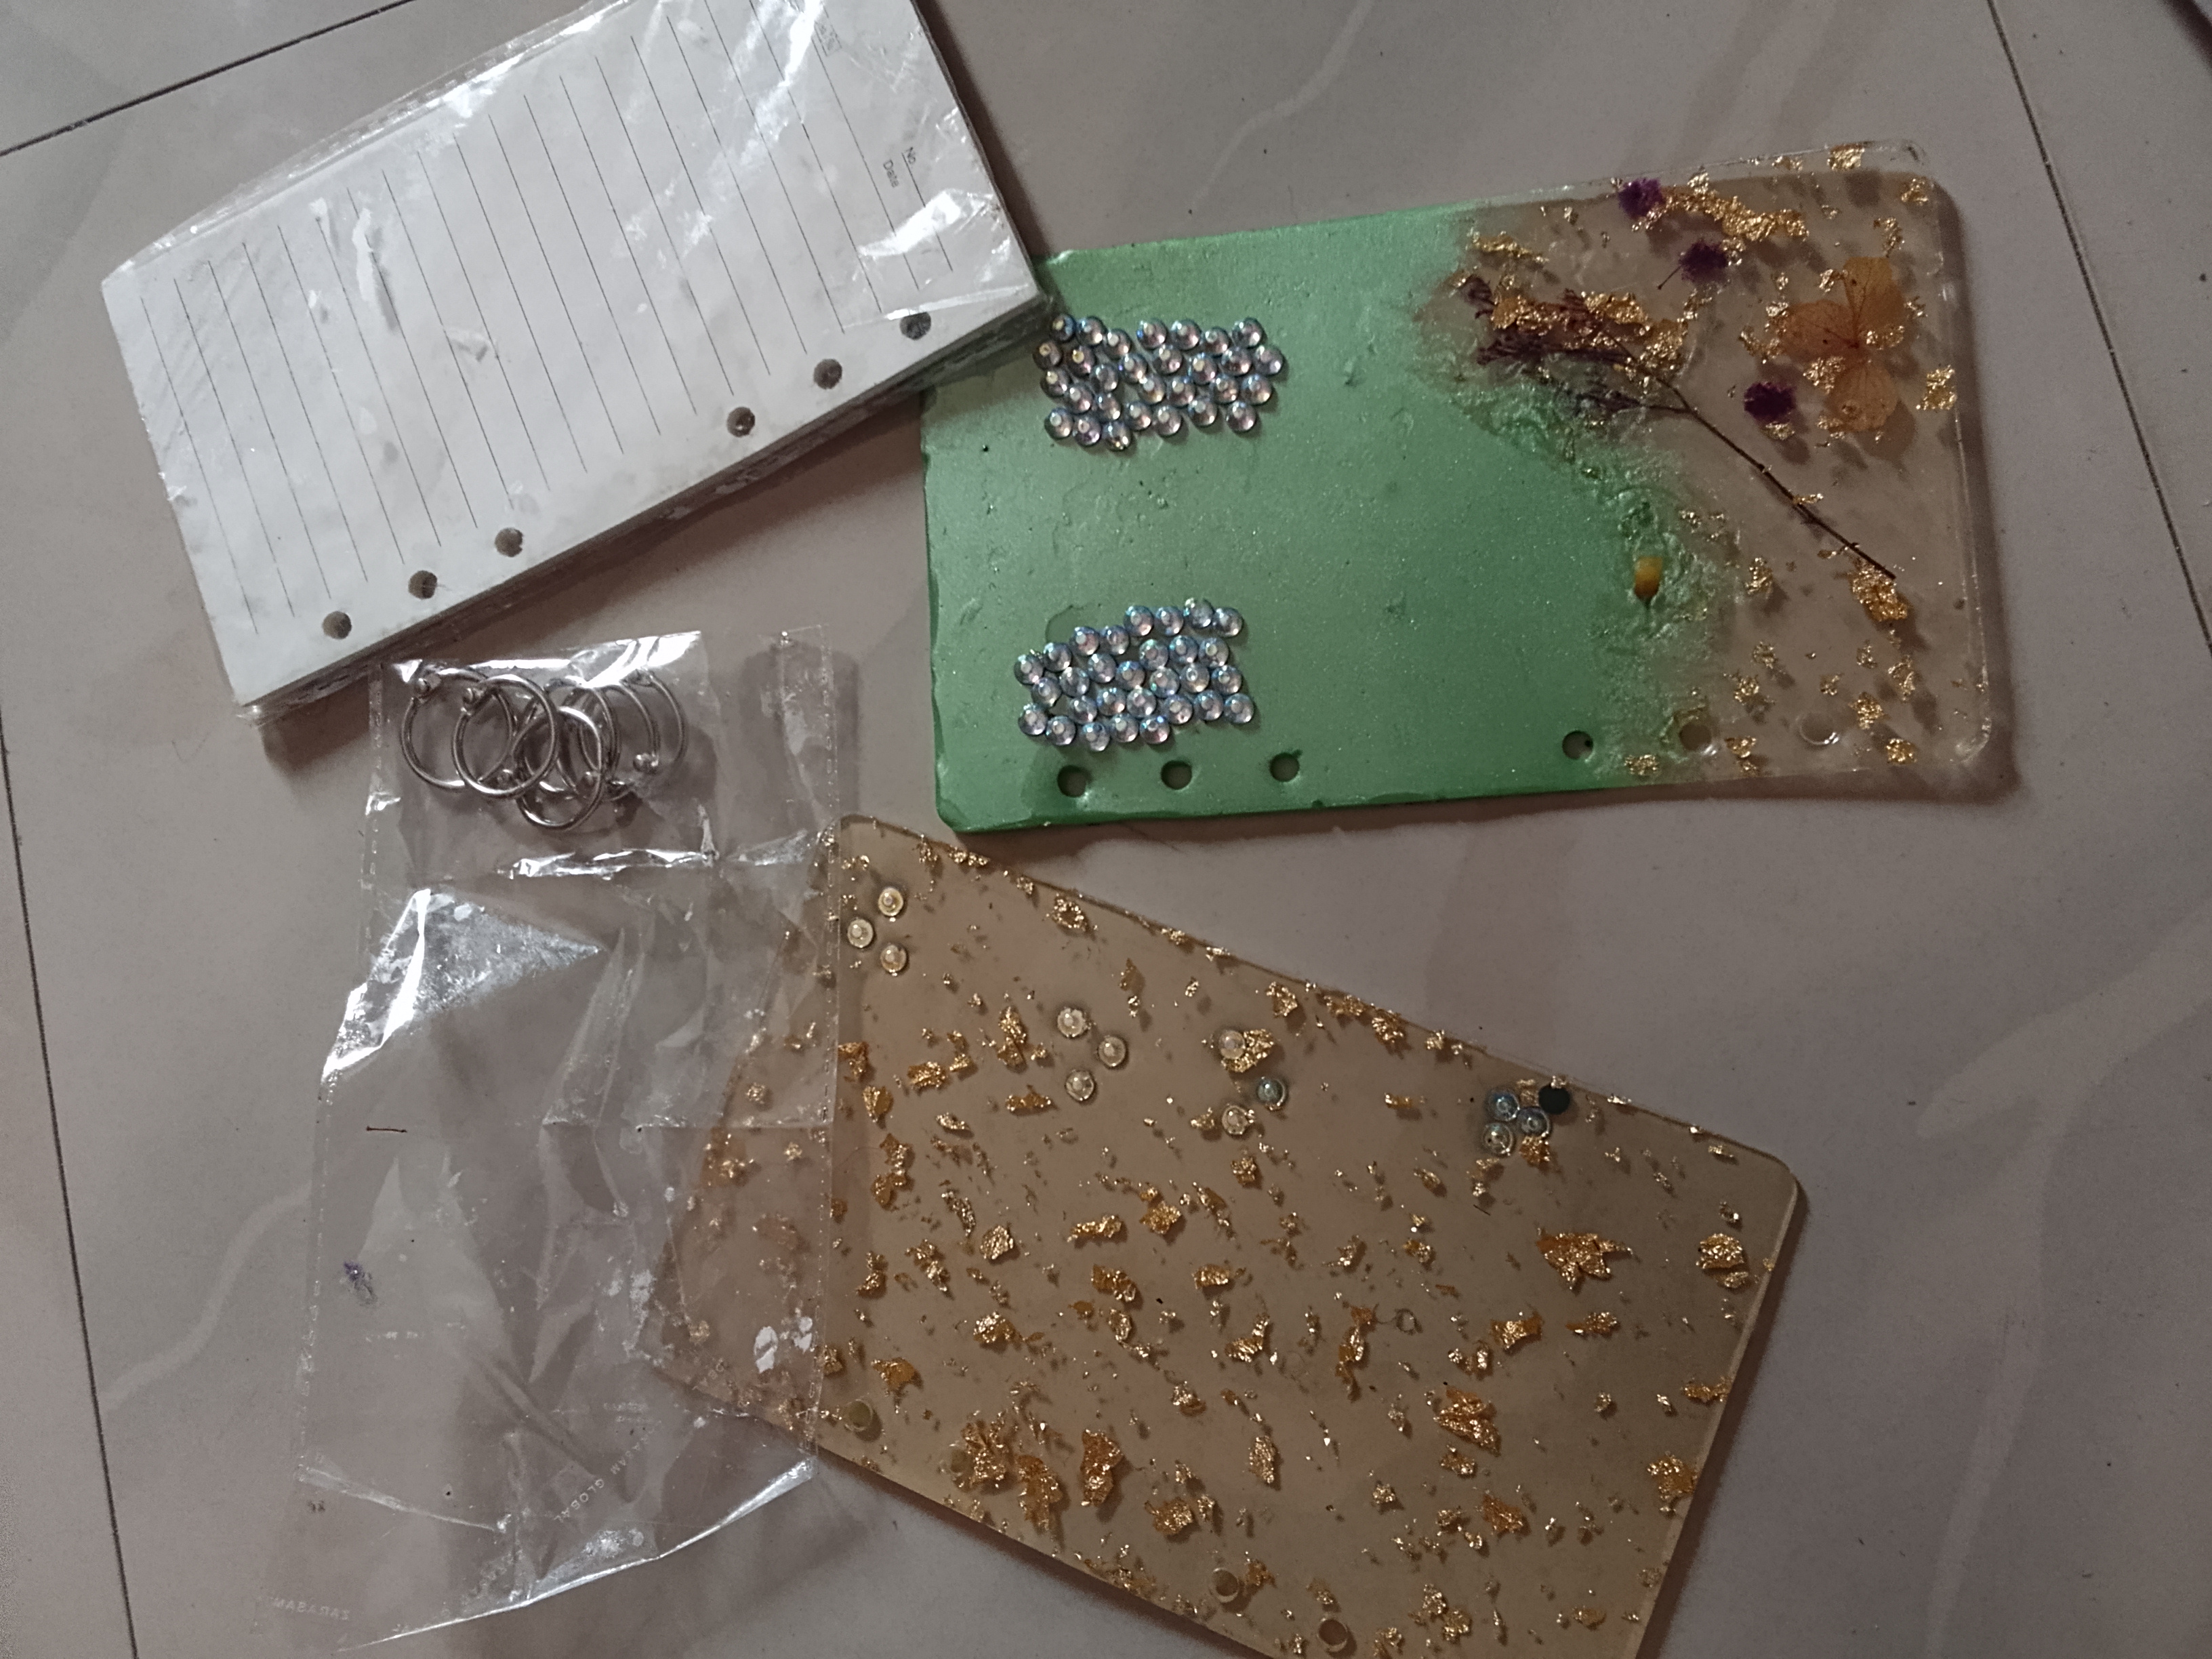
- Diary or notebook to attach the cover

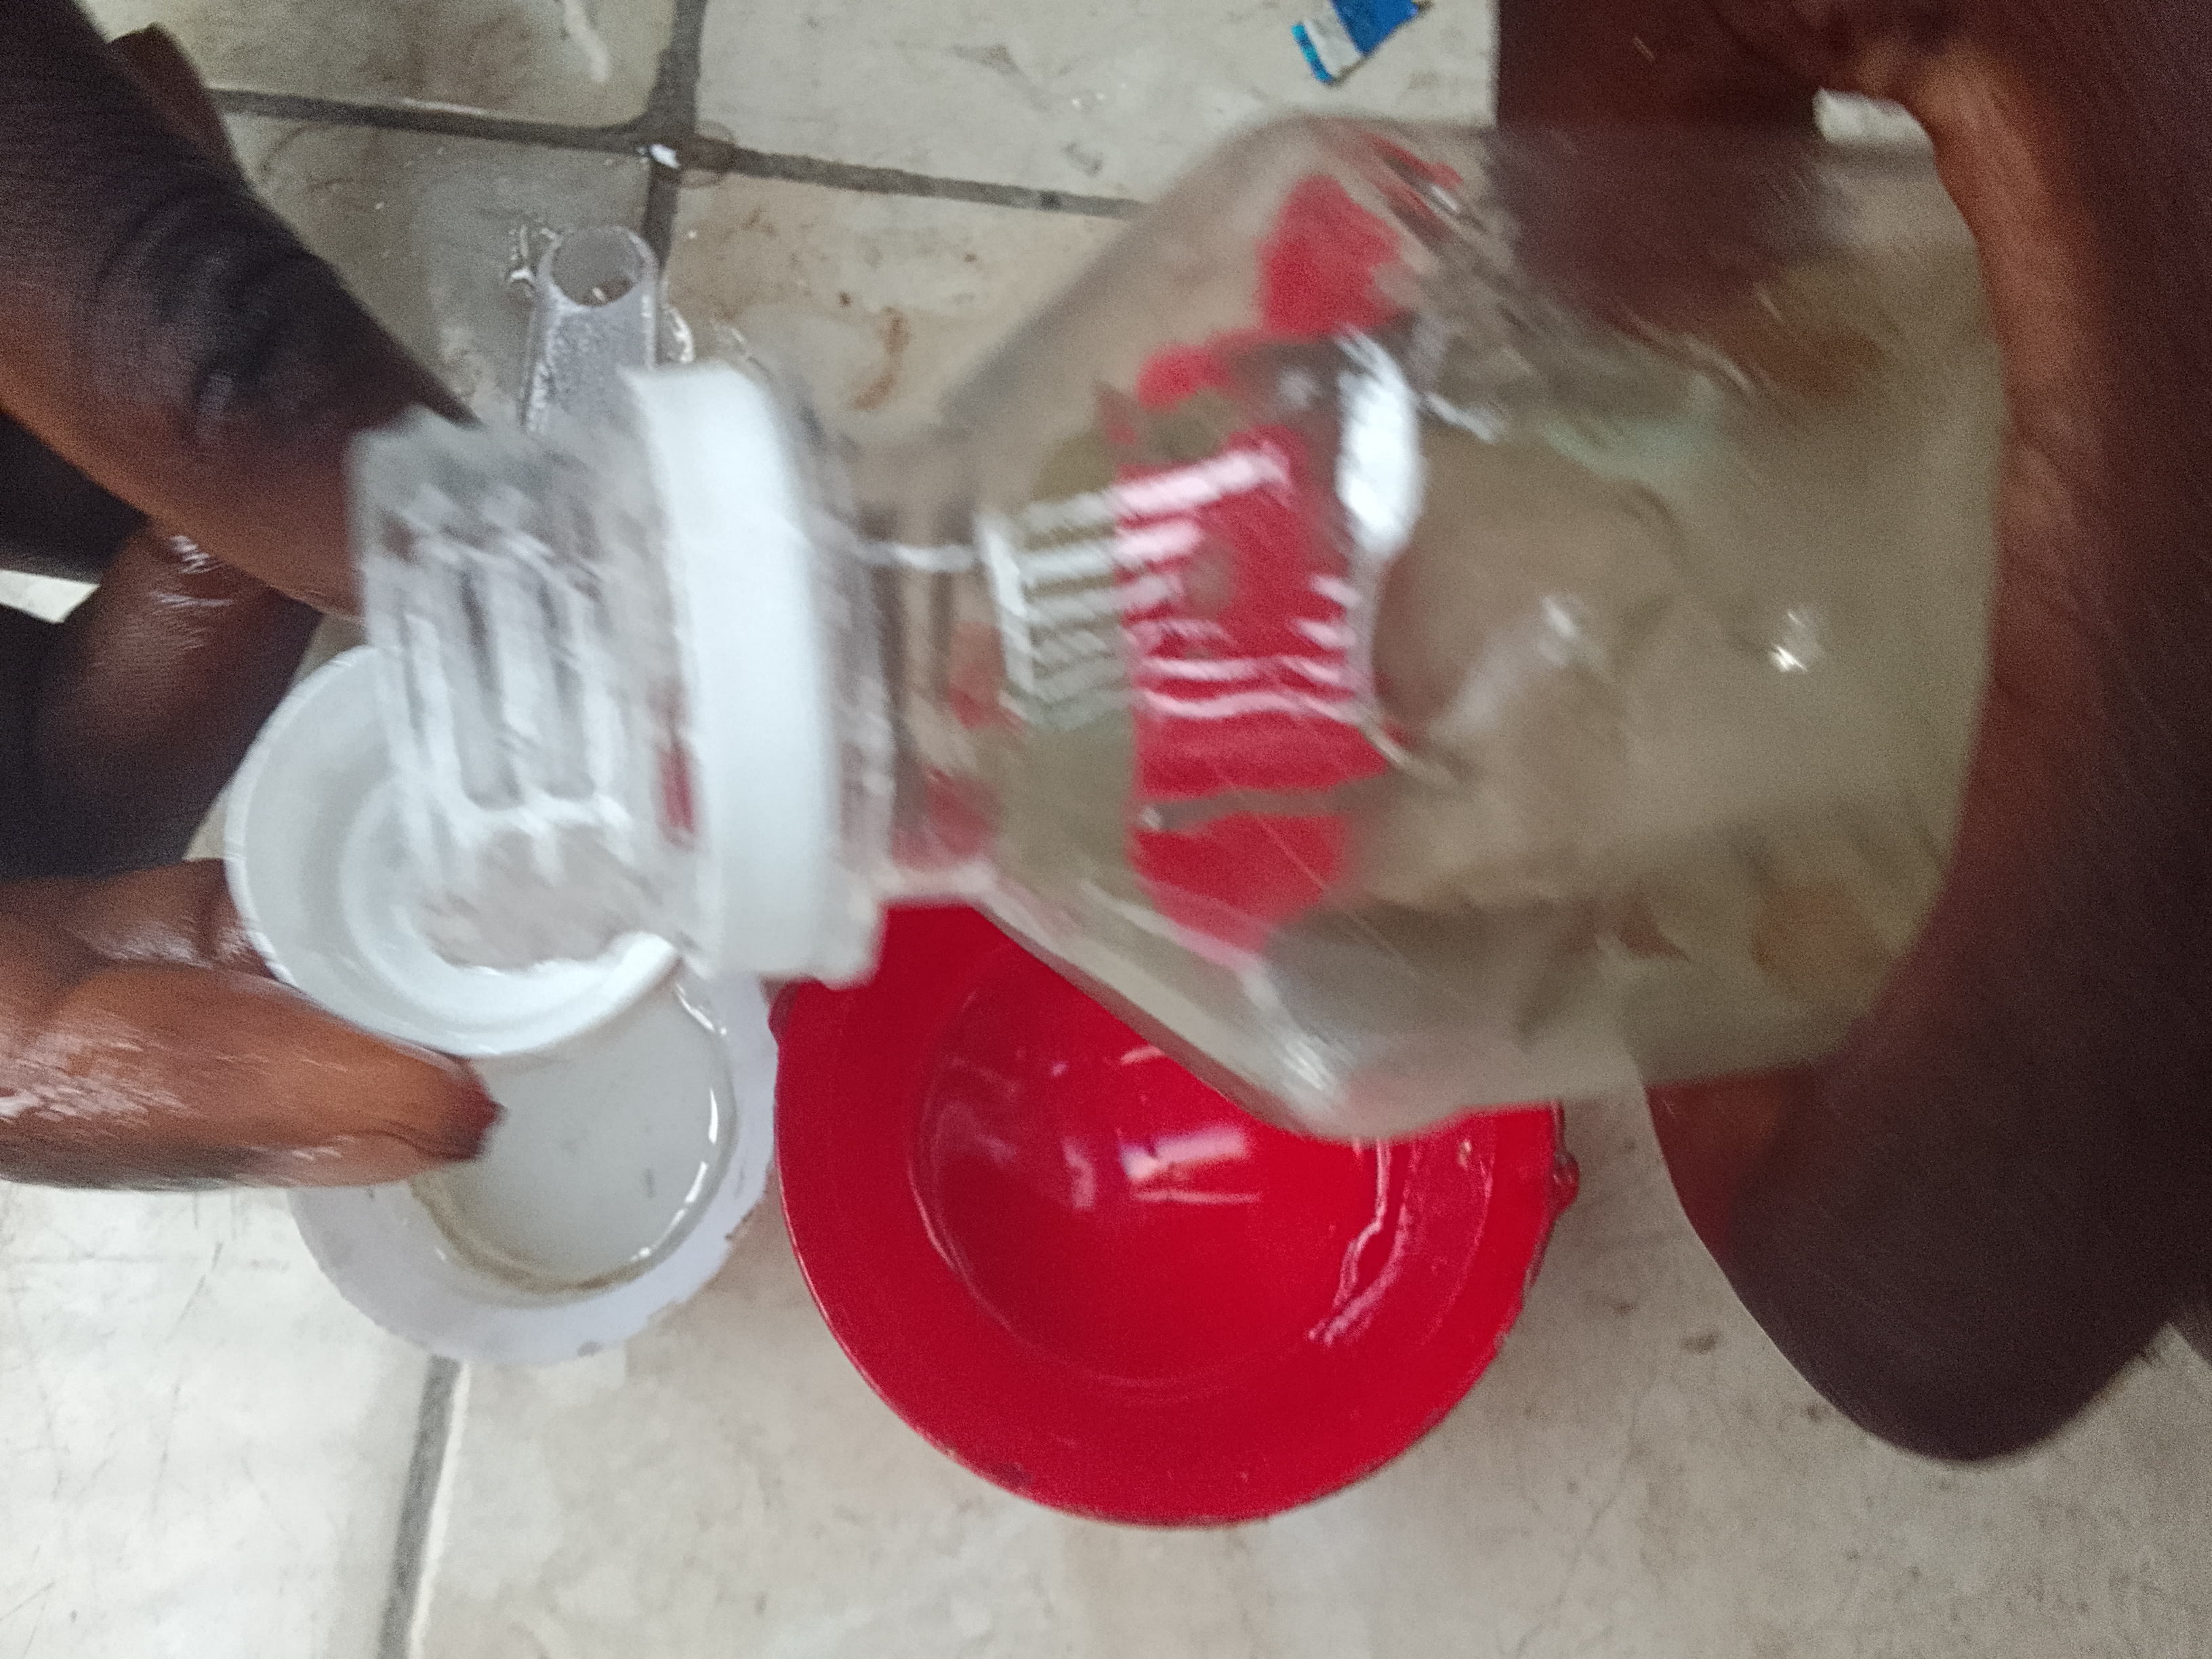
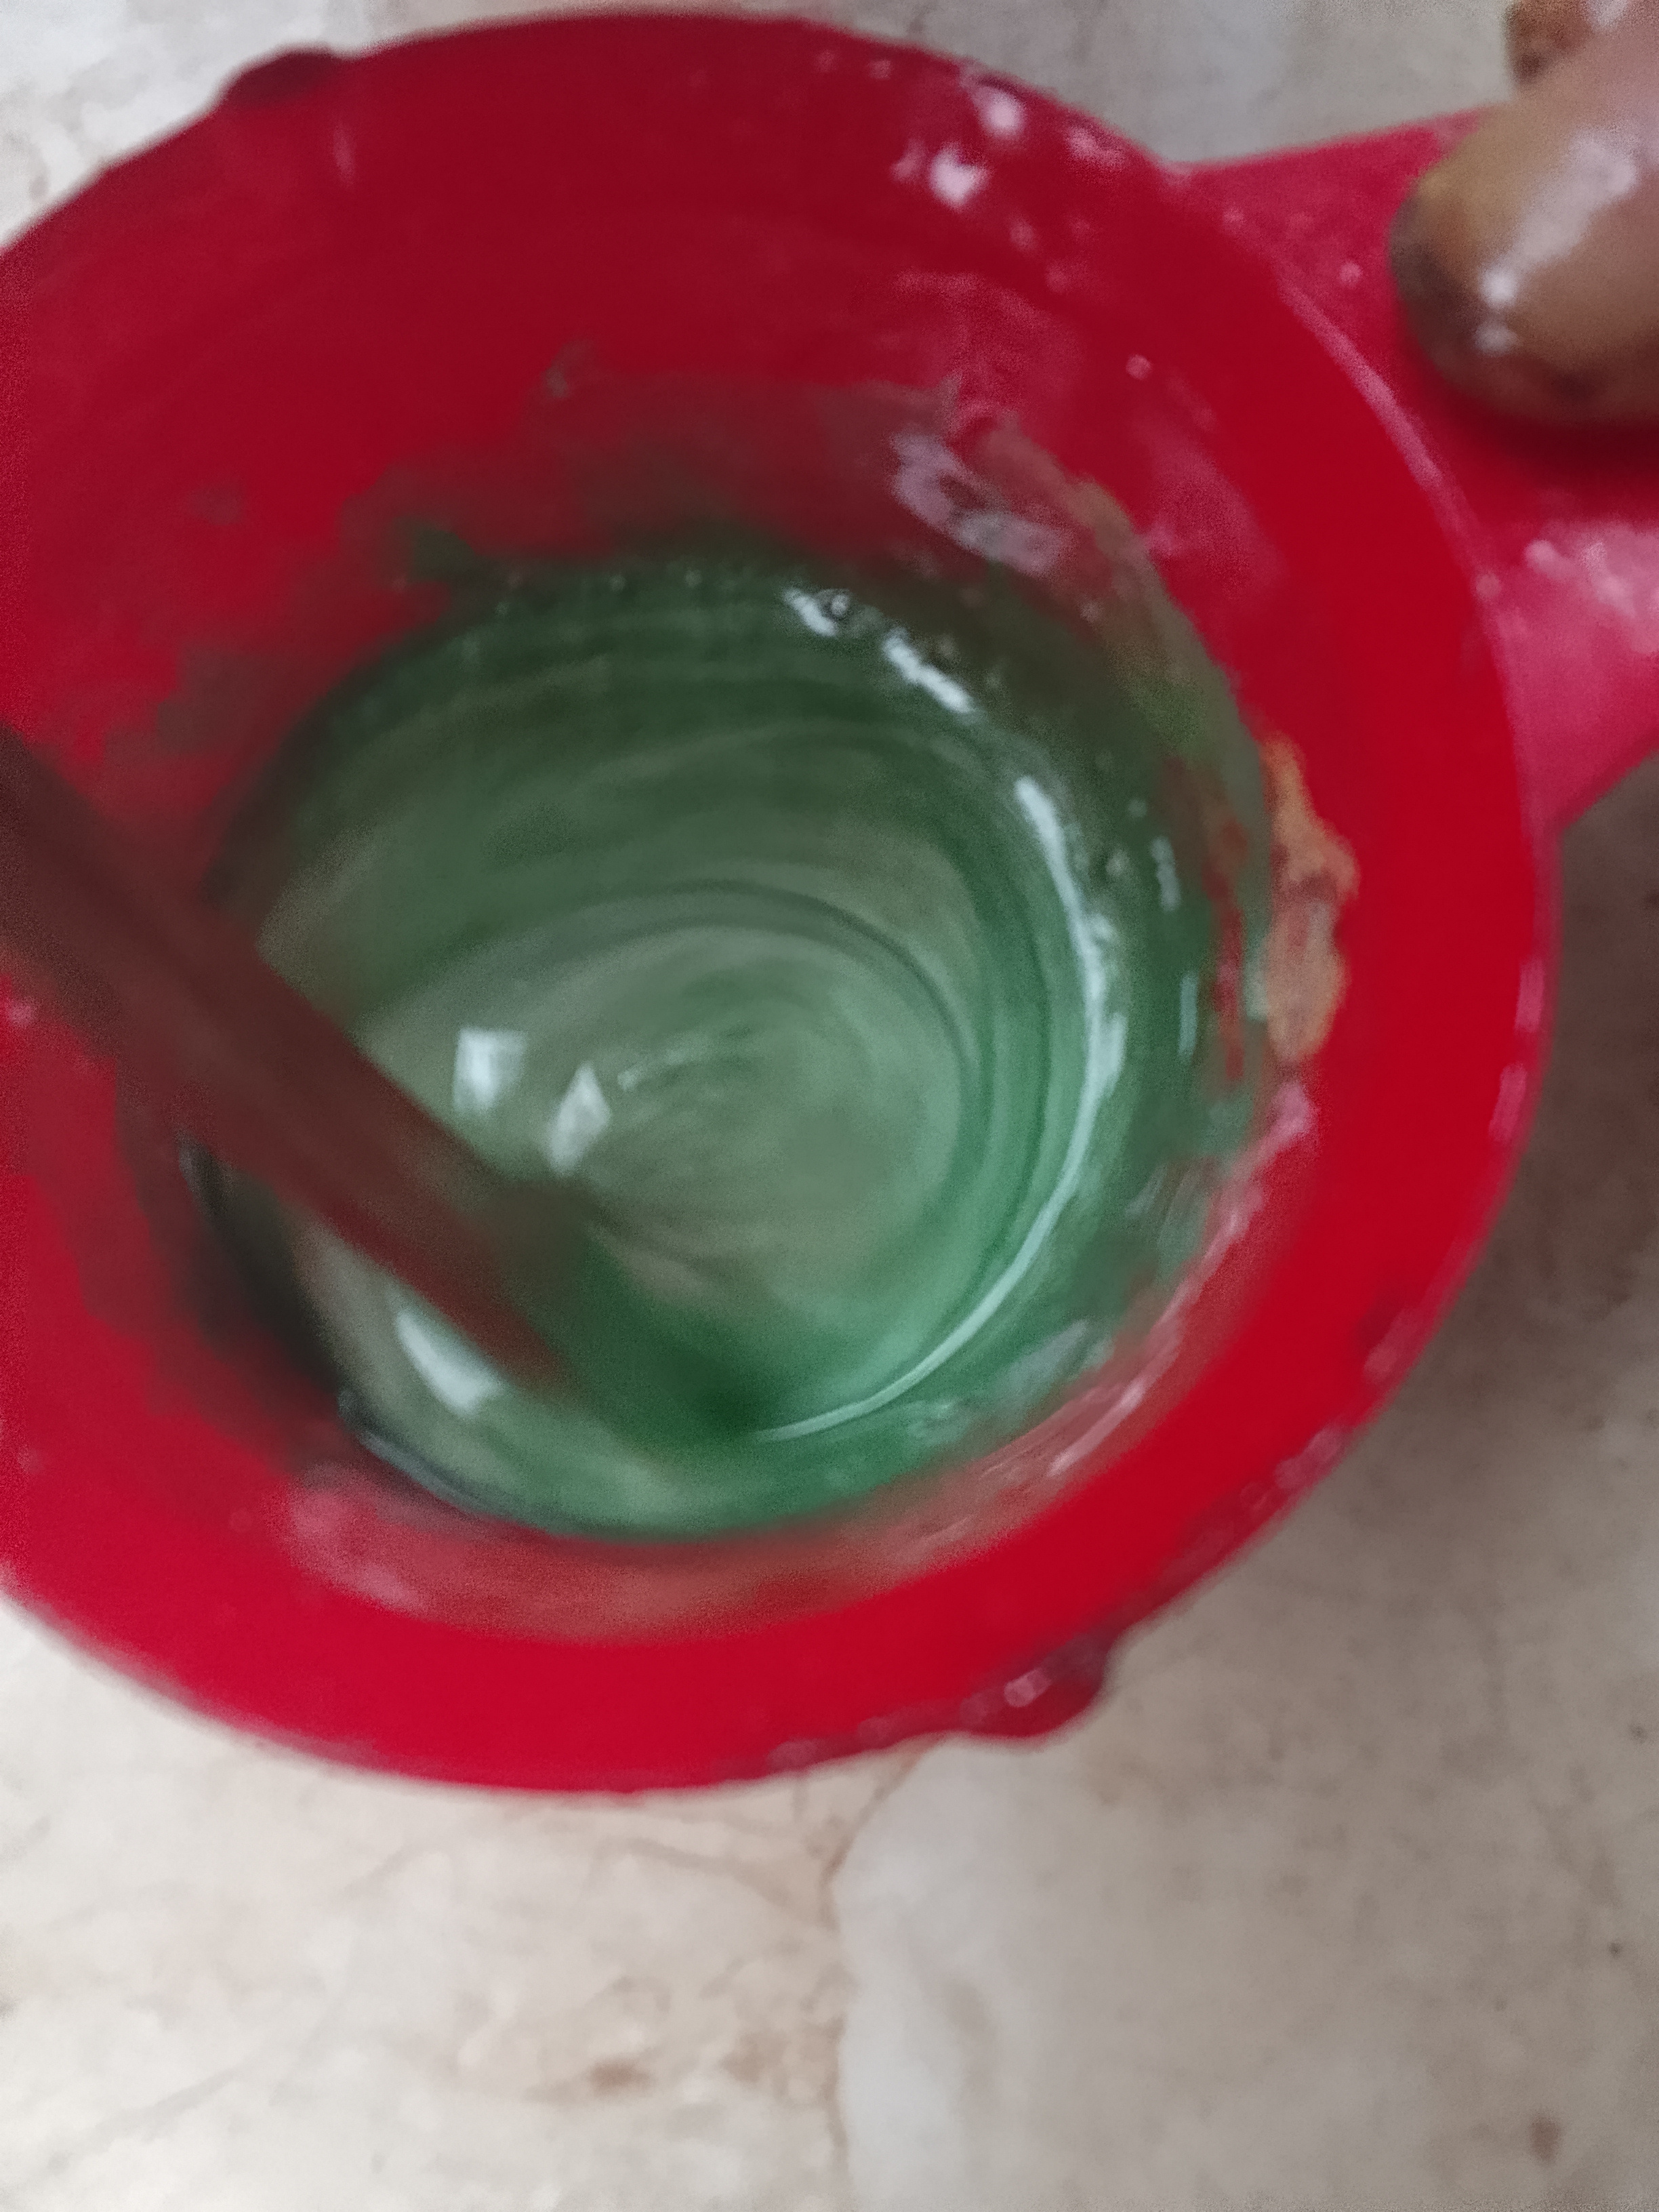
In the mixing bowl I poured 4 plastic bottle cap size of epoxy resin and the same amount of hardener and mixed them in two different mixing cups

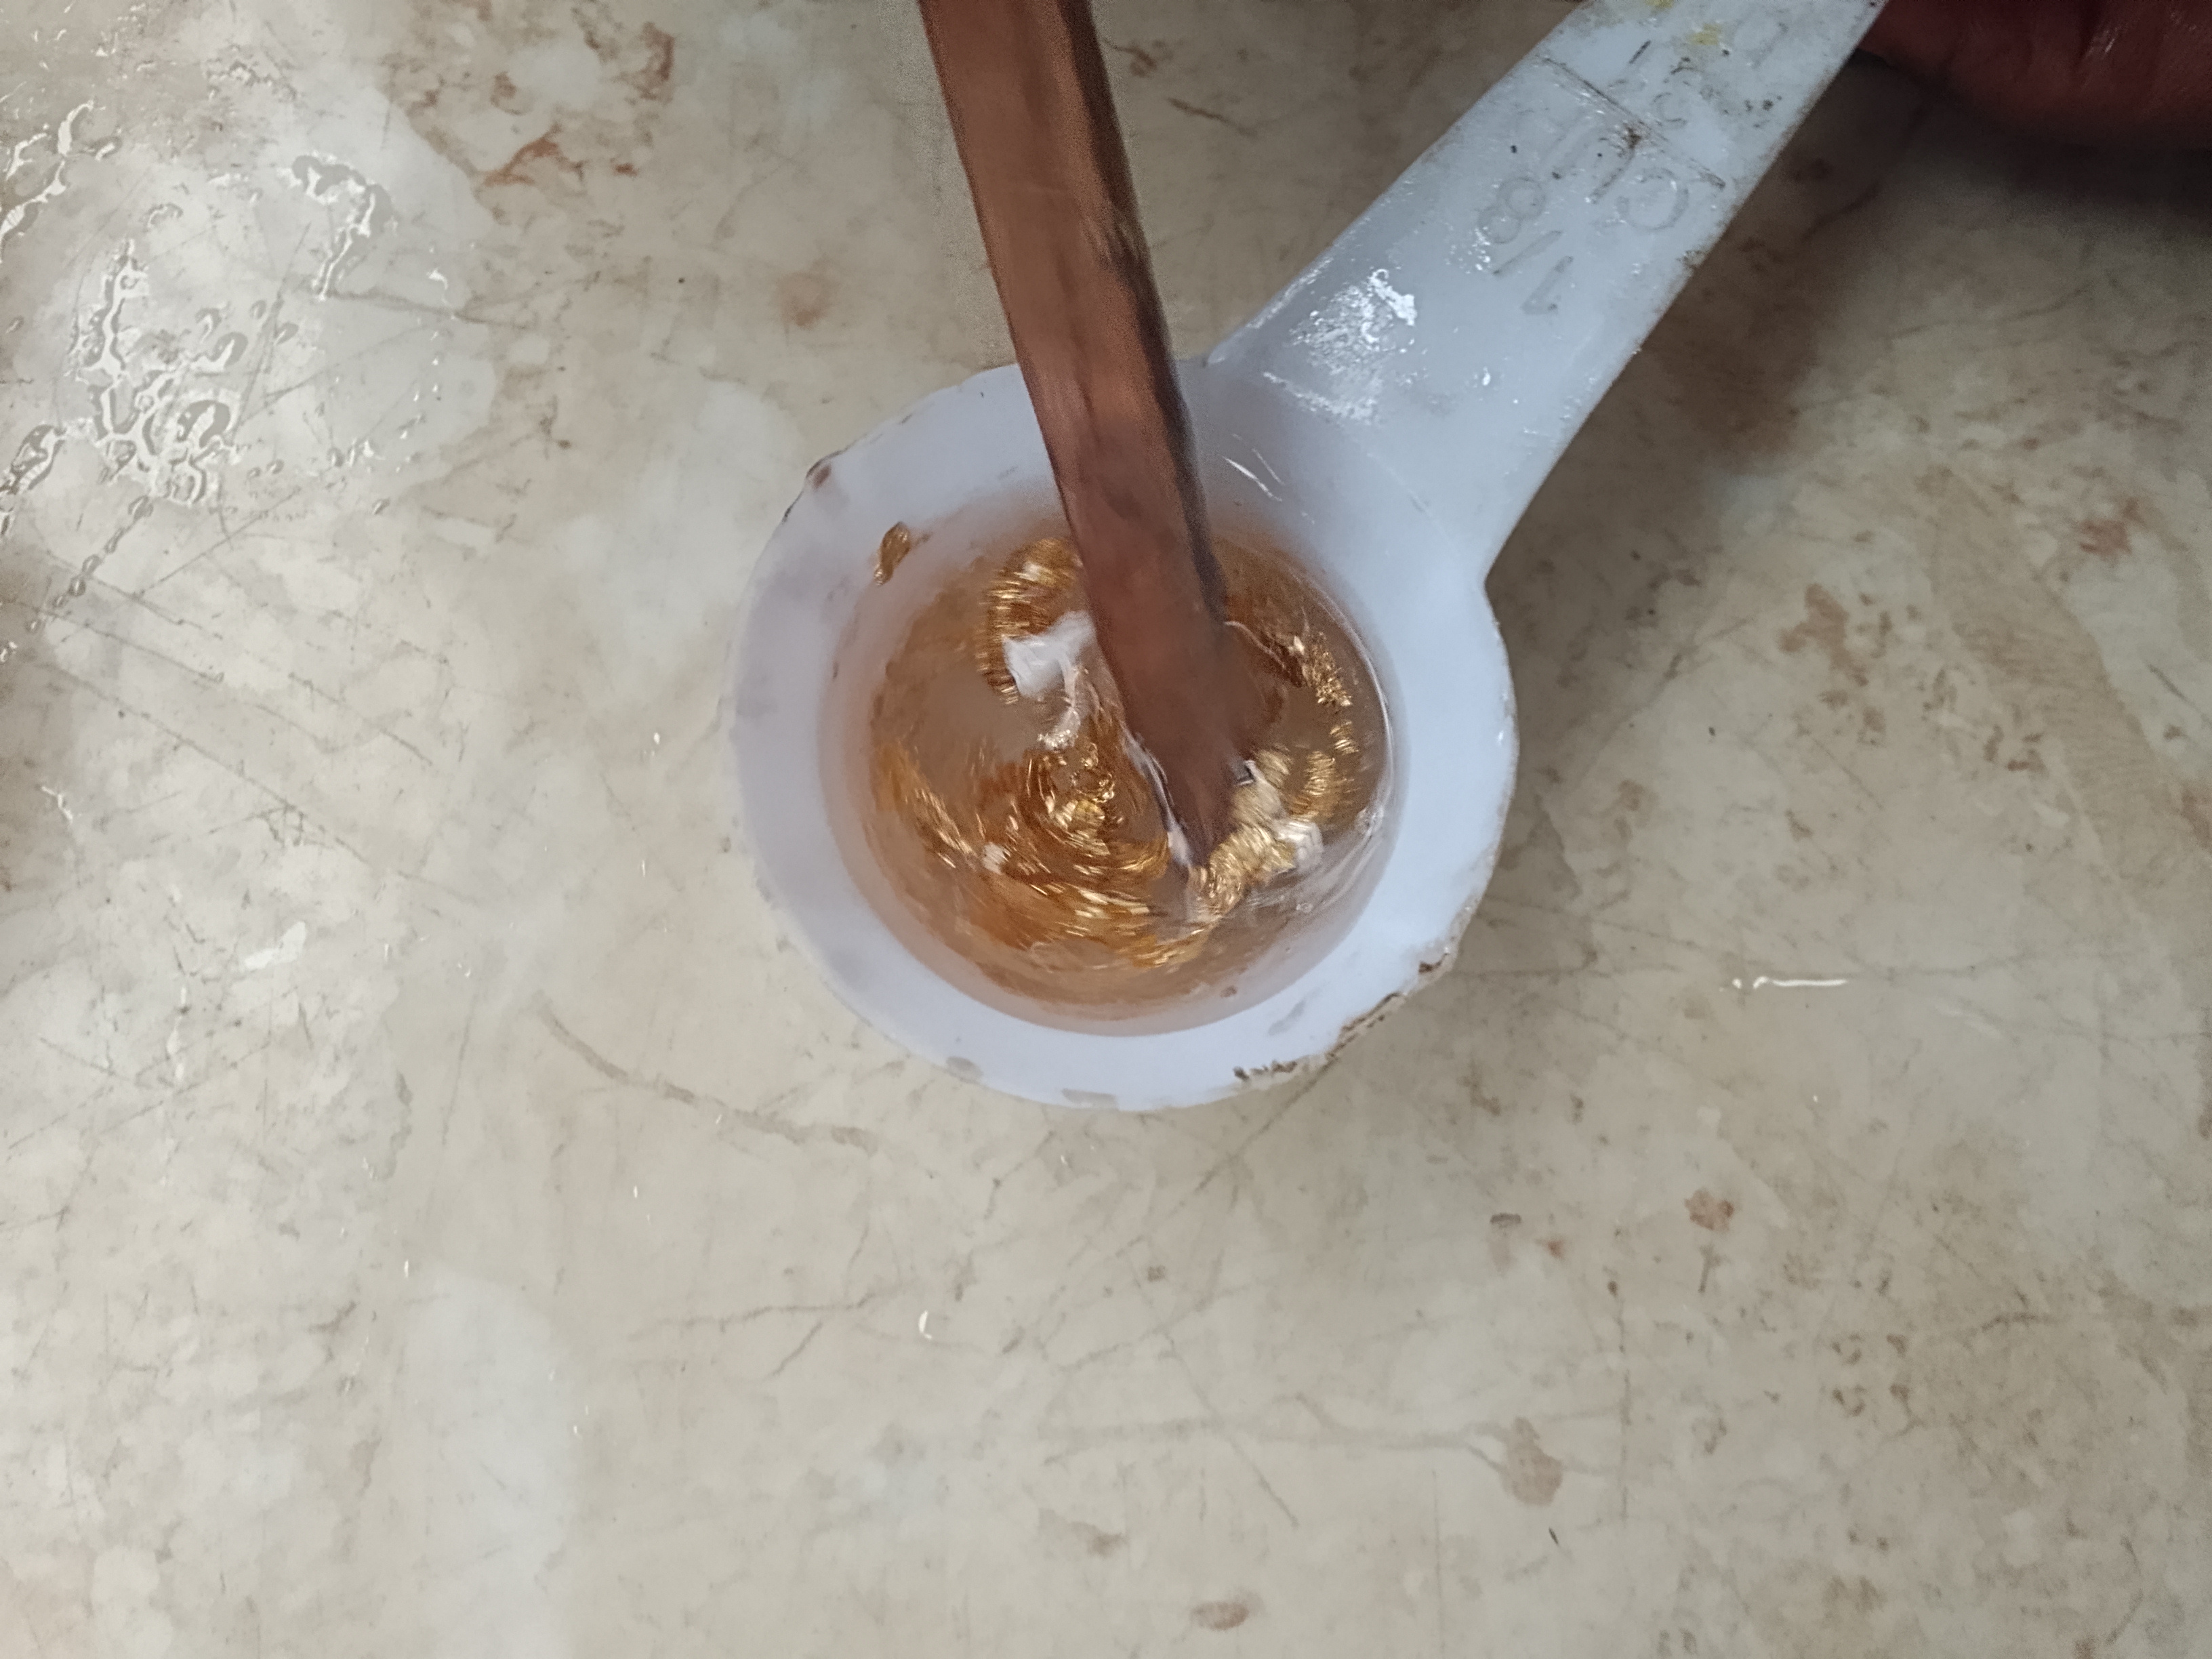
Since I wanted the diary cover to have two dimensional colors, in one cup I added the decorative gold foil and was stirring it in to mix properly
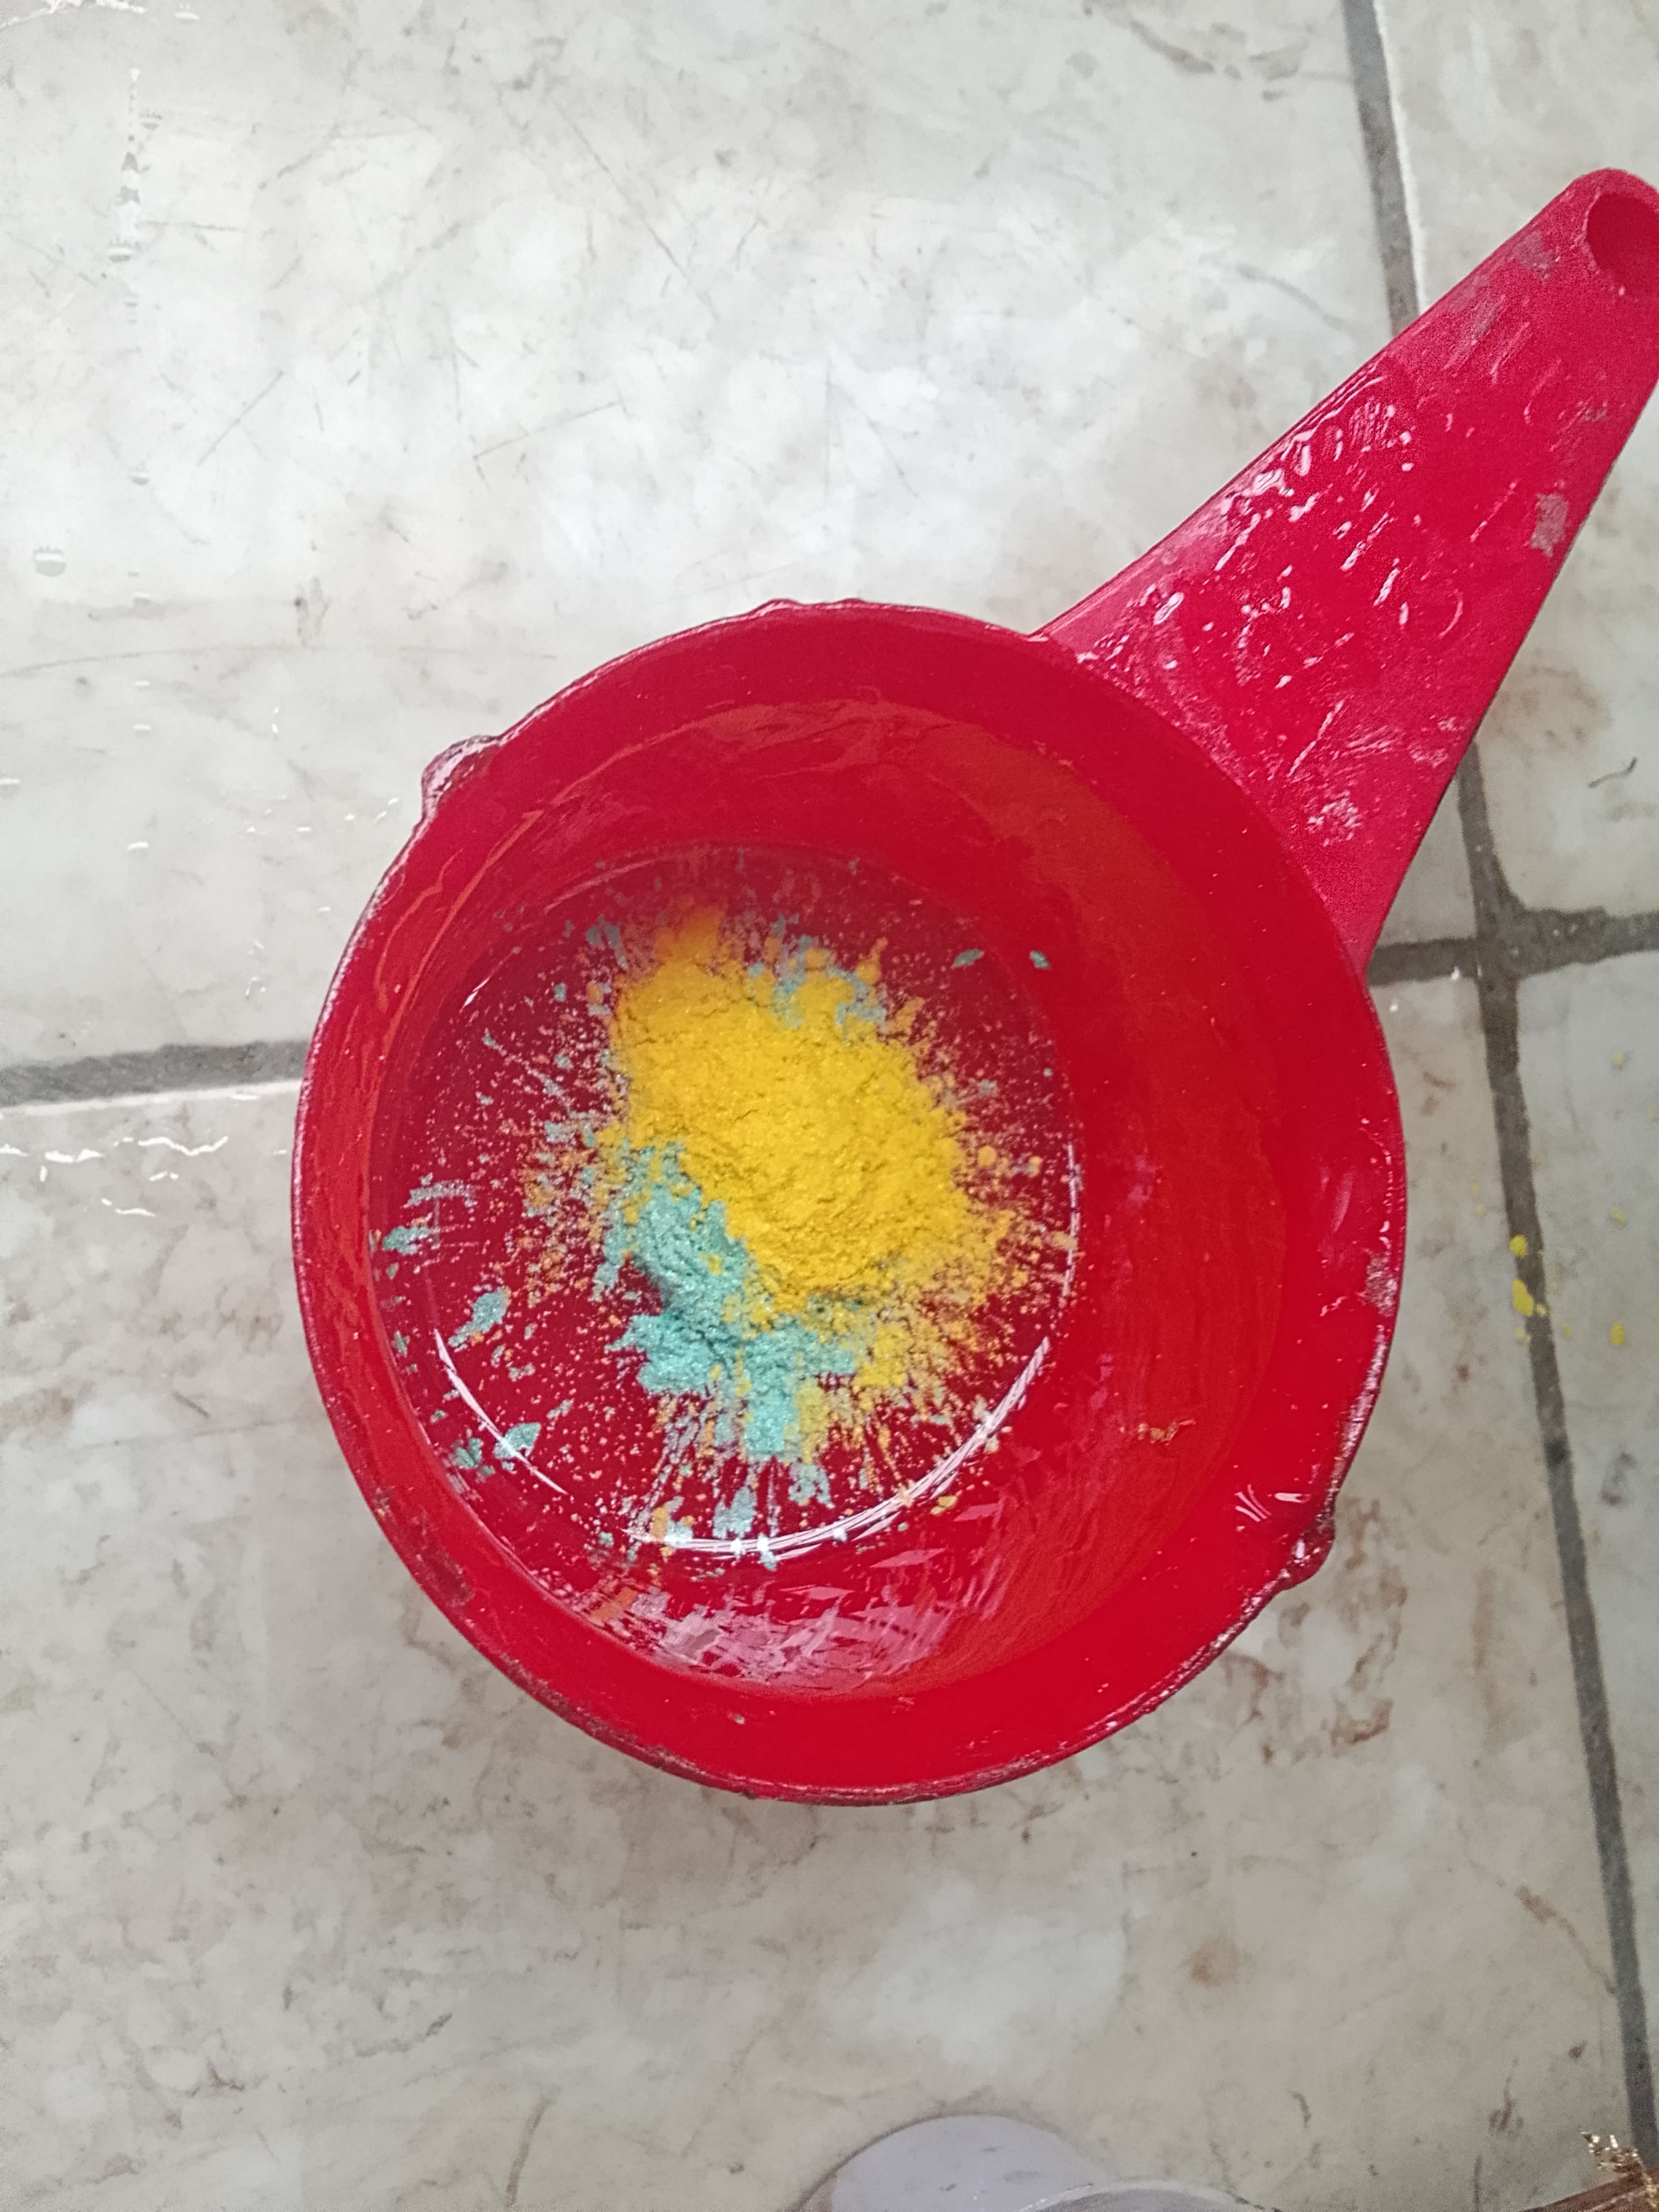
In the other cup I added in green mica powder and then yellow to get a very unique color

Next I was stirring them properly to thicken a bit while bursting any air bubbles that may come up
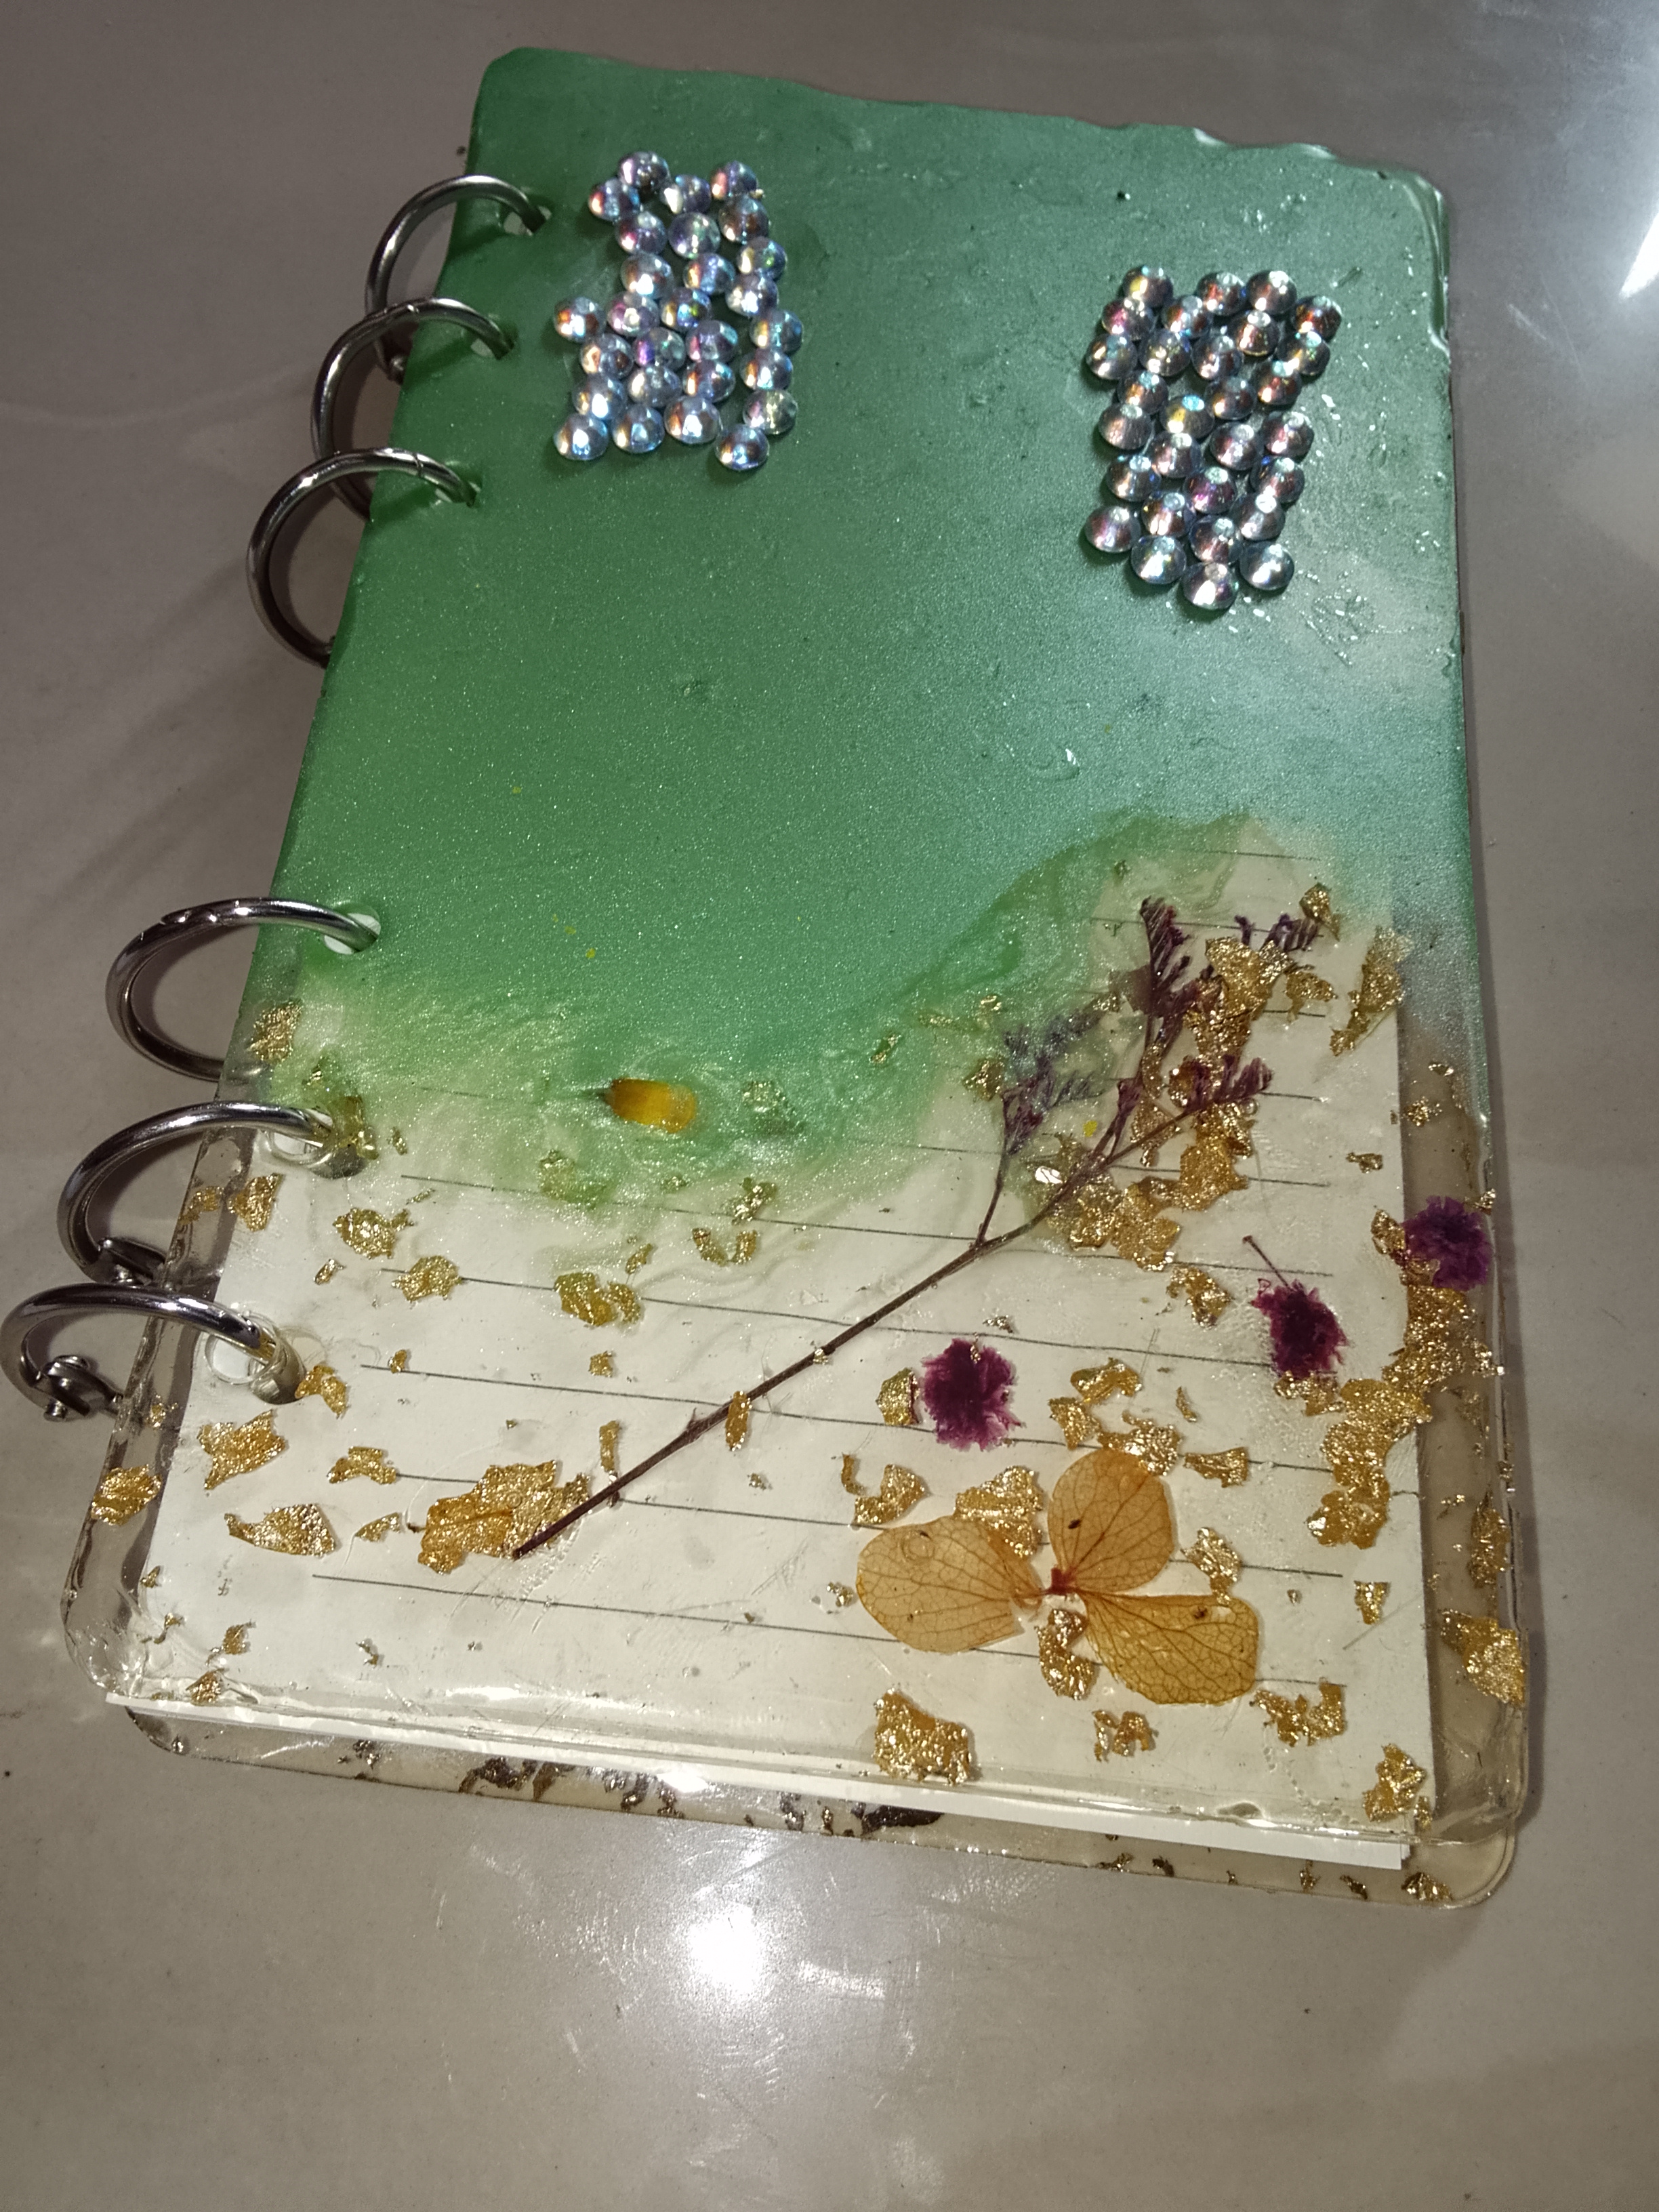
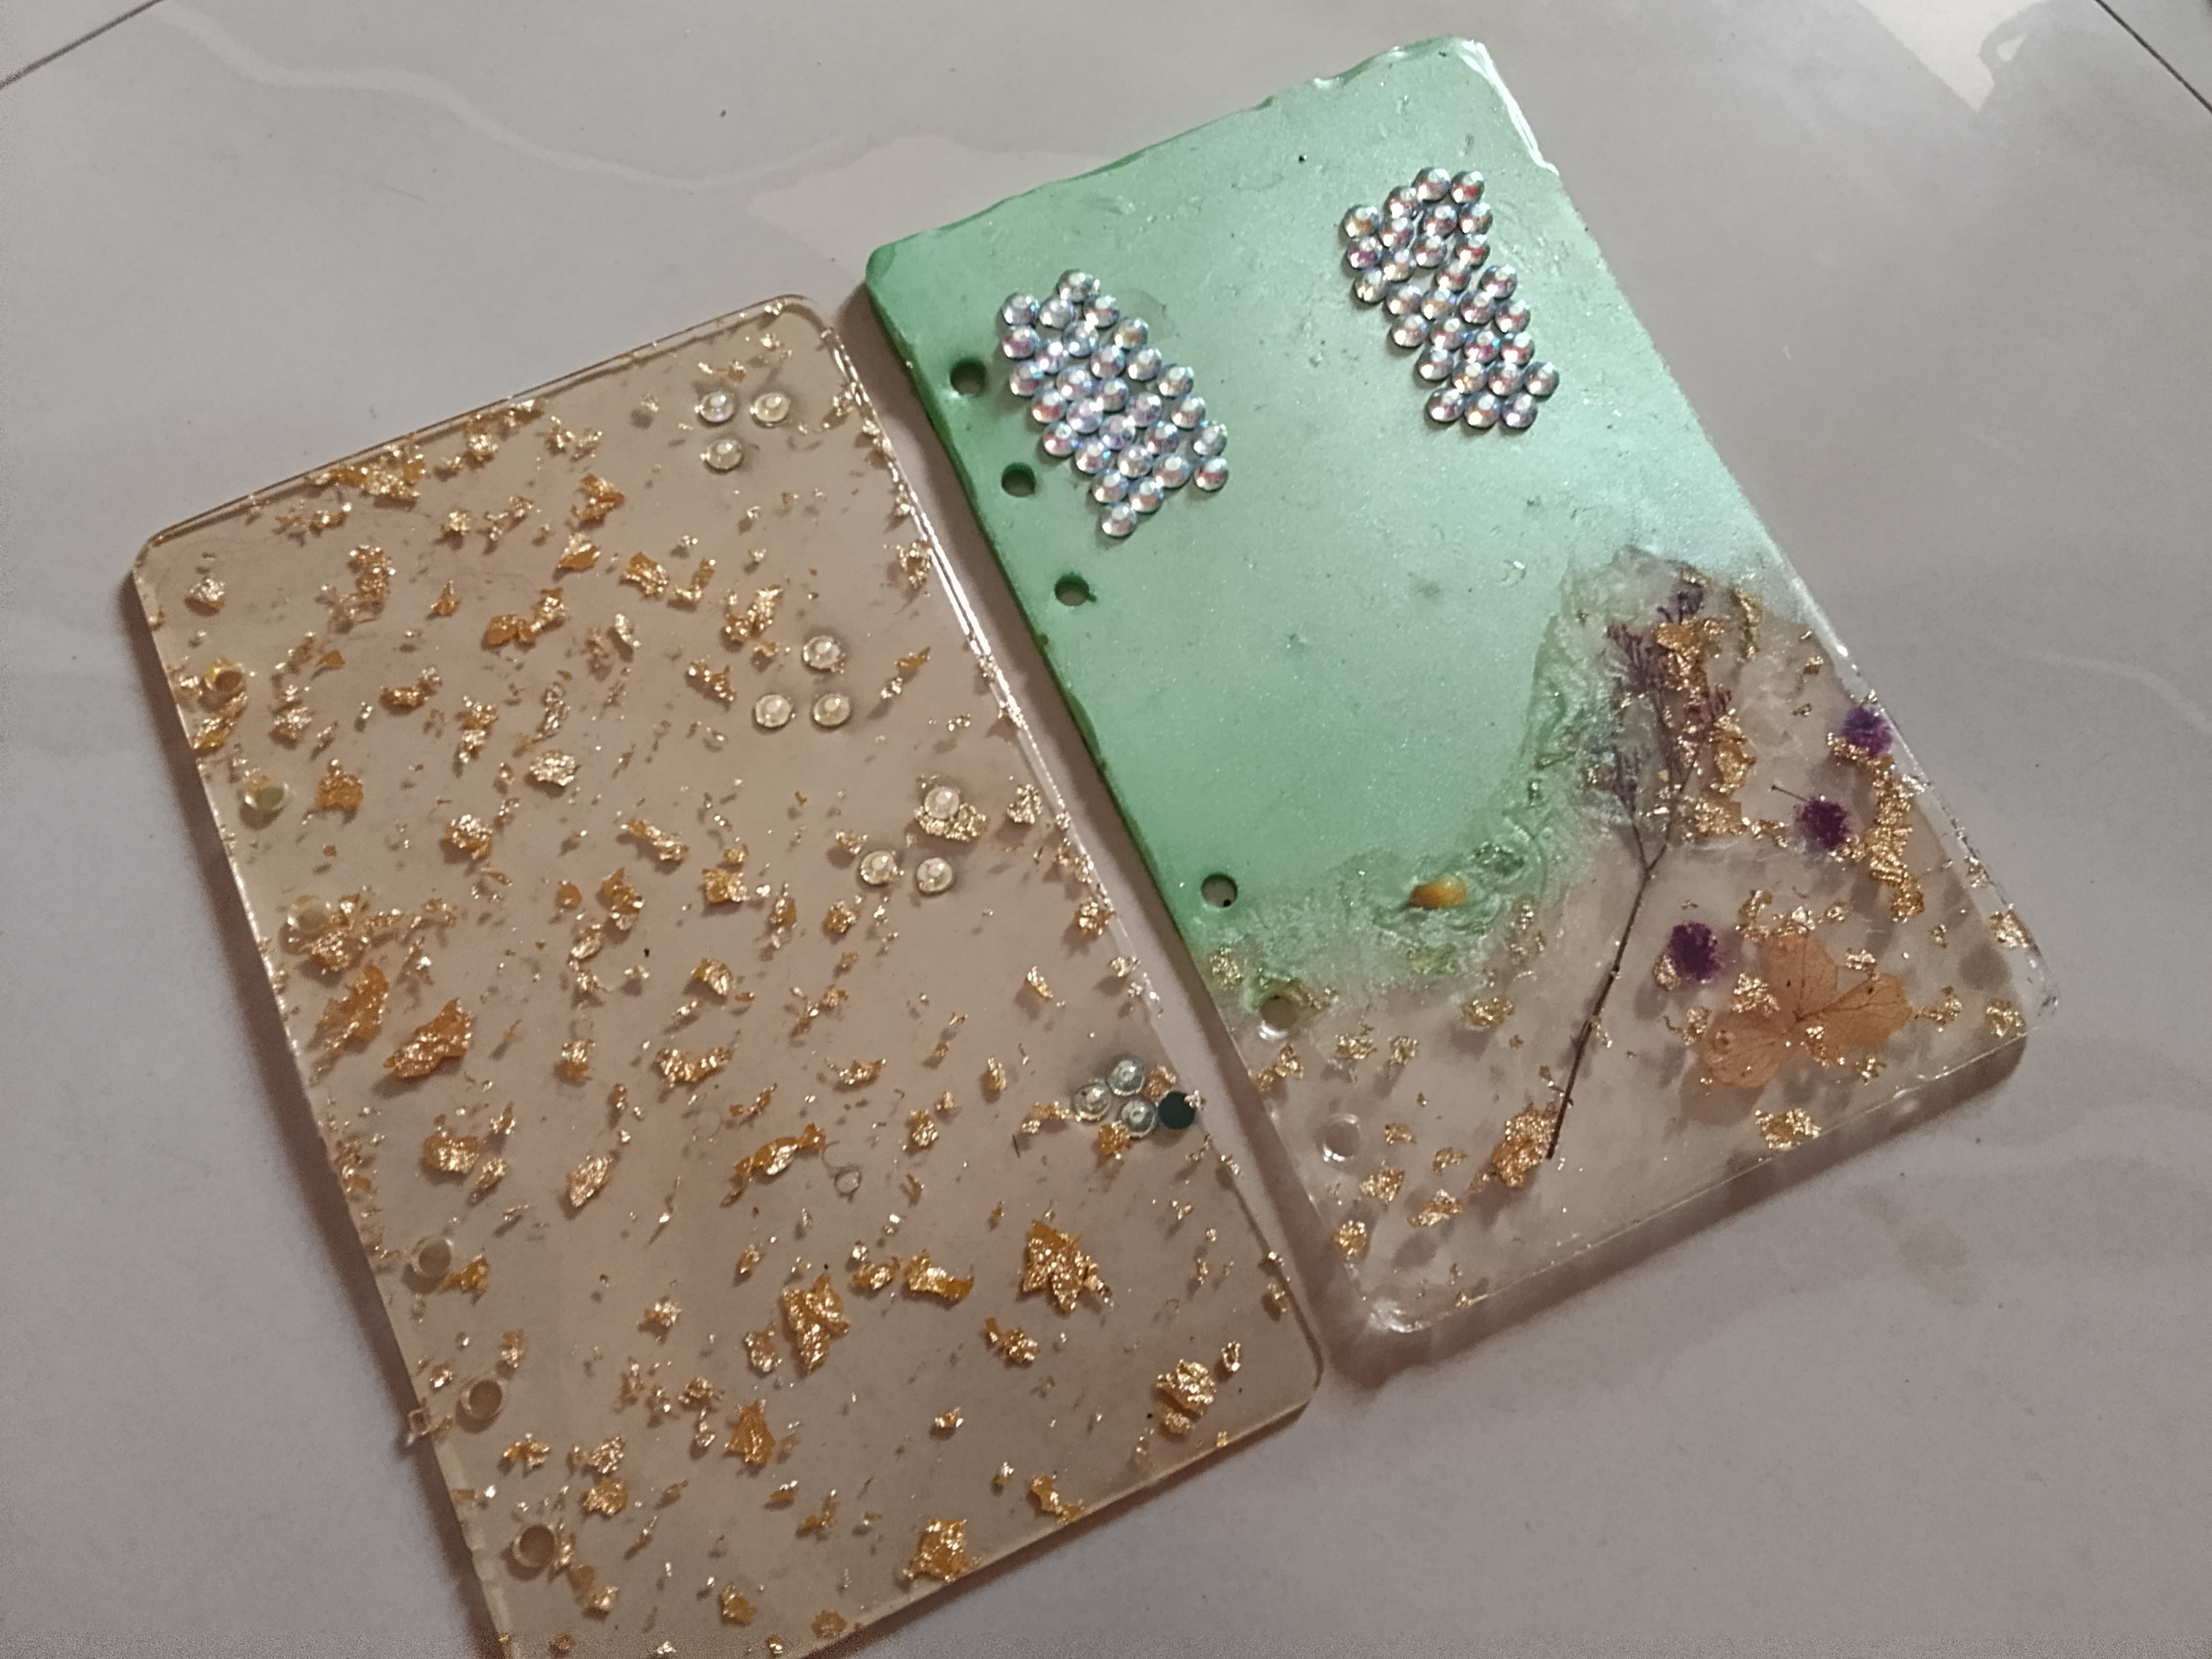
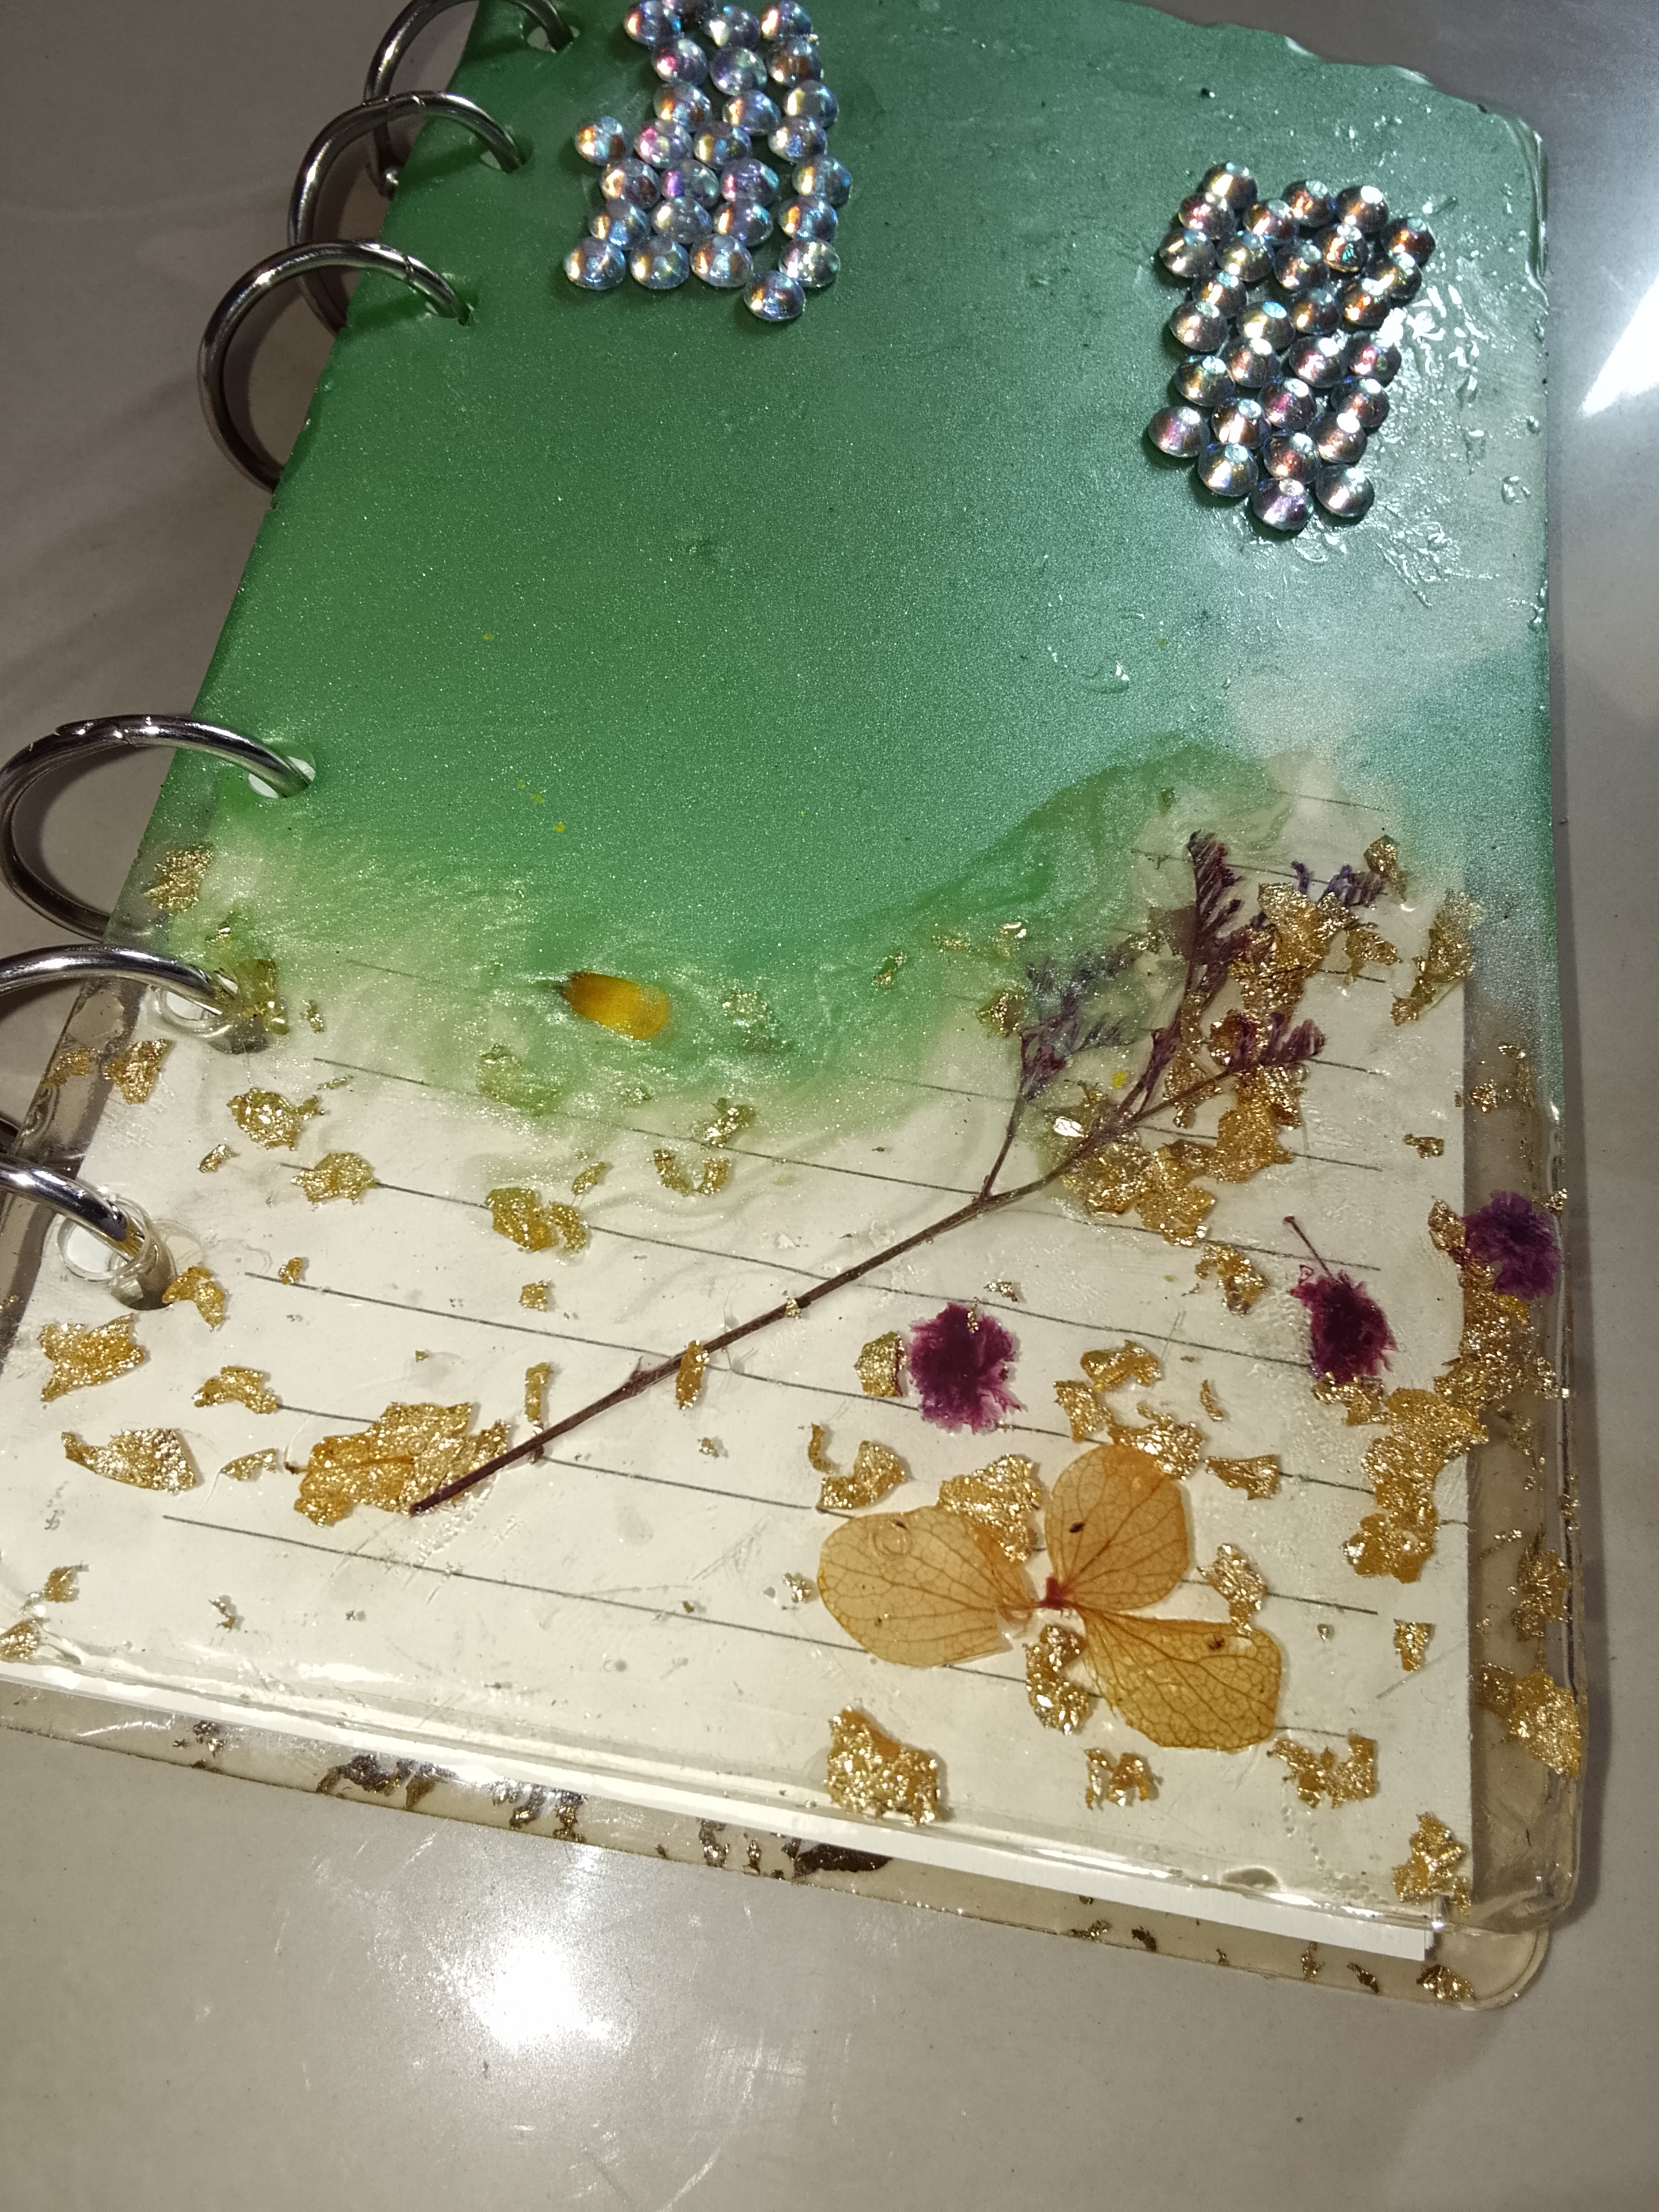
Soon I was finally done stirring them. First Placed my dry flowers where I wanted them to be. Then I poured the one with gold foil design at the top part of the diary cover, the the green part below it.
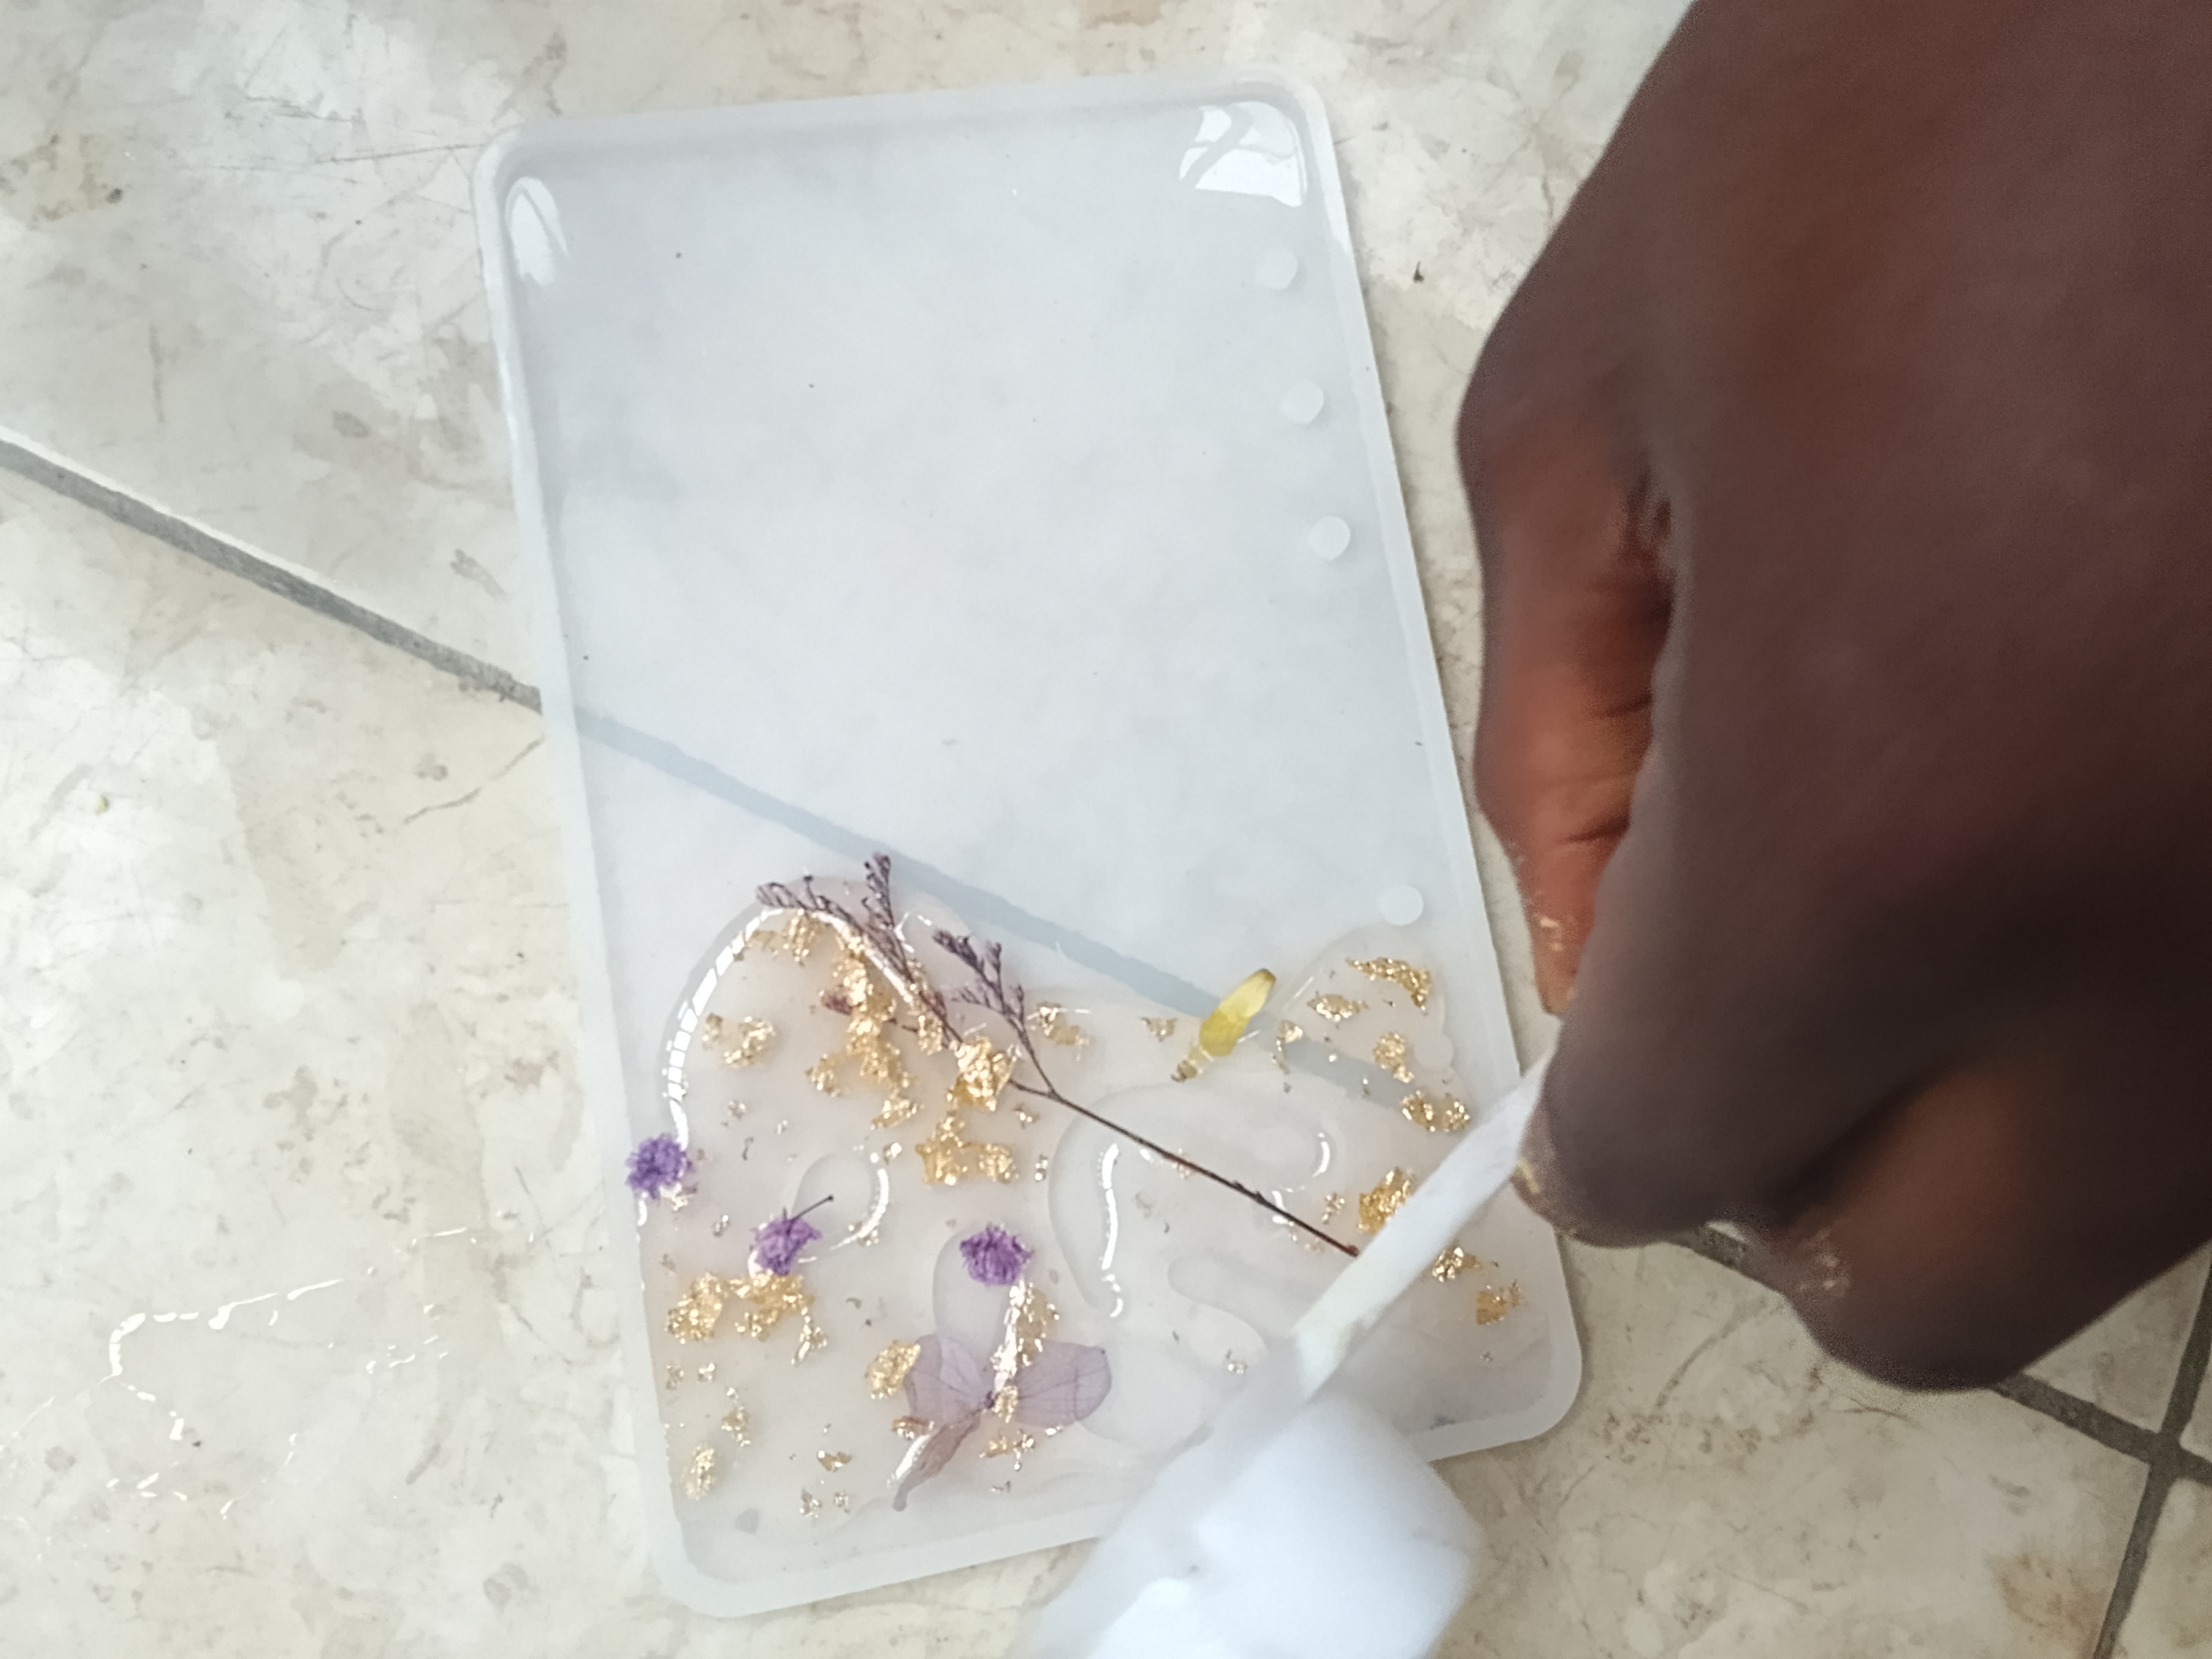

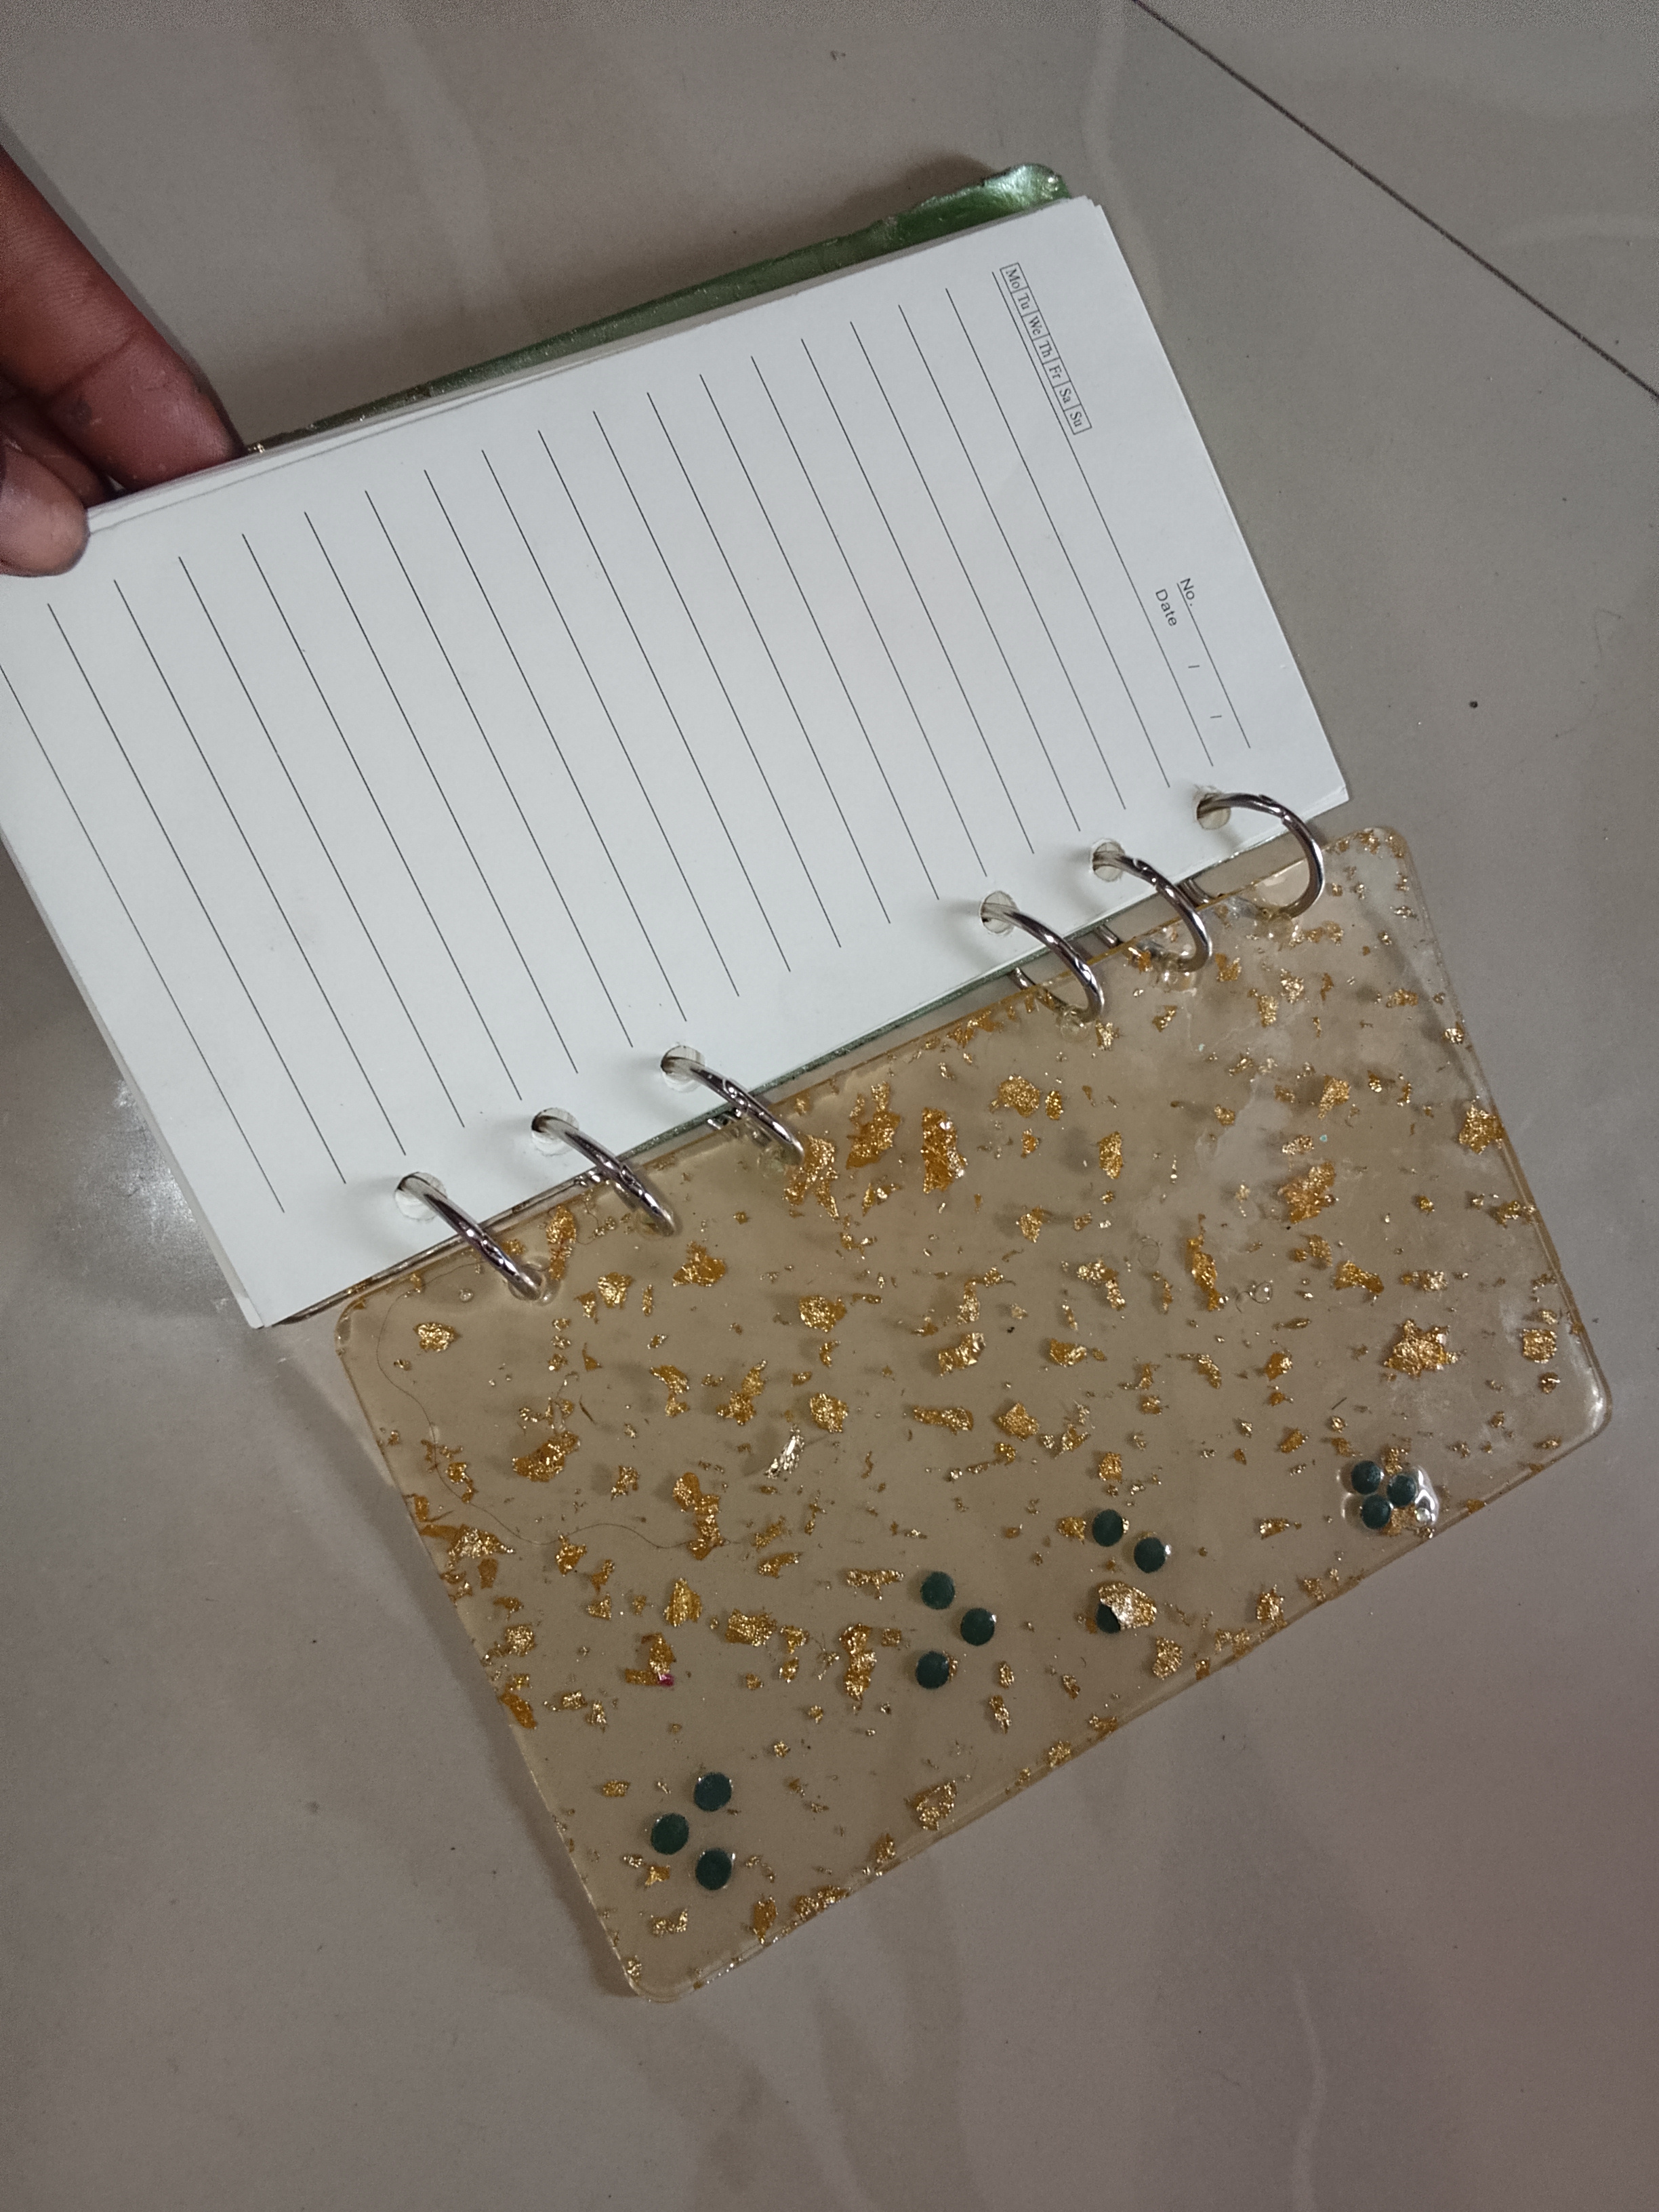
For the back cover, I used the gold foil as the main glitter decoration for it and poured it in the mold too
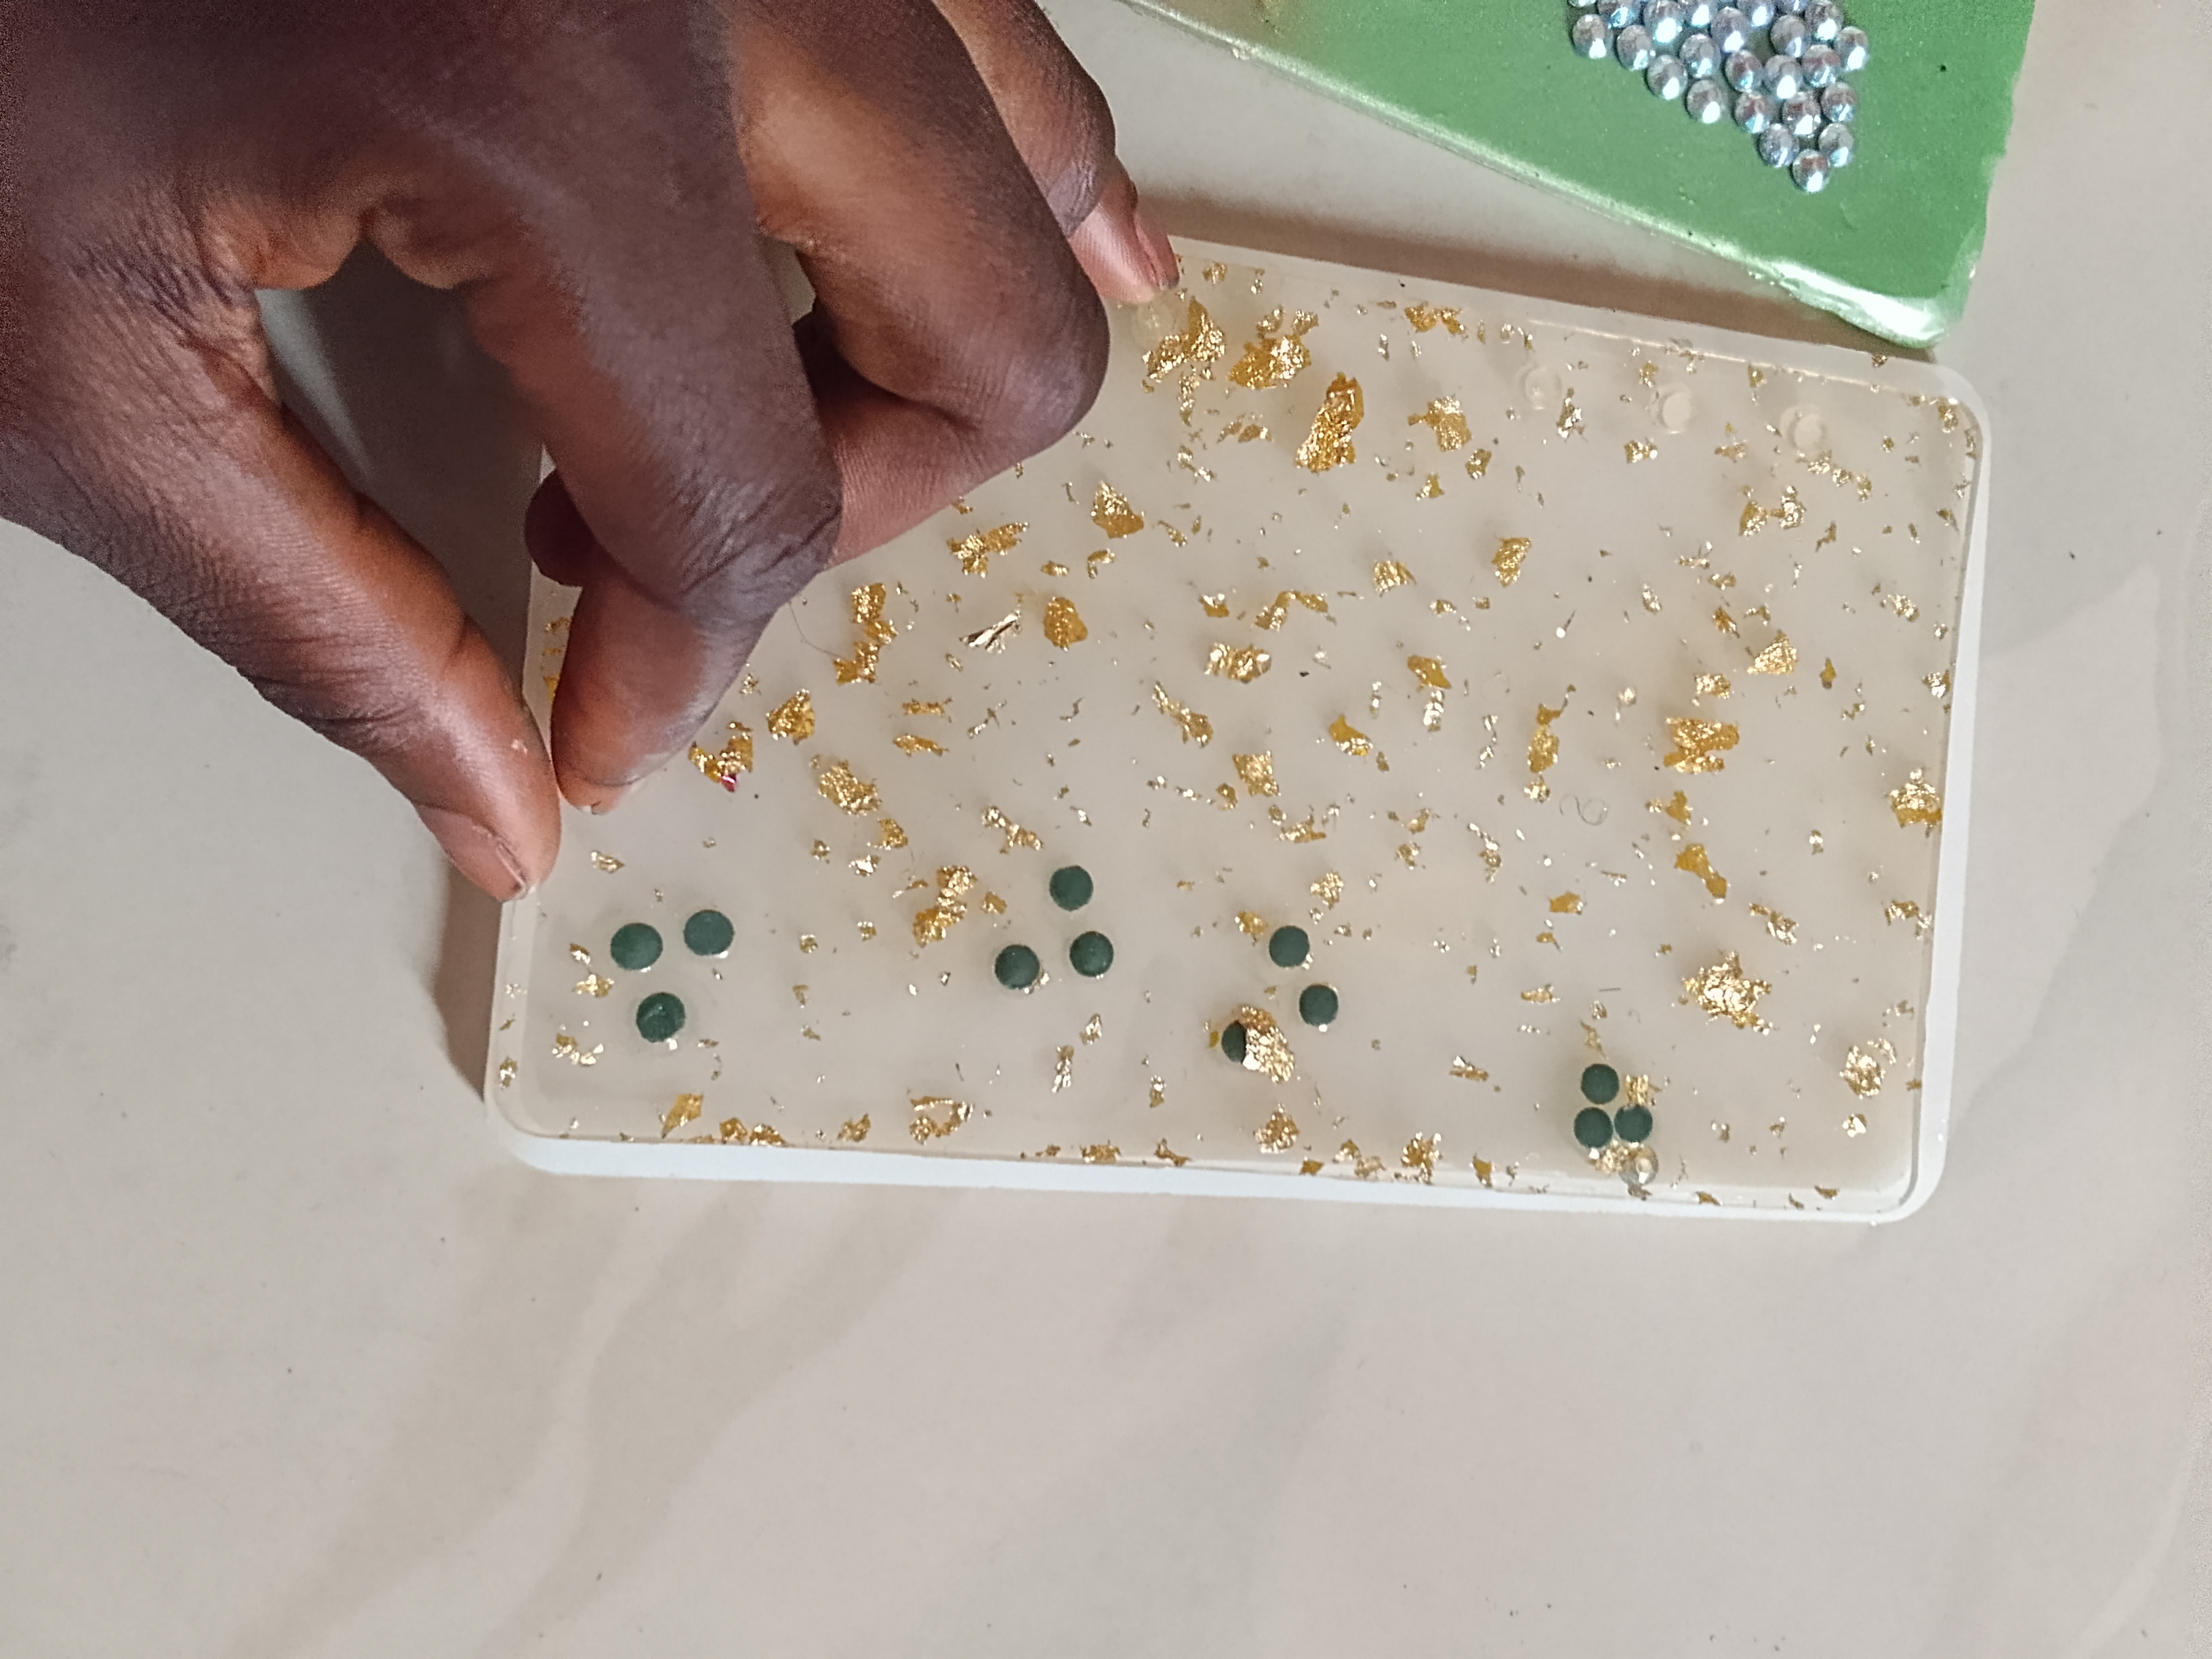
Then I Let the resin harden completely, it took about 6-8 hours for it to dry properly. After it was dry I demolded them and saw how beautiful it turned out
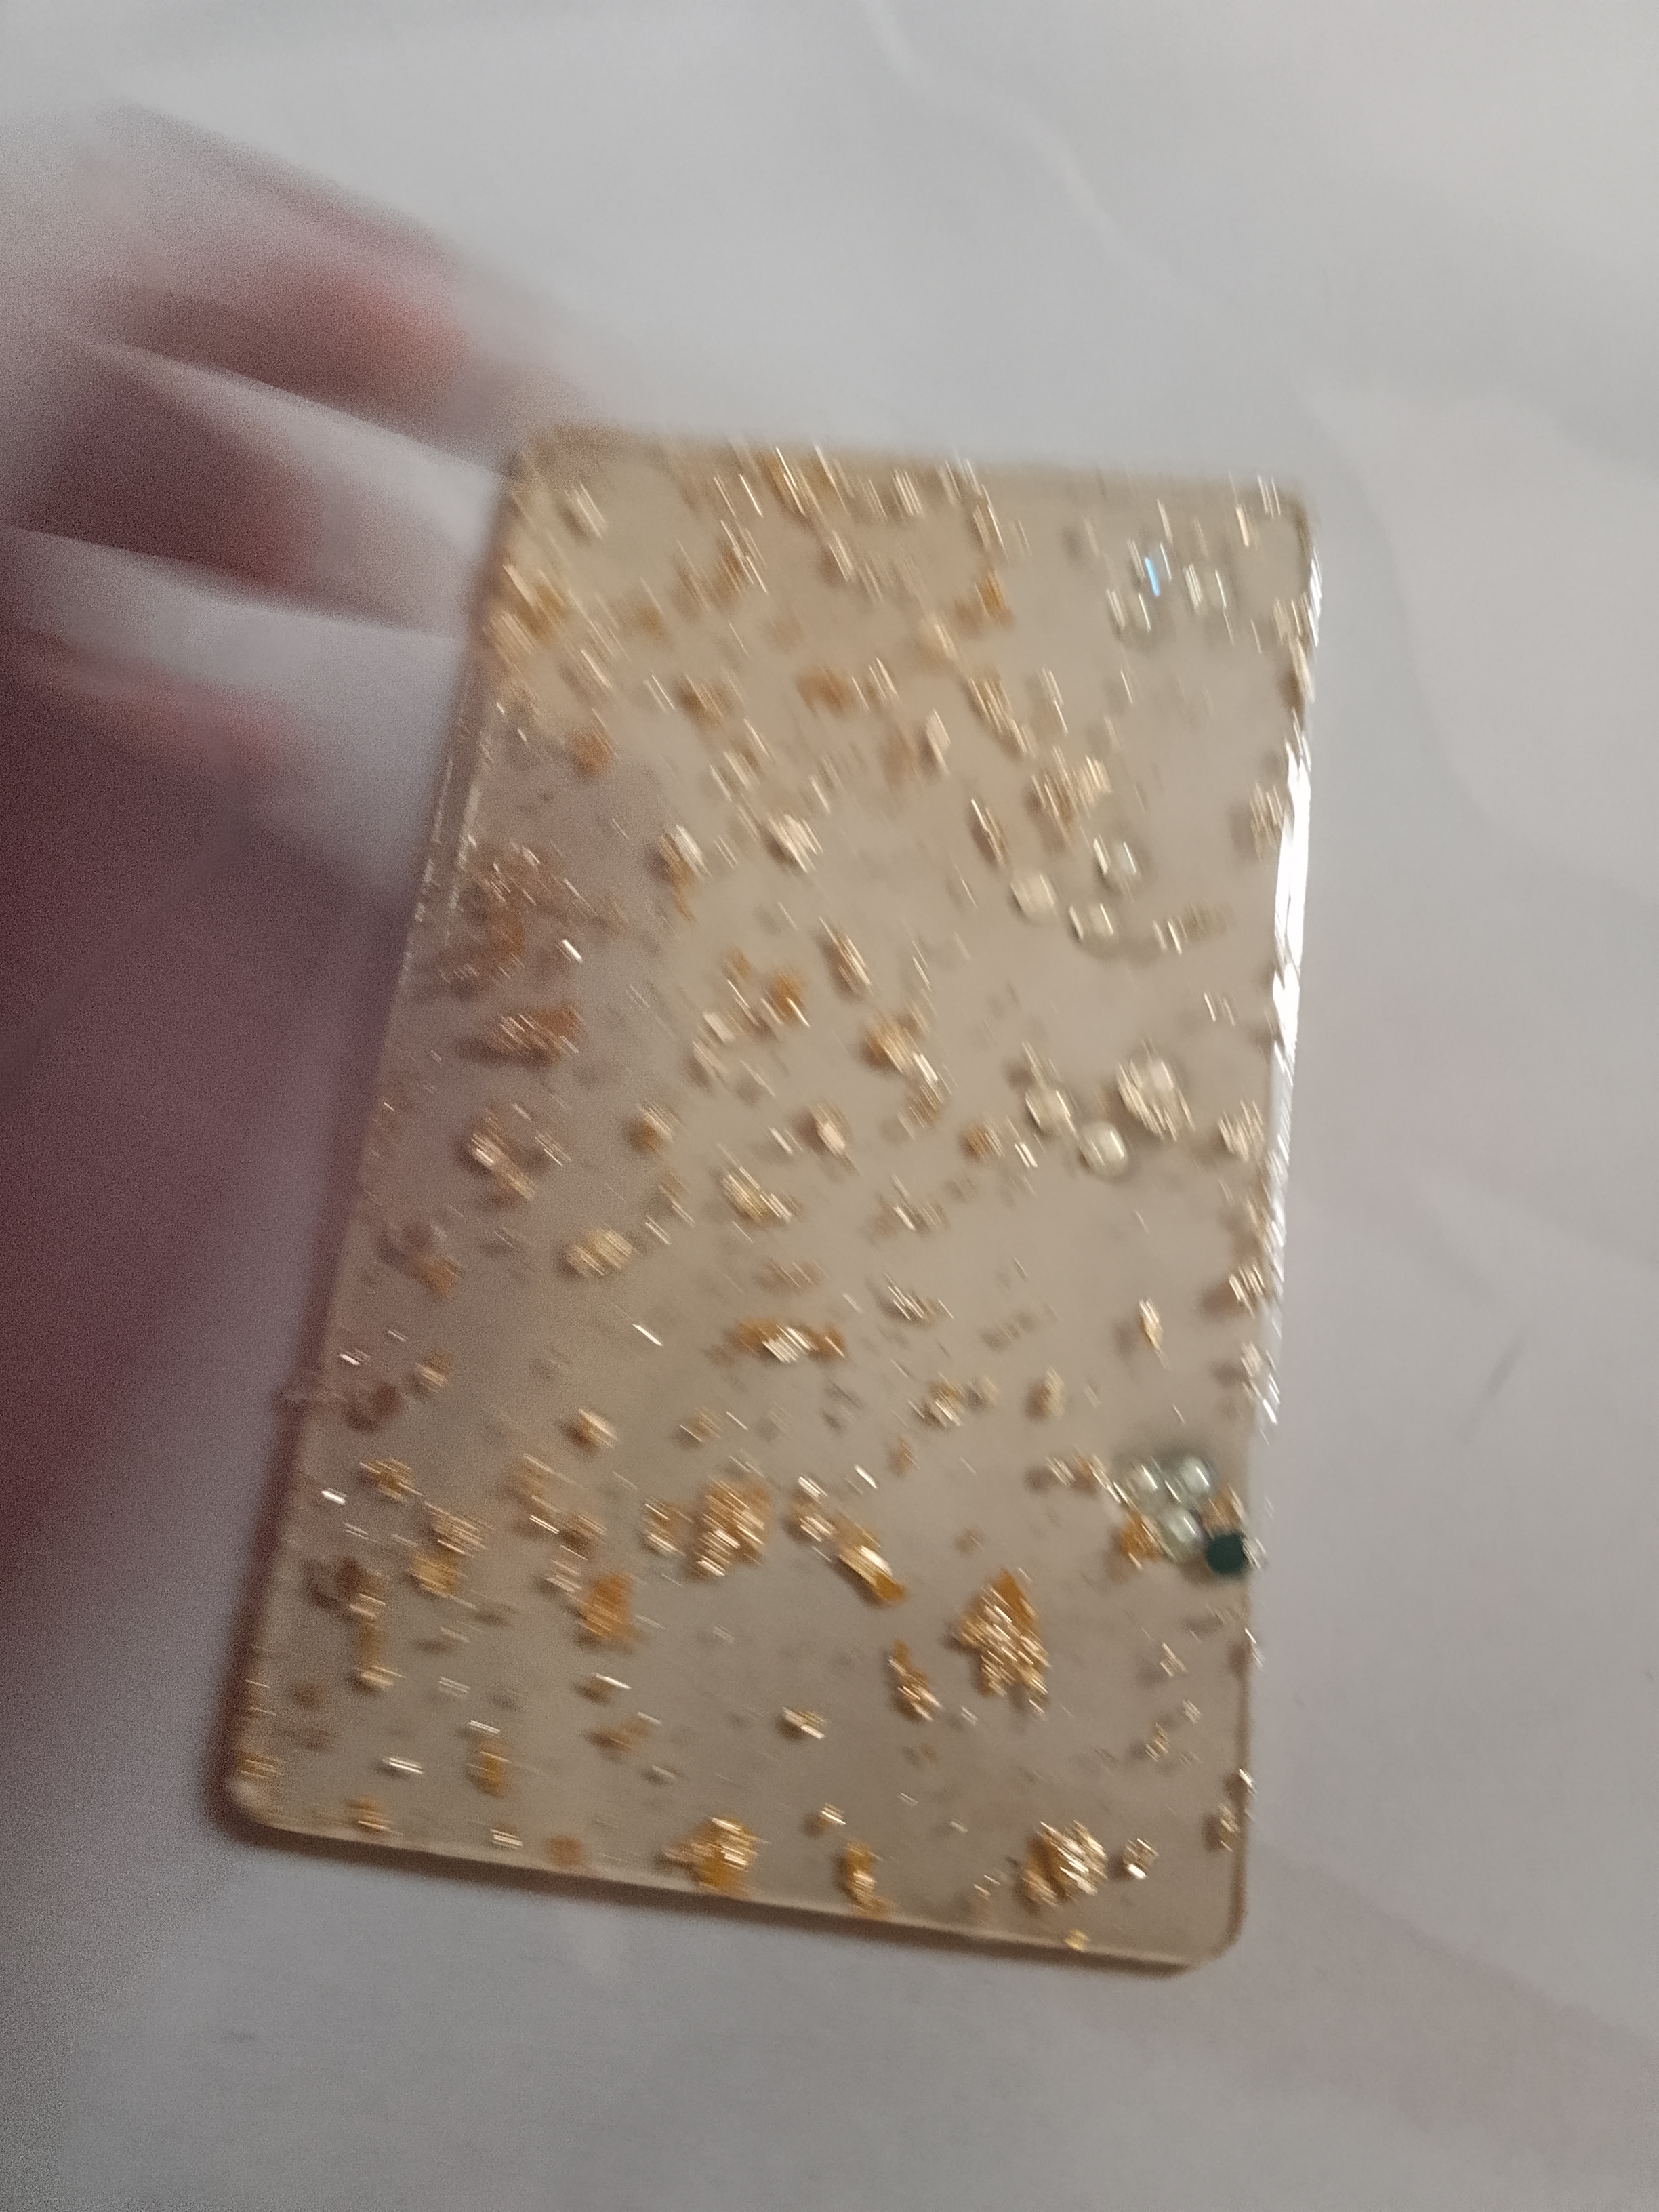
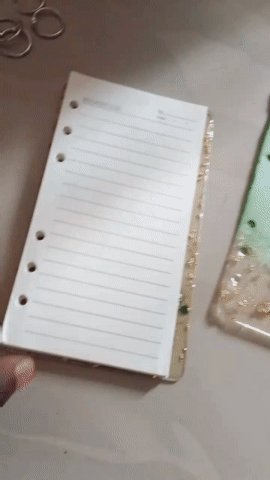
I took out the binder and the diary to attach to the new resin cover for it
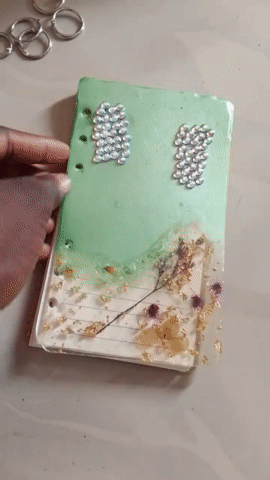
And wow, it was excellent. I totally loved it!

This project was not only fun but also a great way to personalize something I use every day. If you've ever wanted to try resin crafting, this is a simple and very rewarding project to start with.
So imagine if this was your diary, you'll be completely excited to write in it everyday!
I was so happy to see it turned out so nice and I hope you liked it! And see you next time! 🤗
Sending Love and Ecency Curation Vote!
 Follow Eceny's curation trail to earn better APR on your own HP. : )
What a lovely work you've done. This makes your diary cover look so nice and beautiful. Bravo.
Thank you for your kind words
muy bonito, quedo genial!
very nice, it looked great!
Thank you