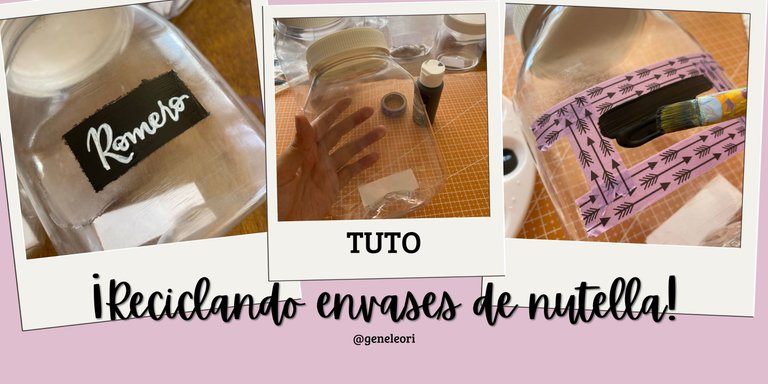
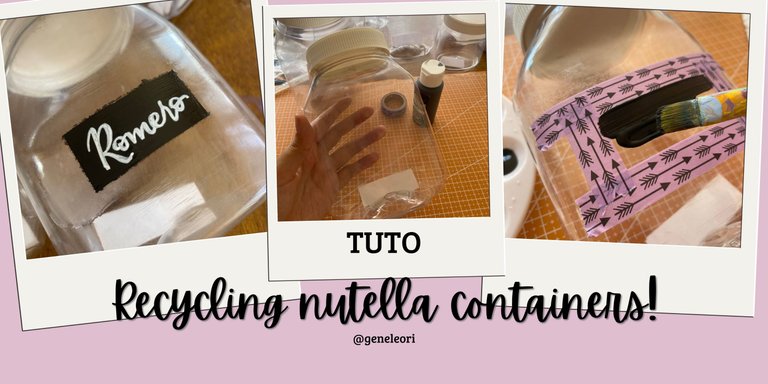
Recycling nutella containers! #tuto / ¡Reciclando envases de nutella! (ESP-ENG)
¡Hola hivers!💜
Espero que se encuentren bien y felices. Hace un tiempo, por petición de una tía, le di una nueva vida a unos envases de nutella convirtiéndolos en frascos para guardar especias. Como fueron un éxito en su casa, reunió otros cuantos más y me los dio para decorarlos y terminar su colección, les muestros como fue el proceso:

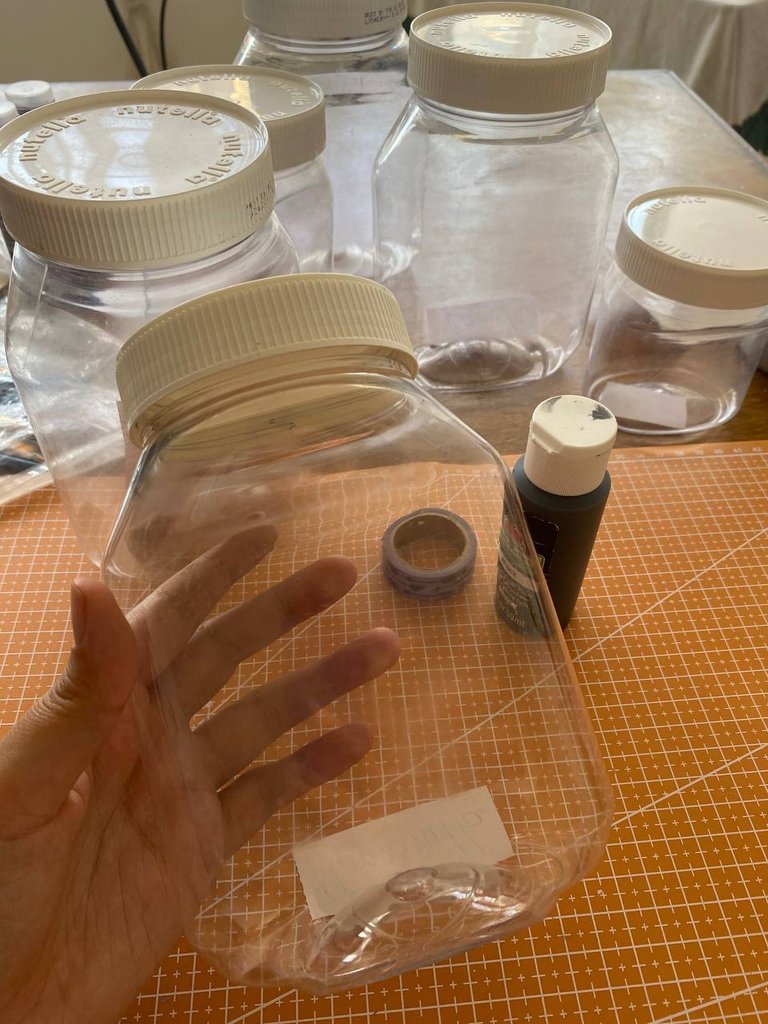
MATERIALES
Frasco de nutella vacío (puede funcionar también alguno de vidrio o plástico donde vienen las salsas)
Cinta de enmascarar o washi tapes
Pintura acrílica (yo use negra)
Pincel
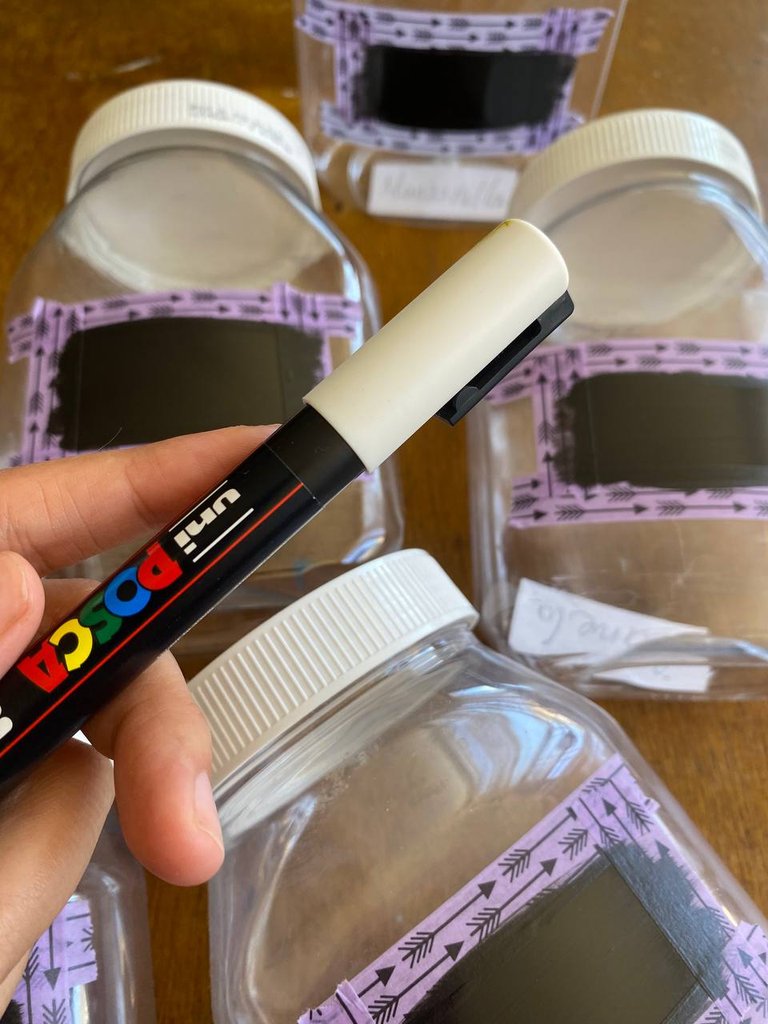
Marcador de pintura acrílica (en mi caso use el blanco)
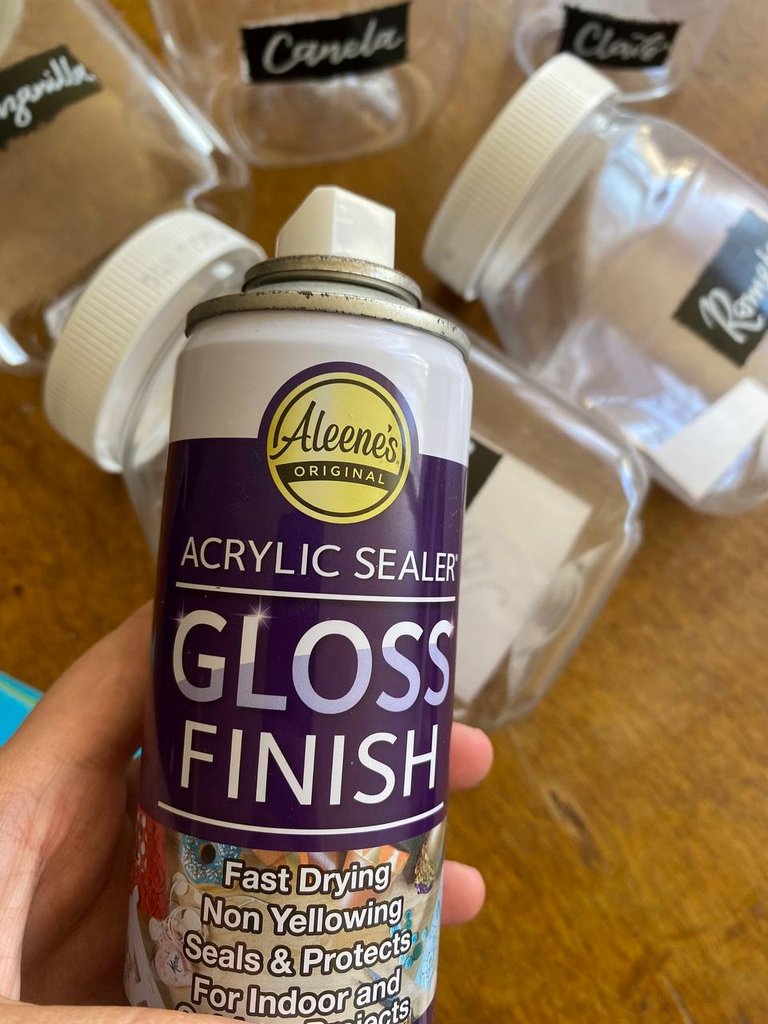
Barniz o spray sellador (todavía tengo en casa un spray sellador con efecto glossy o brillante)
PASO A PASO
 |  |
|---|
PASO 1
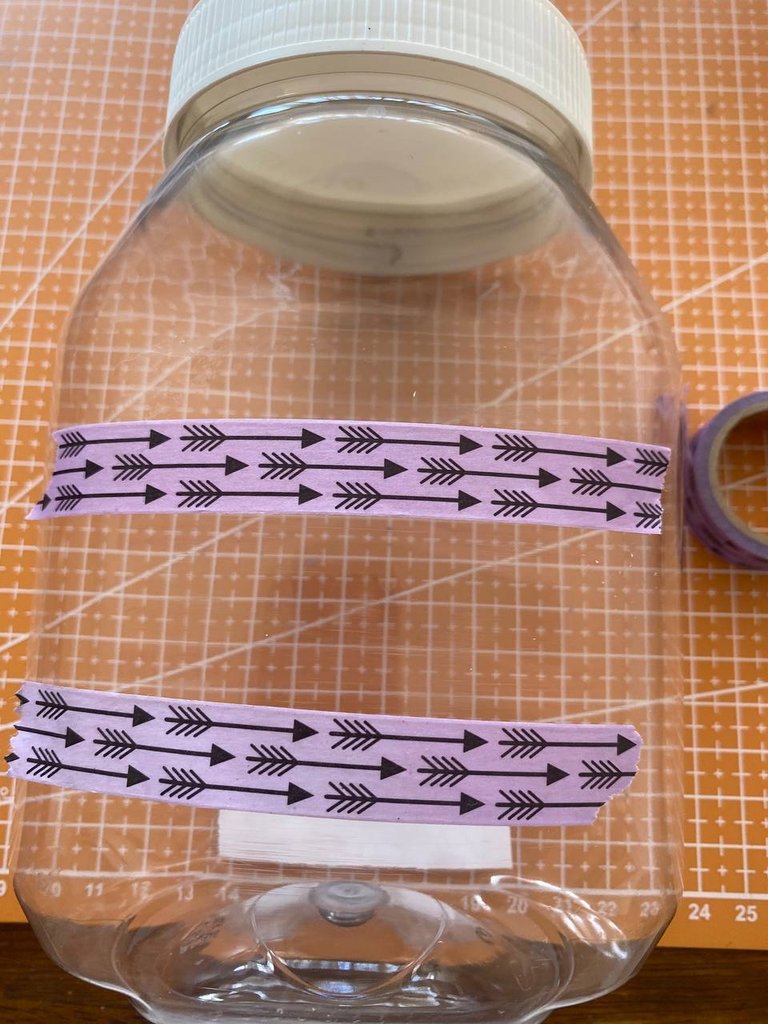
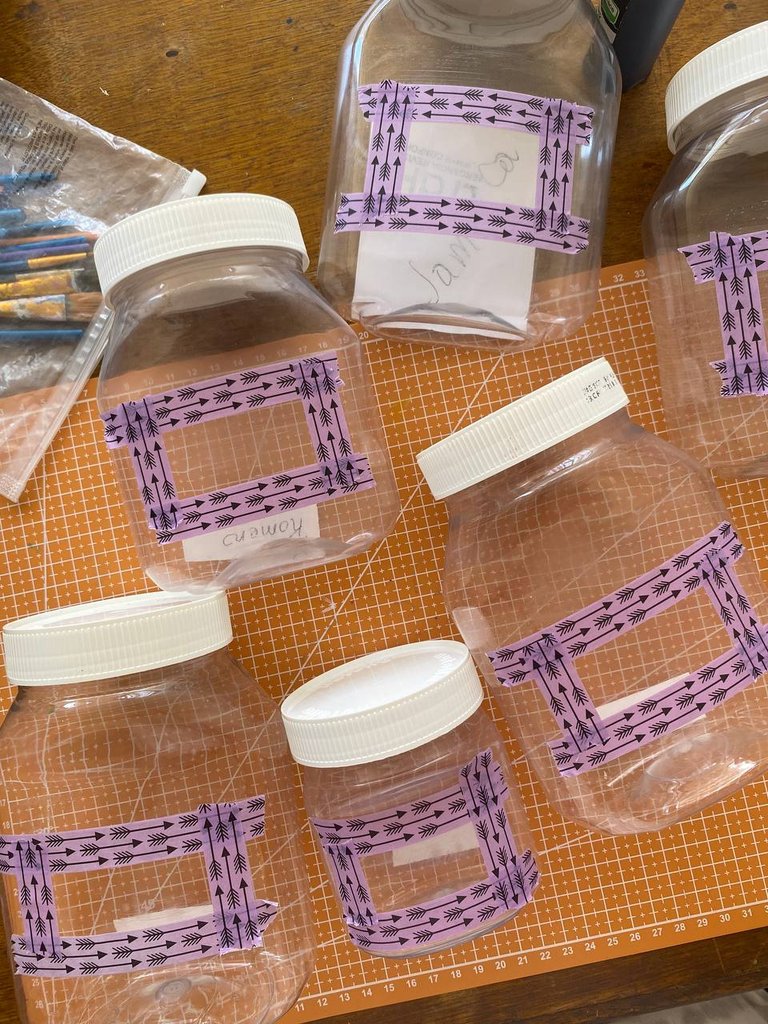
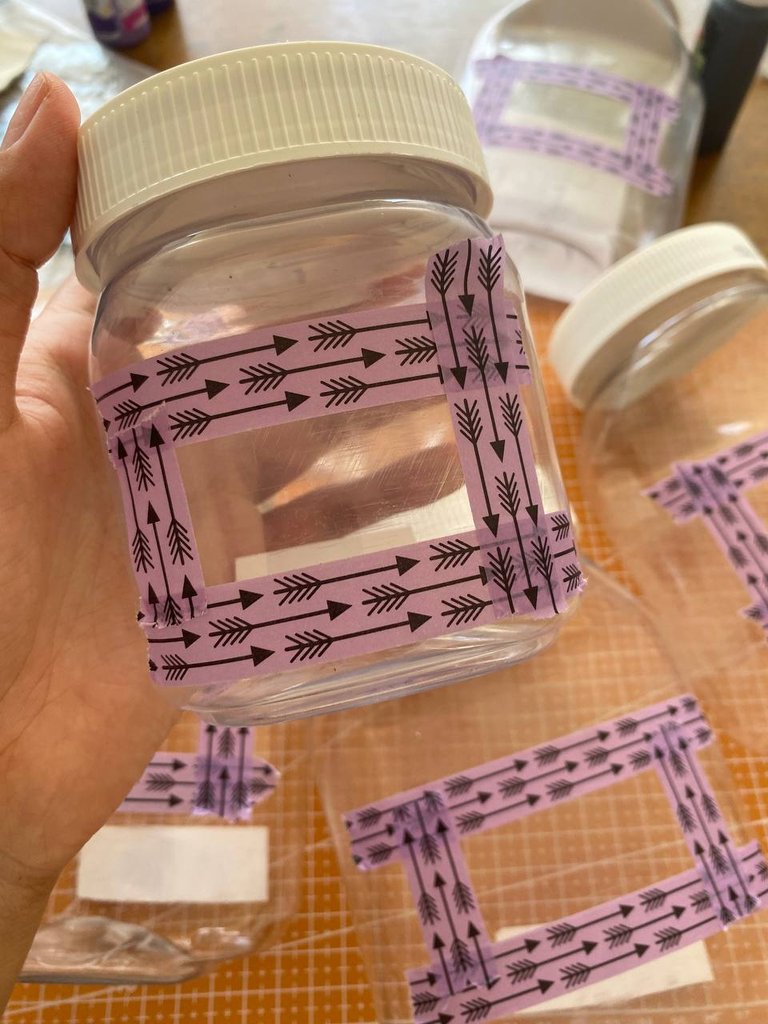
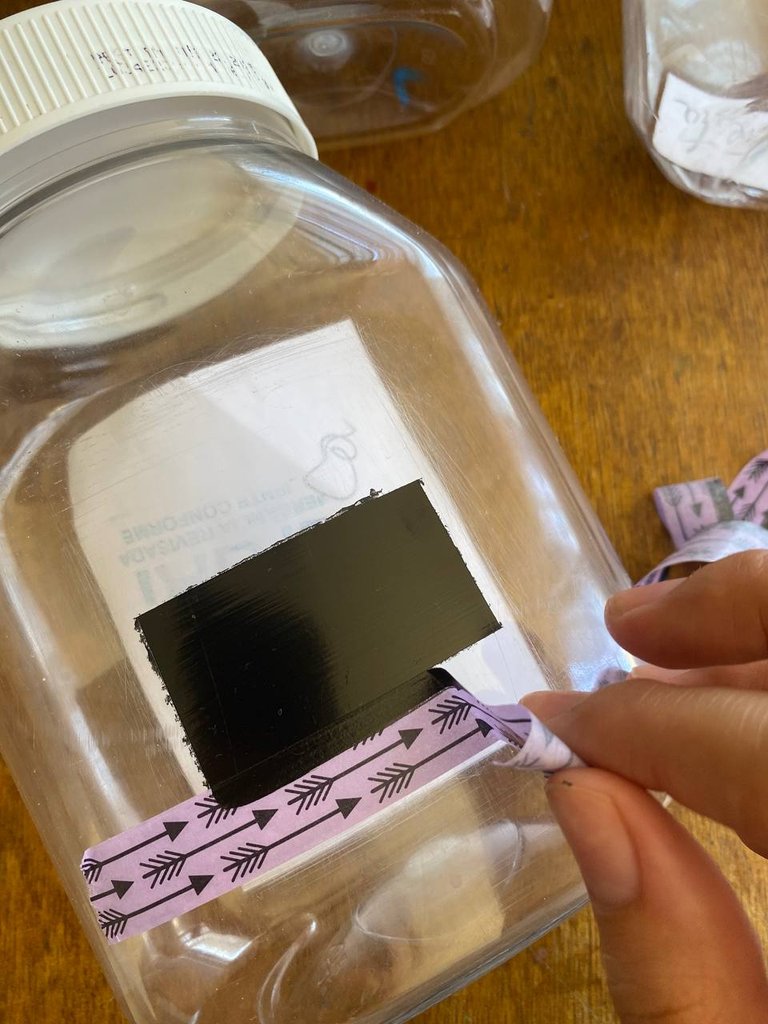
Lo primero fue verificar que los envases estuvieran totalmente limpios y con ayuda de los washi tapes delimitar la zona que iba a pintar, que justo es la zona donde va la etiqueta que identifica las especias.
 |  |
|---|
 |  |
|---|
PASO 2
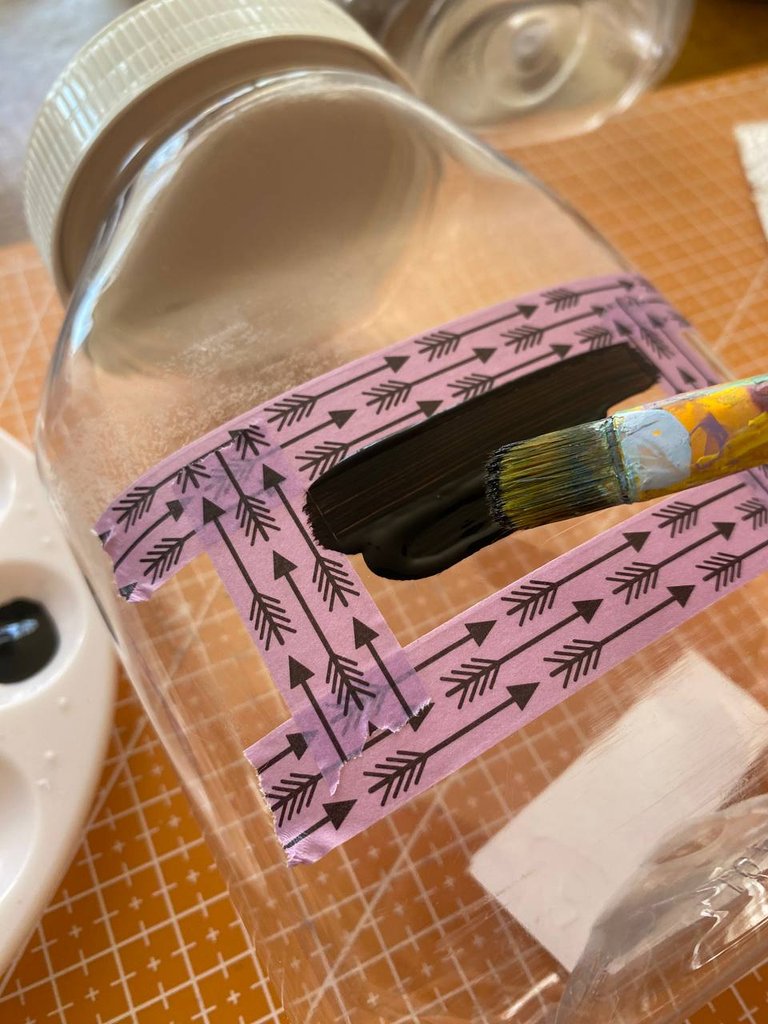
Despues de asegurarme que estuviera bien puesto el washi tape, con ayuda de un pincel aplique una capa de pintura acrílica color negro. Pude haber usado otro color pero mi tía quería que tuvieran un estilo minimalista.
Tuve que aplicar 3 capas de pintura para que quedara bien el fondo. Entre cada capa deje pasar al menos 2 horas, y luego de la última lo deje reposar hasta el otro día.
 |  |
|---|
PASO 3
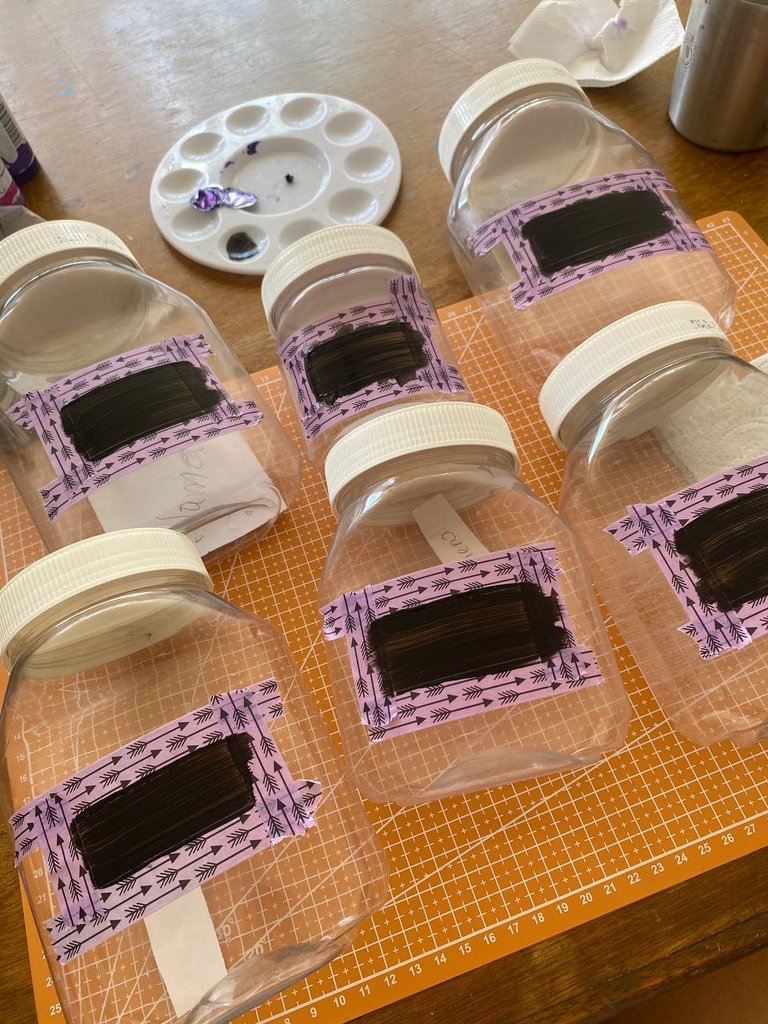
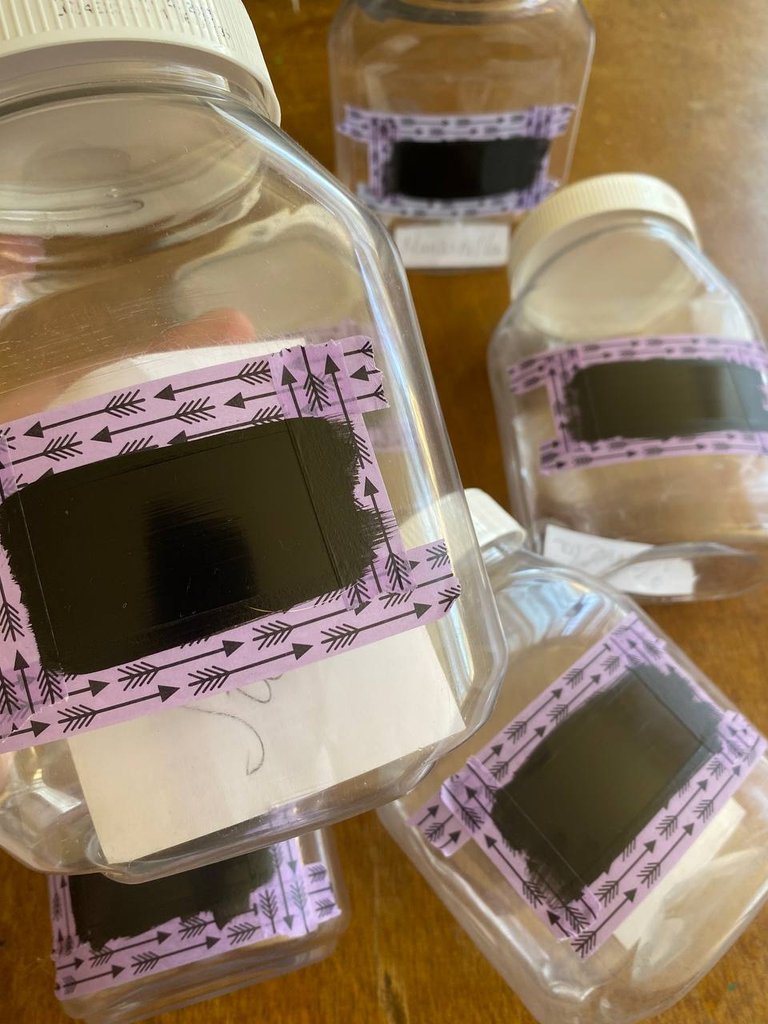
Con el fondo ya seco, retiré los washi tapes y me sentí algo triste al ver que en algunos la pintura había traspasado. Eso quiere decir que el washi no pego bien, para la próxima espero usar otro de mejor calidad.
 |  |
|---|
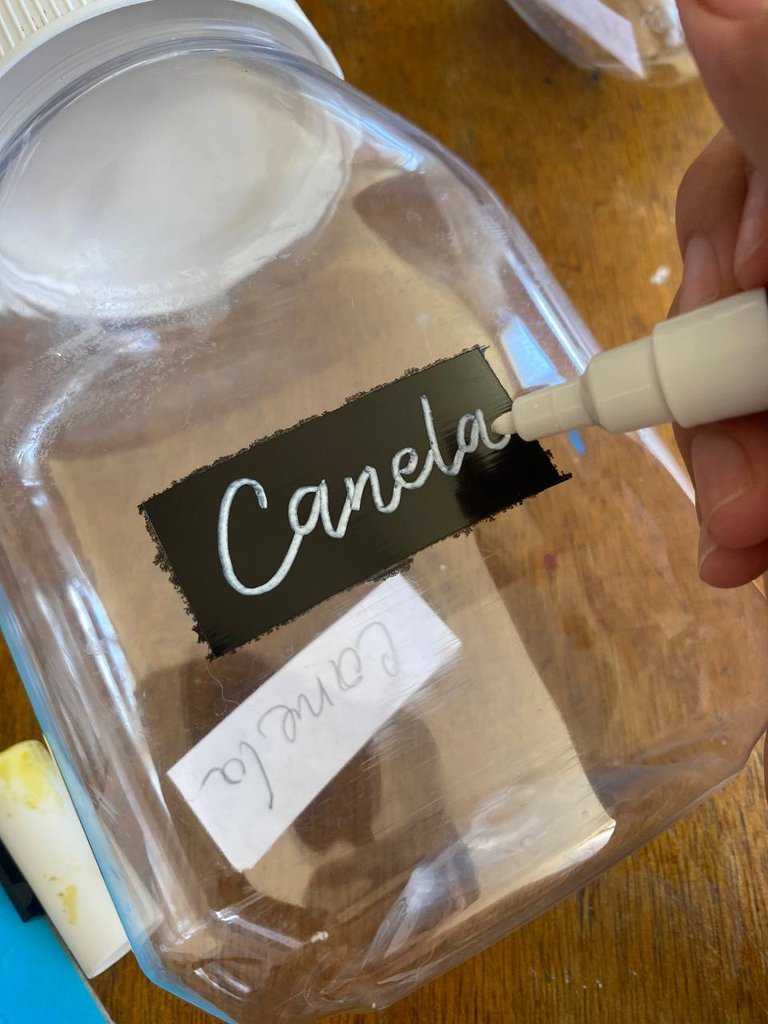
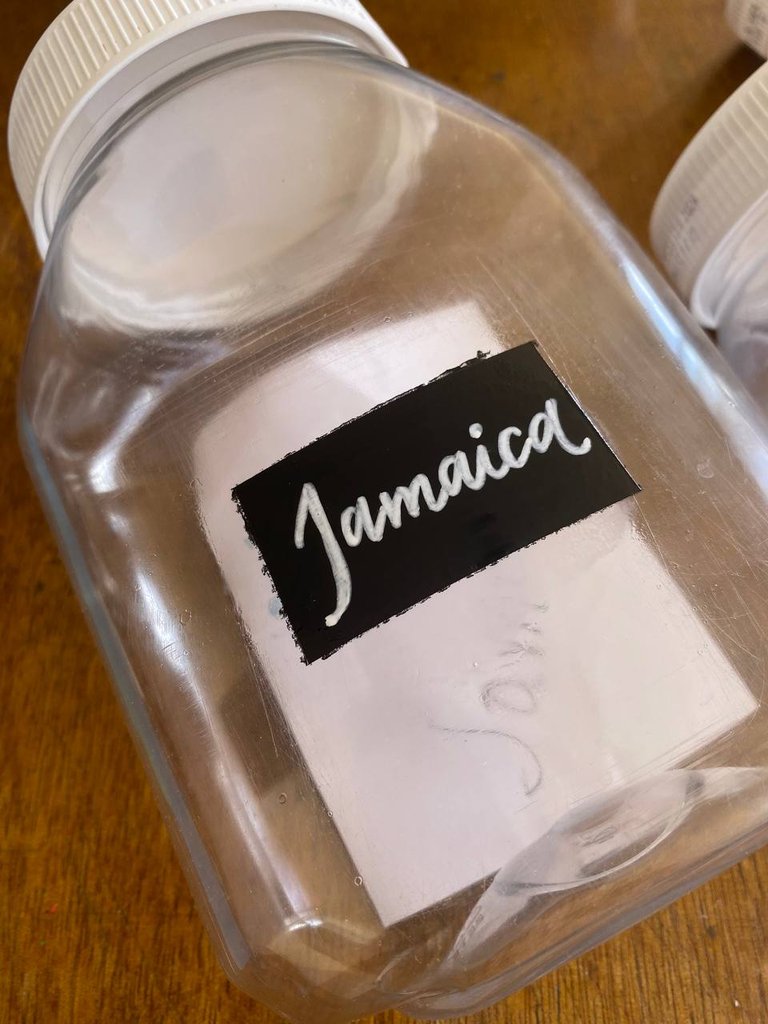
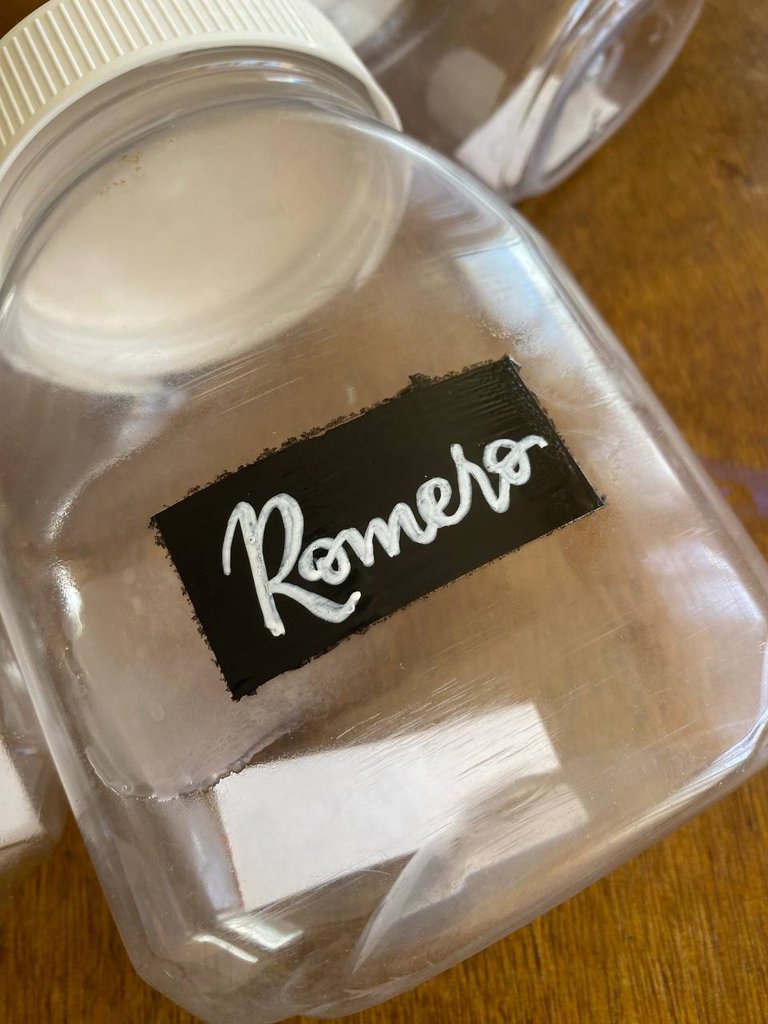
Empecé a escribir el nombre de cada especia (gracias tía por dejar hojitas con los nombres dentro de cada frasco) con ayuda del marcador de pintura acrílica. Este marcador me encanta, porque su punta es fina pero no tan fina y su pintura pigmenta bien. Usé un estilo cursivo para que fuera minimalista y delicado.
Rotule cada frasco y lo deje secar al menos 2 horas.
 |  |
|---|
PASO 4
Al estar rotulado cada envase, solo falta sellarlo. Para esto use un spray sellador con un acabado brillante sobre cada franja con el rotulado y deje secar.
 |  |
|---|
PASO 5
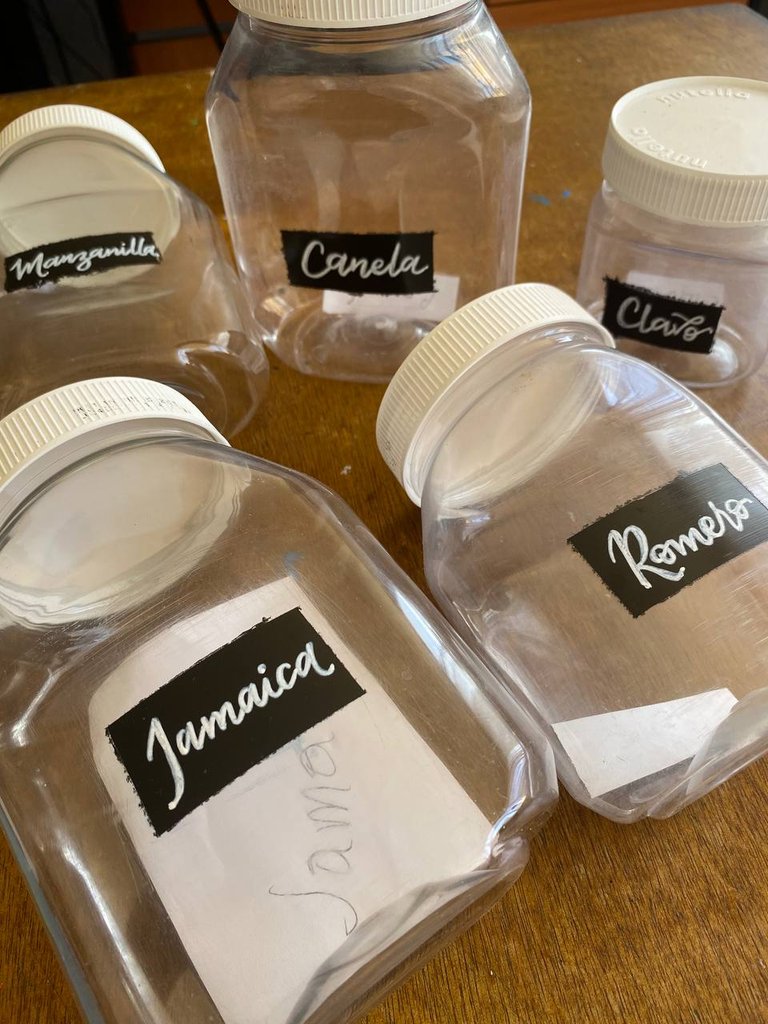
¡Frascos de especias reciclados listos para ser usados!
Me gusta la opción de poner darle una nueva a los envases y que estos se conviertan en parte del día a día con un bonito estilo que combine con nuestra decoración. Es, sin duda, un tutorial fácil, con materiales sencillos y que permite ser bastante creativo porque hay muchísimos estilos que puedes explorar.
Gracias por leerme
Con cariño, G.
Hi hivers! 💜
I hope you are well and happy. Some time ago, at the request of an aunt, I gave a new life to some nutella containers by turning them into jars to store spices. As they were a hit in her house, she gathered a few more and gave them to me to decorate and finish her collection, here's how the process went:
MATERIALS
Empty nutella jar (a glass or plastic jar can also work)
Masking tape or washi tapes
Acrylic paint (I used black)
Brush
Acrylic paint marker (in my case I used white)
Varnish or sealing spray (I still have at home a sealing spray with glossy effect)
STEP BY STEP
| |
|---|
STEP 1
The first thing to do was to verify that the containers were completely clean and with the help of the washi tapes delimit the area to be painted, which is the area where the label that identifies the spices goes.
| |
|---|
| |
|---|
STEP 2
After making sure that the washi tape was well placed, with the help of a brush I applied a coat of black acrylic paint. I could have used another color but my aunt wanted them to have a minimalist style.
I had to apply 3 coats of paint to get the background right. I let at least 2 hours pass between each coat, and after the last one I let it sit until the next day.
| |
|---|
STEP 3
With the background dry, I removed the washi tapes and I was a little sad to see that some of the paint had gone through. That means that the washi didn't stick well, next time I hope to use a better quality one.
| |
|---|
I started to write the name of each spice (thanks aunt for leaving little leaves with the names inside each jar) with the help of the acrylic paint marker. I love this marker because its tip is fine but not too fine and its paint pigments well. I used a cursive style to make it minimalistic and delicate.
Label each jar and let it dry for at least 2 hours.
| |
|---|
STEP 4
Once each jar is labeled, all that's left to do is seal it. To do this, use a spray sealer with a glossy finish on each strip with the lettering and let dry.
| |
|---|
STEP 5
Recycled spice jars ready to use!
I like the option of giving a new look to containers and making them part of our everyday life with a nice style that matches our decor. It is, without a doubt, an easy tutorial, with simple materials and that allows you to be quite creative because there are so many styles that you can explore.
Thank you for reading me
With love, G..
FUENTE
Fotos: iphone 11
Traducción: Deepl
SOURCE
Photos: iphone 11
Translation: Deepl

Me encanta reciclar envases y estos de Nutela nunca los desaprovecho, porque me gusta su forma y la capacidad que tienen.
Me encantó tu proceso y tu letra es realmente bella, yo no tengo la letra tan linda, te felicito.
Hola Génesis. Que linda idea para darle una nueva utilidad a esos frasquitos, se ven lindo. Me encantó la letra para los nombrecitos, ese marcador es muy lindo.
¡Saludos! Gracias por compartir 💕
La idea está bastante genial, es una manera excelente de reciclar y hacer algo práctico al mismo tiempo.
!discovery 30
This post was shared and voted inside the discord by the curators team of discovery-it
Join our Community and follow our Curation Trail
Discovery-it is also a Witness, vote for us here
Delegate to us for passive income. Check our 80% fee-back Program
Se ven geniales para decorar la cocina. Me gusta mucho 😃