Recycled gift bag #tuto / Bolsa de regalo reciclada (ESP-ENG)

¡Hola hivers!💜
Espero que se encuentren bien y felices. Mi cuñada cumplía años y tuve algunos detalles con su regalo de cumpleaños. Su regalo no fluyó (mi forma de decir que todavía lo estoy ideando y espero traerles pronto como tutorial), así que le compramos un lindo pijama de stich, pero se nos olvidó la bolsa. Grave error. No me gustaba las que tenía en casa, y no tenia mi invaluable papel kraft (que siempre me salva de todo), así que continué buscando y encontré una bolsa de cartón kraft que tenía un pequeño detalle técnico: tenía una sticker, se lo quite y me traje un poquito de papel, era poco visible pero igual me molestaba; del otro lado estaba perfecto, así que con ayuda de mis marcadores podía arreglarlo.
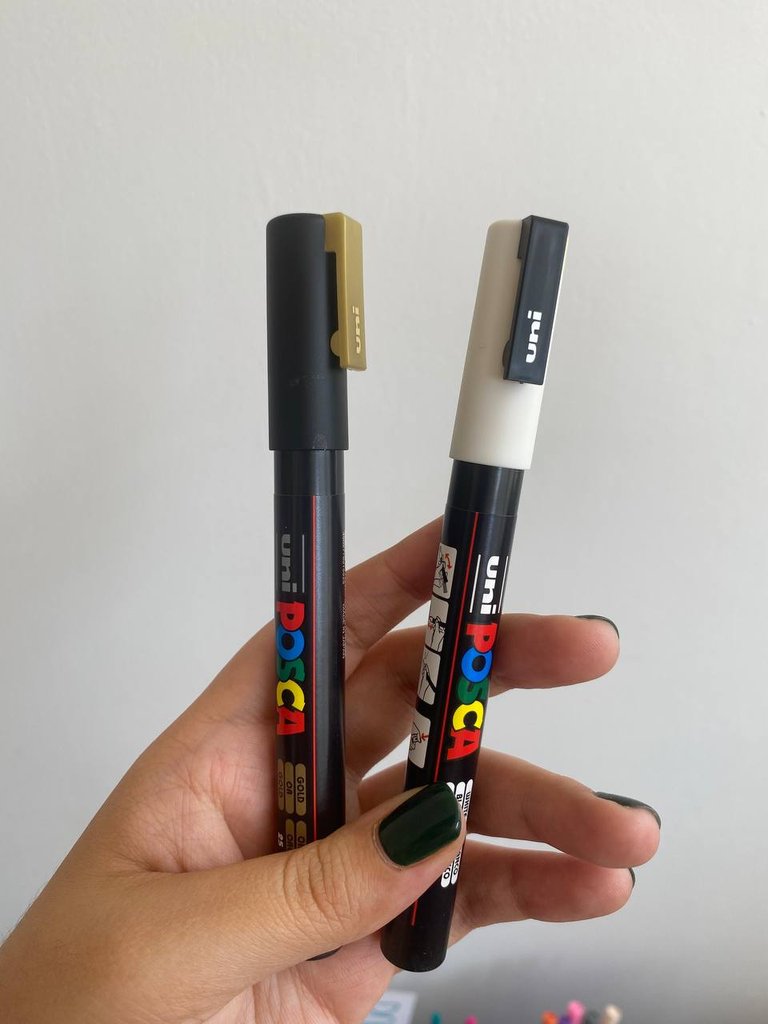
Otra cosa: era el momento perfecto para probar los nuevos marcadores posca que había pedido. Pedi uno blanco y otro dorado (la verdad era que los quería todos, pero no son marcadores exactamente economicos, aqui en venezuela te puede costar 1 solo marcador unos $8, mientras que afuera unos $3 o $4 dependiendo del tamaño de la punta), siempre había querido uno y llegó el momento. Así que te muestro como con un lápiz, 2 marcadores y una bolsa reciclada hice una bolsa genial:

MATERIALES
Bolsa de cartón kraft
Lápiz
Goma
Marcadores de pintura acrílica
PASO A PASO
PASO 1
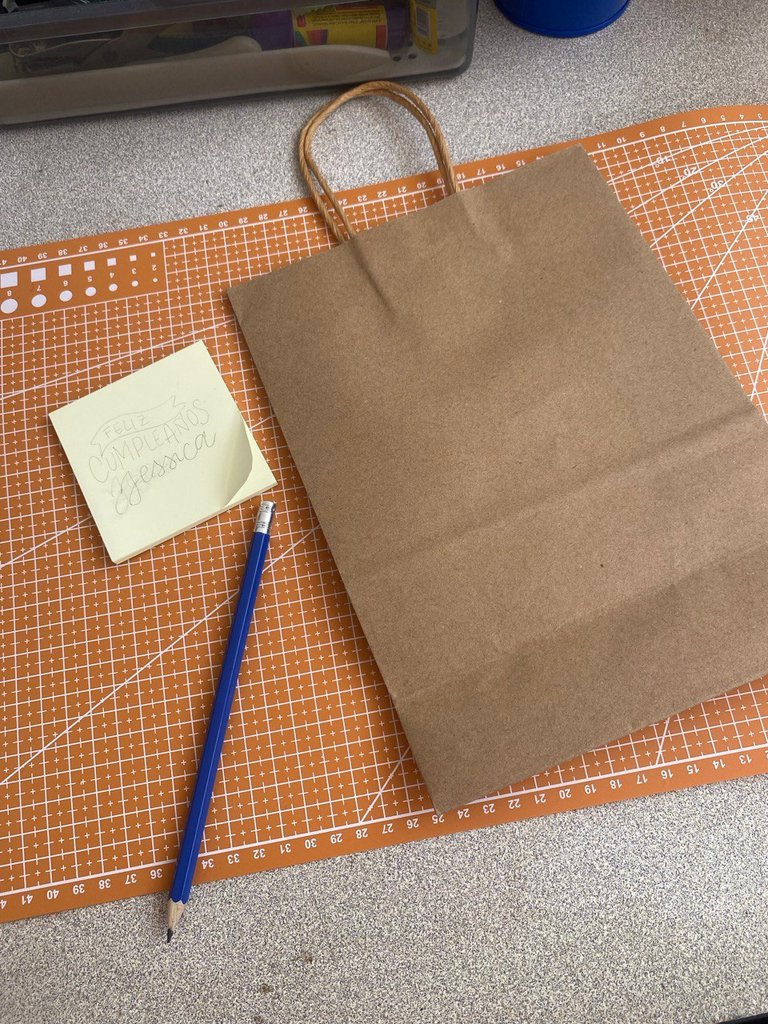
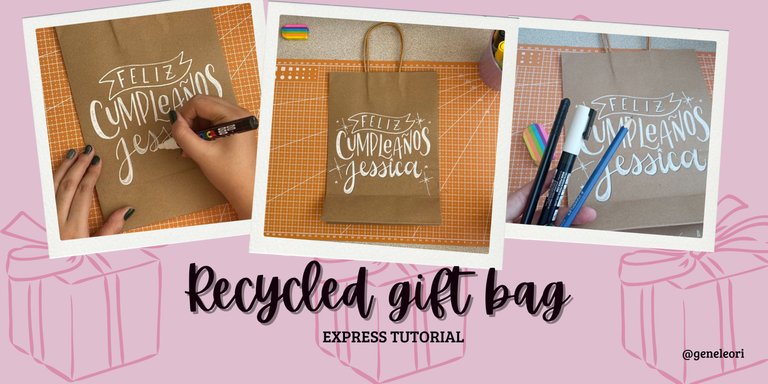
Primero, hice un pequeño boceto en lo primero que encontré: unos post it. Ahí trace una pequeña cinta, defini los estilos de letras que usaría y su contraste para luego pasarlo en grande a la bolsa de cartón kraft con ayuda de un lápiz. Dibujar letras guías es algo que me ayuda mucho, aunque seré honesta con algo: nunca las sigo completamente, muchas veces solo corrijo sobre ellas.
 |  |
|---|
PASO 2
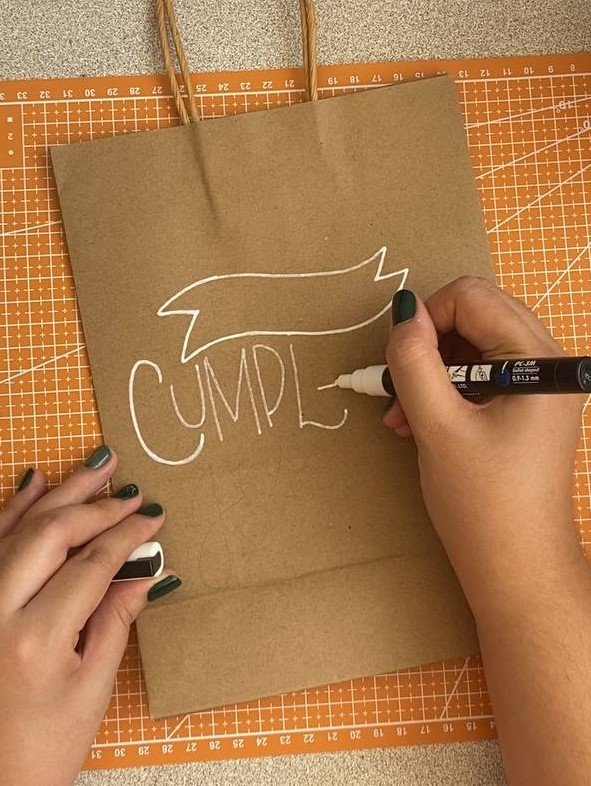
Hora de darle vida: con el marcador blanco. Sí, tal vez el blanco no sea el color más vivo pero su efecto sobre el color del papel kraft es hermoso. A veces me parece tan maravilloso como algo tan sencillo puede quedar tan perfecto.
 |  |
|---|
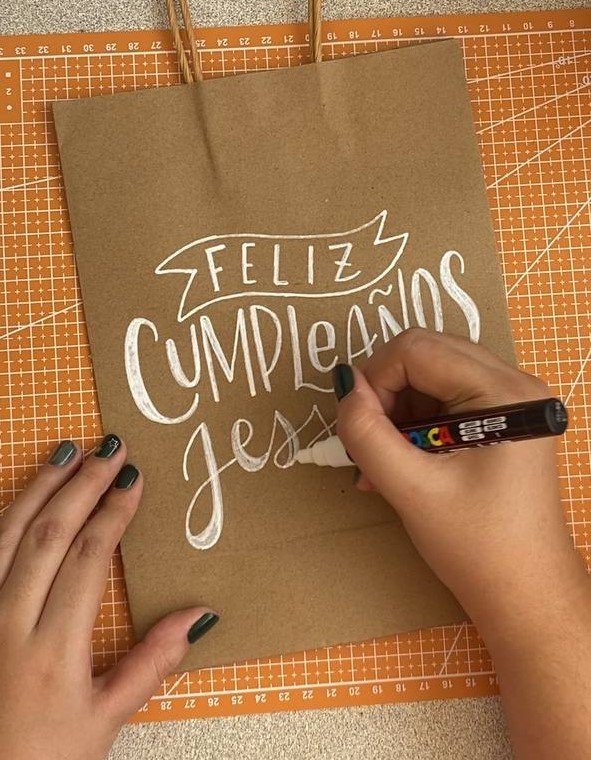
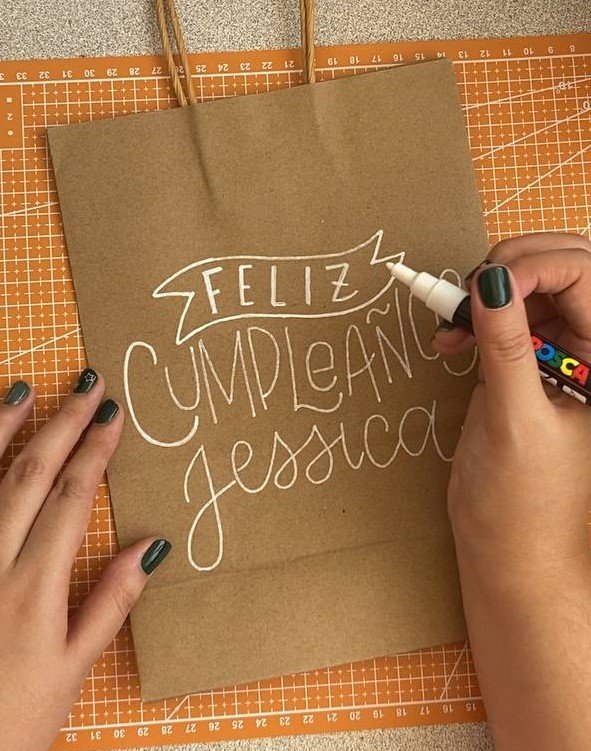
La frase fue sencilla: “Feliz cumpleaños Jessica”. Nada elaborado. Para “Feliz” use una cinta sencilla y letras rectas con algo de contraste en el trazo que baja. “Cumpleaños” busque encajarlo con la cinta y use un estilo recto para más divertido. Y para “Jessica” un estilo cursivo que me encanta, porque los trazos que bajan tienden a tener más contraste en su parte inferior, es un estilo groovy.
PASO 3
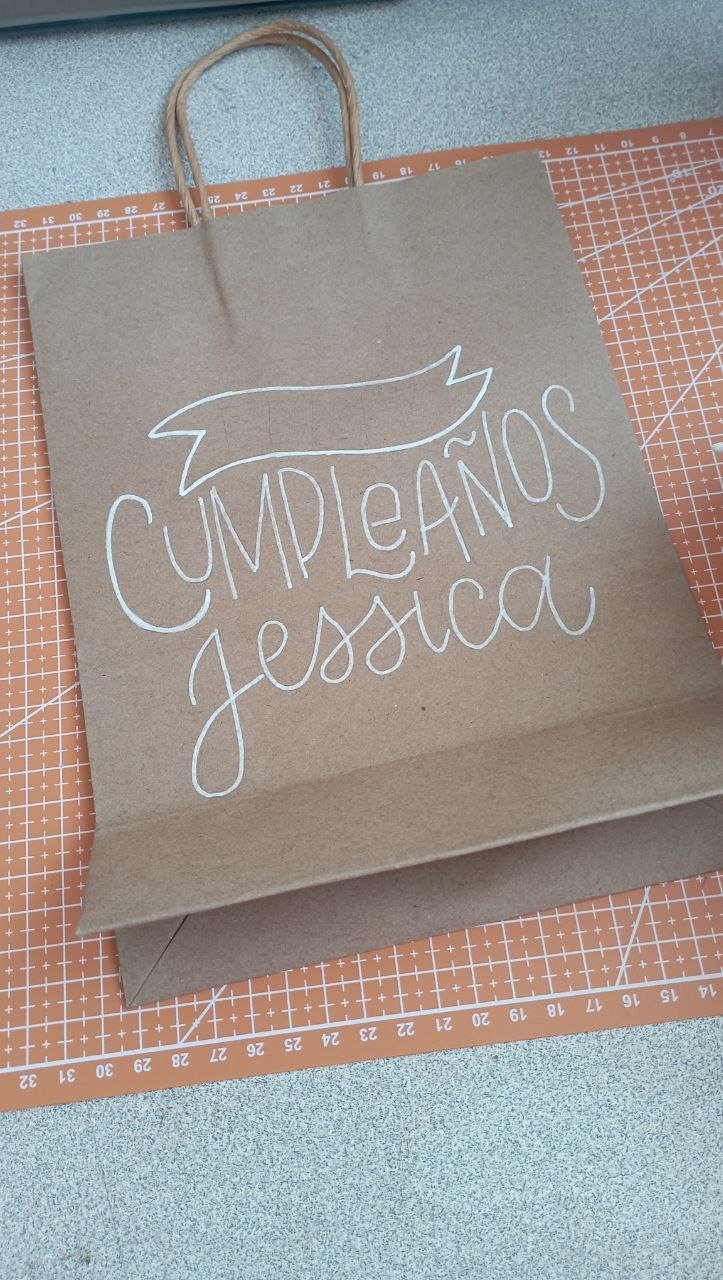
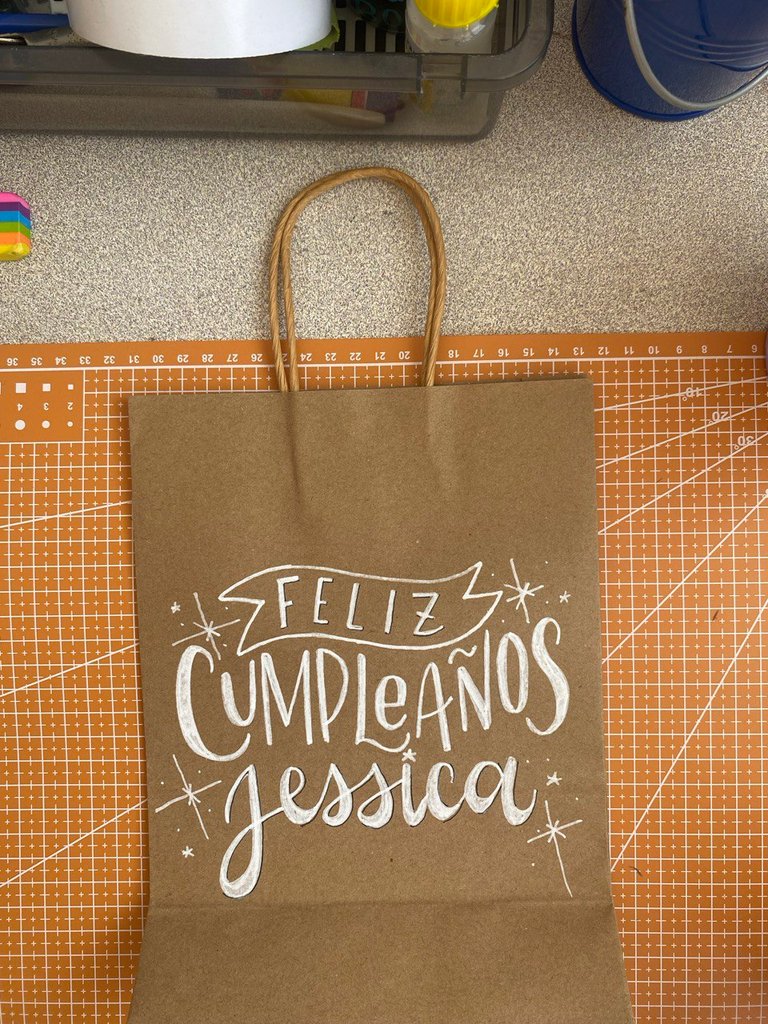
Con las letras en blanco listas, se me ocurrio usar un marcador negro de punta 0.4 (que este kores k-liner, uno de mis favoritos para hacer delineados), este solo lo use en las letras “Feliz”. No quise hacer abuso de él, ya que en blanco se veía perfecto. También añadí algunas estrellas y destellos.
PASO 4
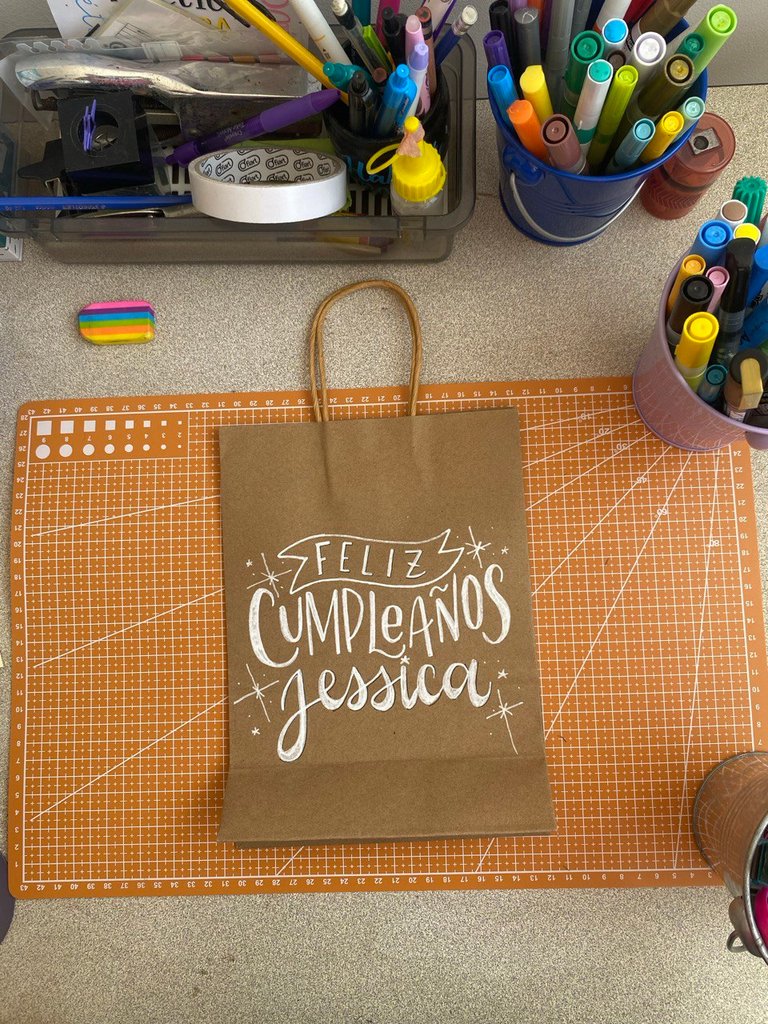
¡Bolsa de regalo lista!
Este es un tutorial muy expres, pocos pasos, pocos materiales y funciona para reusar bolsas. Amo el resultado y a Jessica le encanto. Aun así espero pronto terminar de armar su regalo original y poder mostrarles como quedo. Que la creatividad los guíe
Gracias por leerme
Con cariño, G.
Hi hivers! 💜
I hope you are well and happy. My sister-in-law had a birthday and I had a few details with her birthday gift. Her gift didn't flow (my way of saying I'm still coming up with it and hope to bring it to you soon as a tutorial), so we bought her some cute stich pajamas, but forgot the bag. Big mistake. I didn't like the ones I had at home, and I didn't have my invaluable kraft paper (which always saves me from everything), so I kept looking and found a kraft cardboard bag that had a small technical detail: it had a sticker, I removed it and brought a little bit of paper, it was not very visible but it still bothered me; on the other side it was perfect, so with the help of my markers I could fix it.
Another thing: it was the perfect moment to try the new posca markers I had ordered. I ordered a white one and a gold one (the truth was that I wanted them all, but they are not exactly cheap markers, here in Venezuela it can cost you $8 for a single marker, while outside it costs $3 or $4 depending on the size of the tip), I had always wanted one and the time came. So I show you how with a pencil, 2 markers and a recycled bag I made a great bag:
MATERIALS
Kraft cardboard bag
Pencil
Rubber
Acrylic paint markers
STEP BY STEP
STEP 1
First, I made a small sketch on the first thing I found: some post it notes. There I drew a little ribbon, defined the styles of letters I would use and their contrast and then I transferred it to the kraft cardboard bag with the help of a pencil. Drawing guide letters is something that helps me a lot, although I'll be honest with something: I never follow them completely, many times I just correct over them.
| |
|---|
STEP 2
Time to bring it to life: with the white marker. Yes, white may not be the most vivid color but its effect on the color of the kraft paper is beautiful. Sometimes I find it so wonderful how something so simple can look so perfect.
| |
|---|
The phrase was simple: “Happy Birthday Jessica”. Nothing elaborate. For “Happy” use simple ribbon and straight letters with some contrast in the stroke going down. “Birthday” look to fit it with the ribbon and use a straight style for more fun. And for “Jessica” a cursive style that I love because the strokes going down tend to have more contrast at the bottom, it's a groovy style.
STEP 3
With the white letters ready, I thought of using a black 0.4 tip marker (which this kores k-liner, one of my favorites for outlining), I only used it on the “Happy” letters. I didn't want to overuse it, as it looked perfect in white. I also added some stars and sparkles.
STEP 4
Gift bag ready!
This is a very express tutorial, few steps, few materials and it works for reusing bags. I love the result and Jessica loved it. I still hope to soon finish making her original gift and be able to show you how it turned out. May creativity guide you
Thank you for reading me
With love, G..
FUENTE
Fotos: iphone 11
Traducción: Deepl
SOURCE
Photos: iphone 11
Translation: Deepl

Te quedó hermosa, y estoy de acuerdo contigo en que el blanco sobre este color queda increíble, y los detalles hacen el trabajo.
Gracias💜💜
This is such a creative idea for a birthday gift, am sure she will like it and it looks good by the way. Nicely done and good job 👍
Thanks!💜