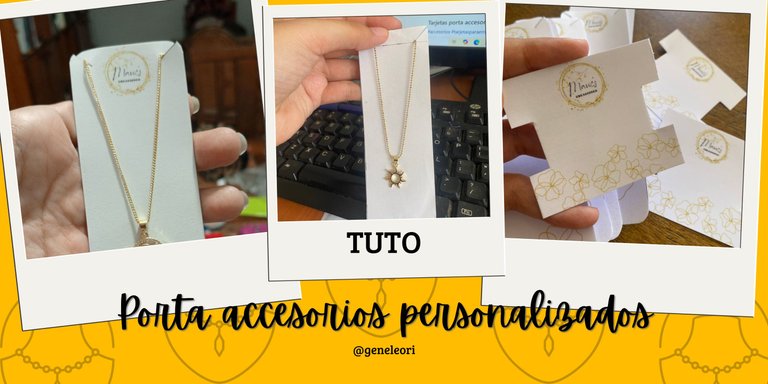
Personalized accessory holder #tuto / Porta accesorios personalizados (ESP-ENG)
¡Hola hivers!💜
Espero que se encuentren bien y felices. Hace unos días me contactaron para hacer unos porta accesorios de una marca, específicamente un porta collares y un porta pulseras. Me solicitaron usar como paletas de color: blanco, amarillo, lila y naranja en conjunto con 2 versiones de logo con doodles florales. Así que en base a eso trabaje, les muestro como fue el proceso:

MATERIALES
Lápiz
Regla
Papel de reciclaje
Papel fotográfico
Guillotina
Tijeras
Papel contact
PASO A PASO
 |  |
|---|
PASO 1
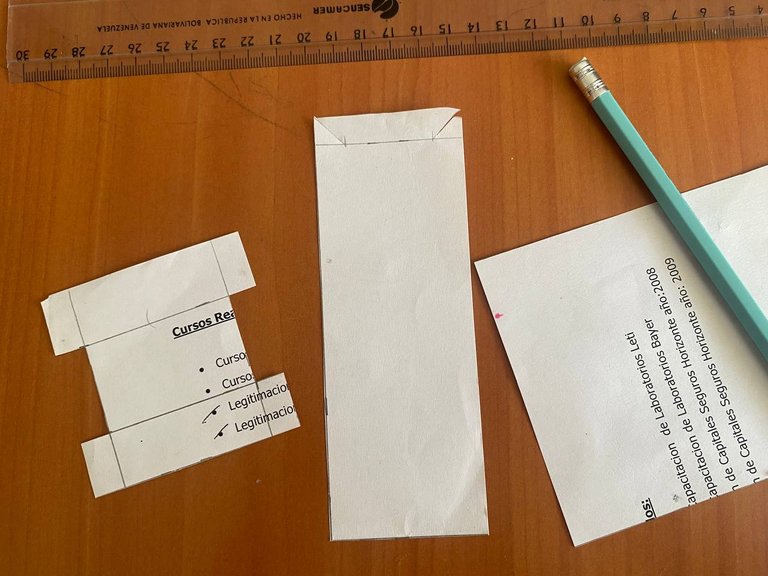
Lo primero que hice fue tomar las medidas. Luego de ver las referencias con ayuda de un lápiz, regla y tijeras hice un molde de papel de reciclaje para el porta collares y el porta pulseras. El porta collares es de 14 cm de alto por 5 cm de ancho, mientras que el porta pulseras es de 7 cm de ancho la parte de arriba y abajo, la del medio de 5.5 cm y de alto 6 cm.
 |  |
|---|
 |  |
|---|
PASO 2
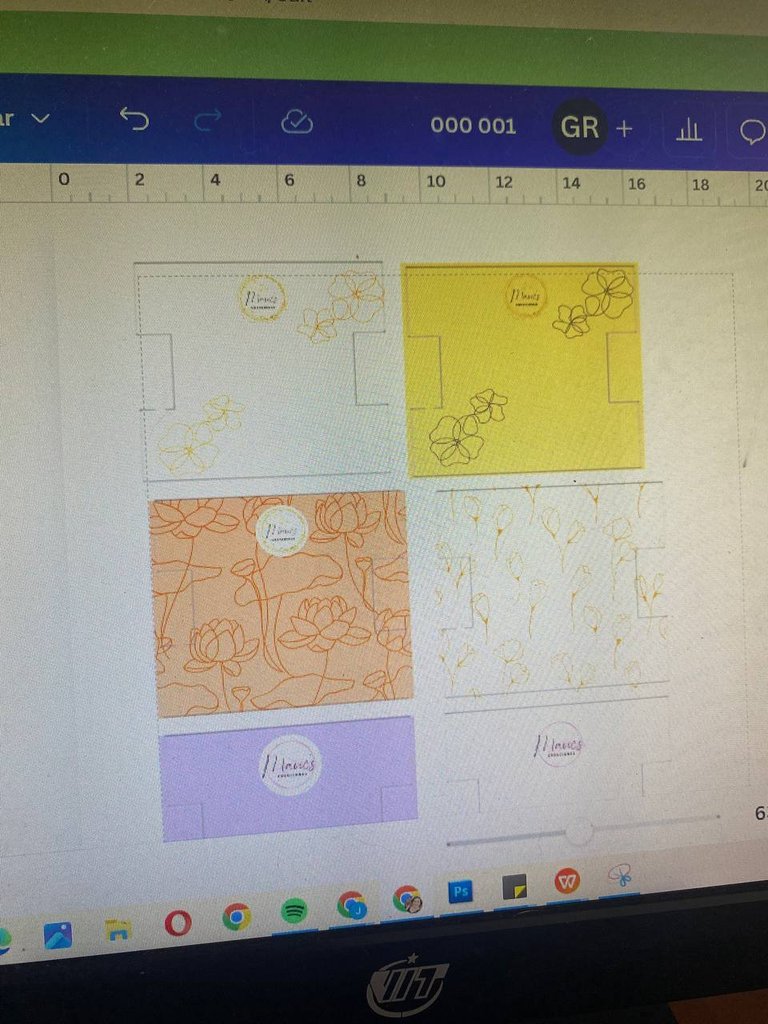
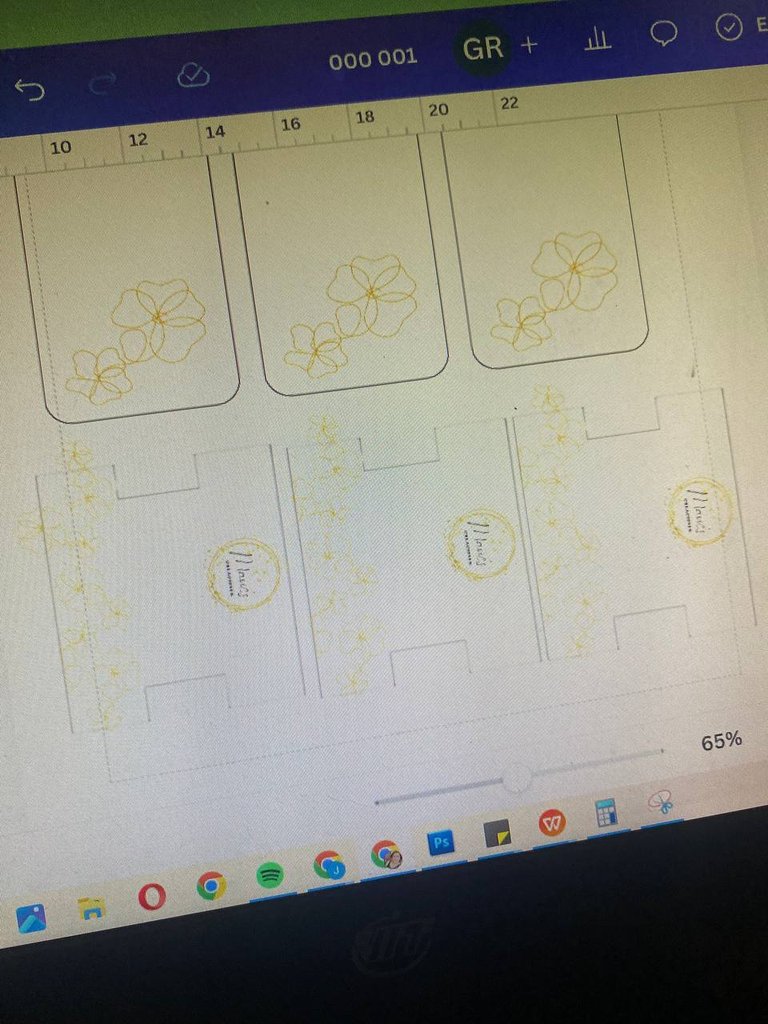
Con las medidas listas empecé el diseño. Use canva para diseñar las formas. Saqué al menos 3 tipos de diseños para cada porta accesorios combinando los colores que me habían pedido y distintos doodles florales de líneas finas. Al final, envie los diseños a la cliente y se decidio por un modelo con fondo blanco, flores en amarillo tostado y logo morado.
 |  |
|---|
PASO 3
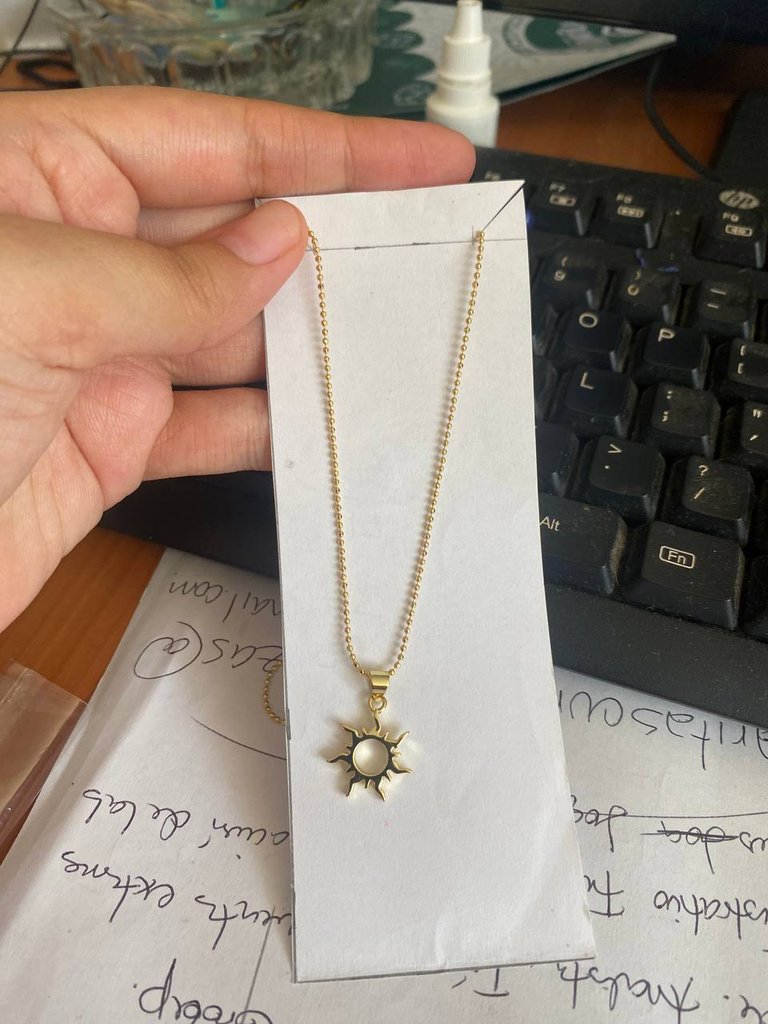
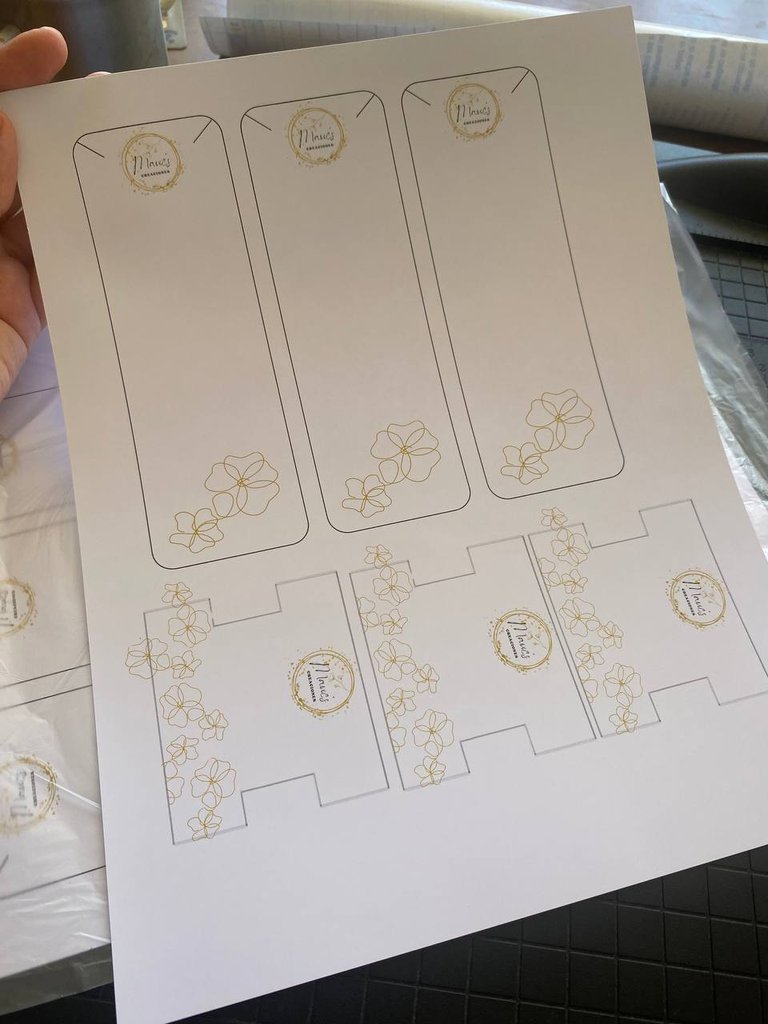
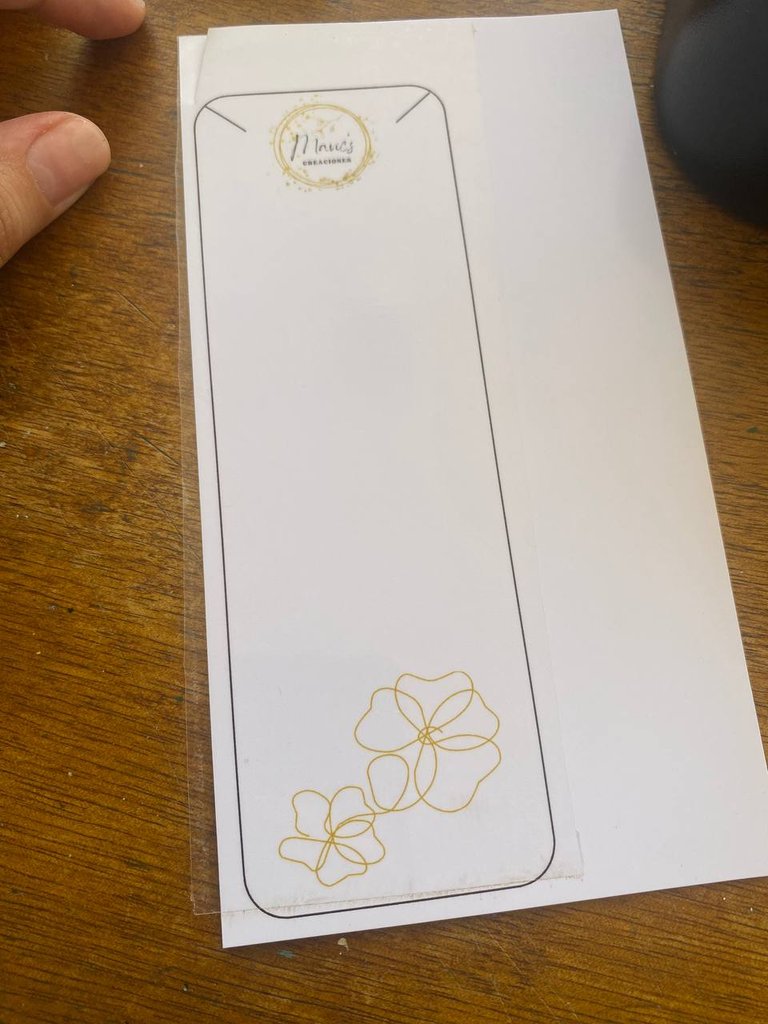
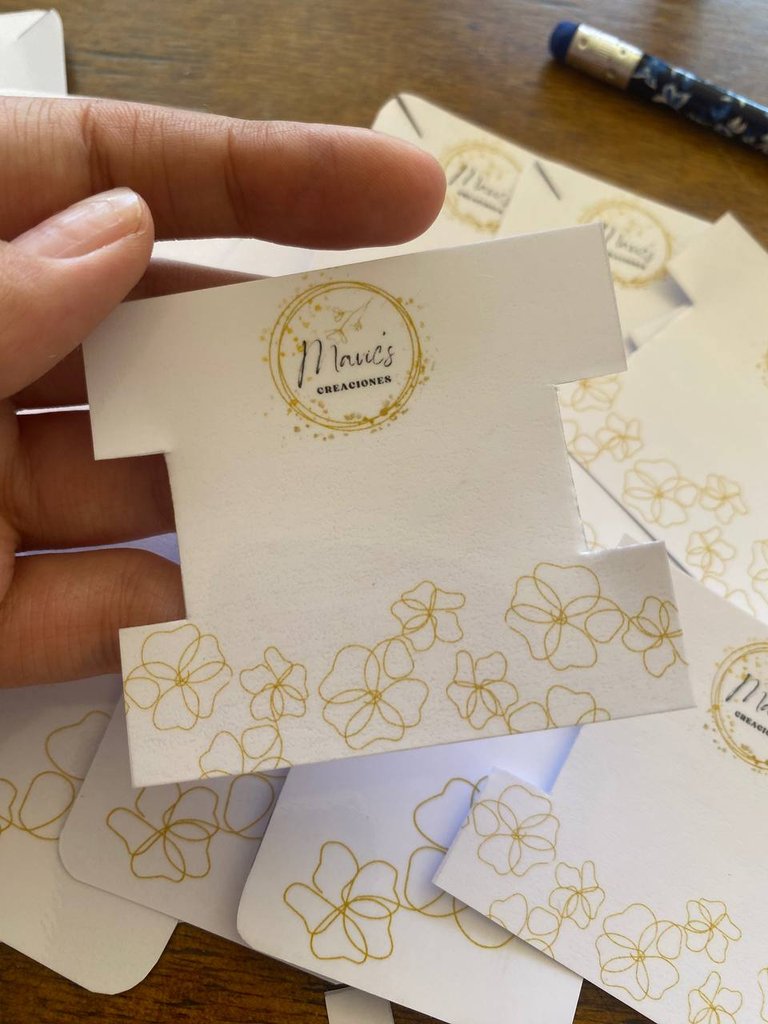
Con el diseño listo, lo envié a imprimir en papel fotográfico. Quería hacer una prueba laminando el papel fotográfico con papel contac transparente (laminado en frío), para esto recorte uno de los porta collares con ayuda de la guillotina. Corte el papel contact un poco más grande y con ayuda de un pañito fui laminando el papel fotográfico. Como me gustó el resultado, decidí laminarlos todos.
 |  |
|---|
Esta vez, lamine todas las hojas y corte con ayuda de la guillotina. Para cortar el área redondeada y las líneas de los collares use una tijera.
 |  |
|---|
 |  |
|---|
PASO 4
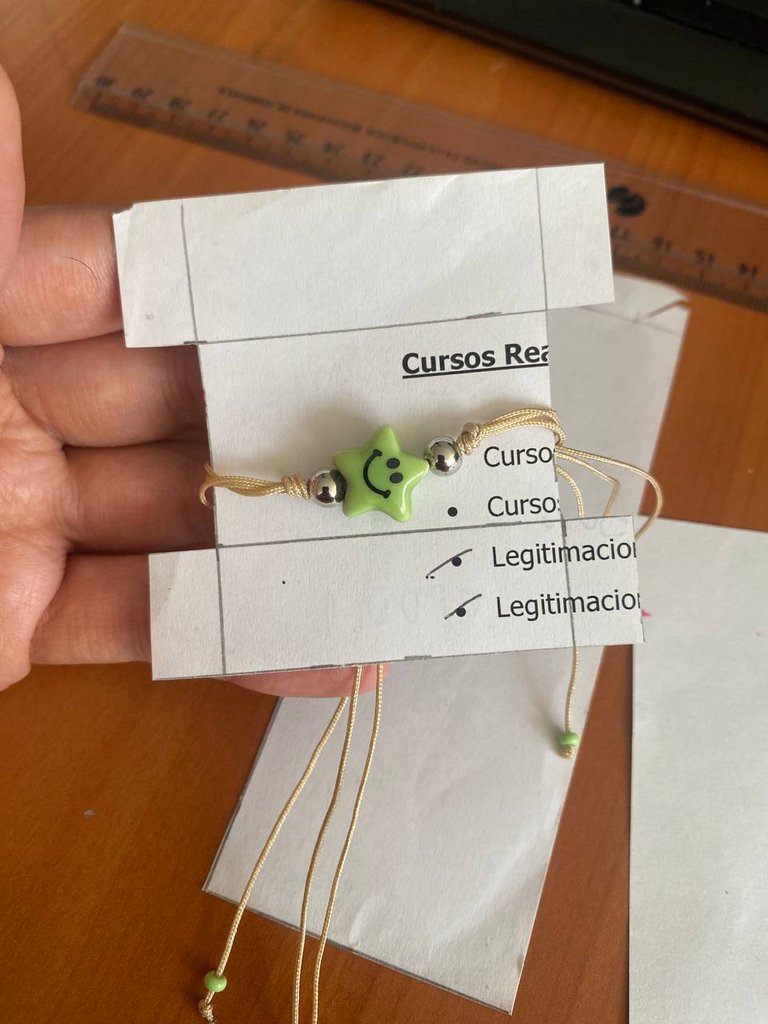
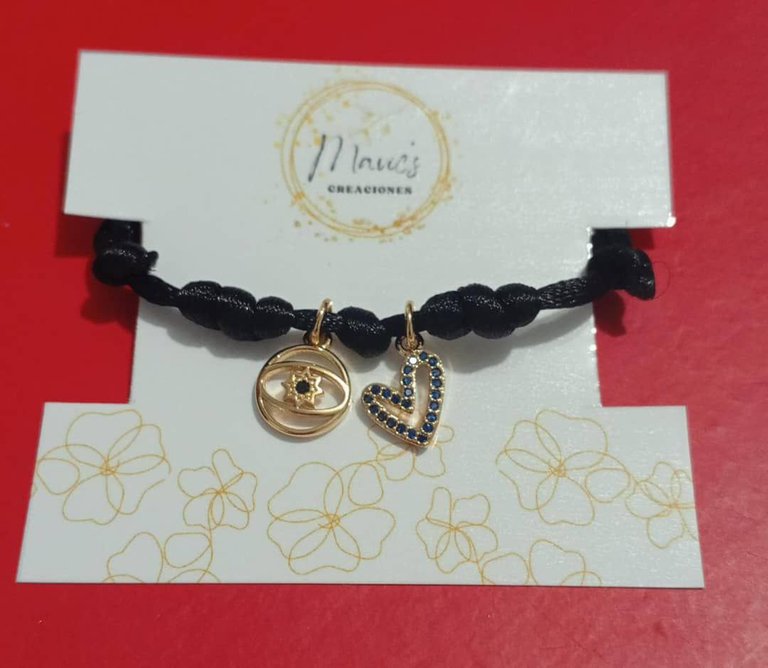
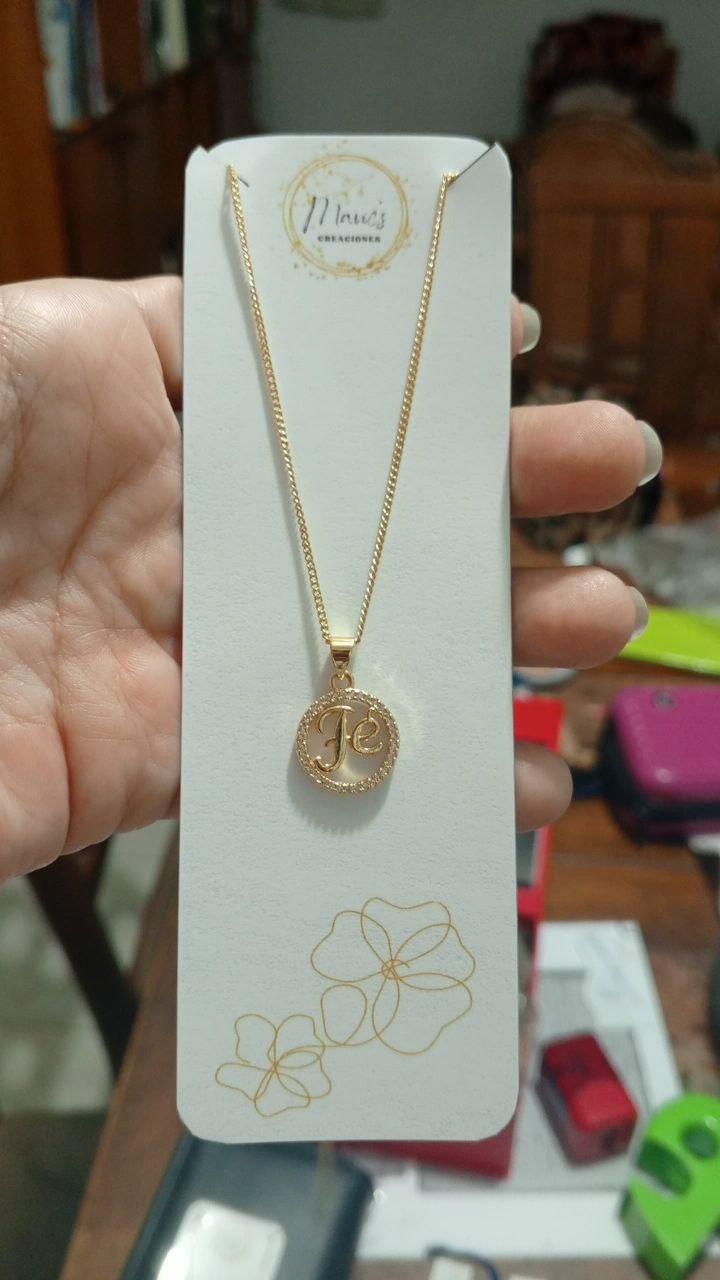
Con los porta accesorios recortados hicimos una prueba con los accesorios y listos para la venta
 |  |
|---|
 |  |
|---|
Me gustó el resultado final y a la cliente le encantó. Salieron 6 de cada uno y espero puedan repetir el pedido. No le tenía fe al laminado en frío, pero le dio el toque perfecto a cada porta accesorios, además de que permitirá que el color se mantenga y sea más resistente. Me encantan este tipo de pedidos, nos vemos en el siguiente.
Gracias por leerme
Con cariño, G.

Hi hivers! 💜
I hope you are well and happy. A few days ago I was contacted to make some accessory holders for a brand, specifically a necklace holder and a bracelet holder. They asked me to use as color palettes: white, yellow, lilac and orange in conjunction with 2 versions of logo with floral doodles. So based on that I worked, I show you how was the process:
MATERIALS
Pencil
Ruler
Recycling paper
Photographic paper
Guillotine
Scissors
Contact paper
STEP BY STEP
| |
|---|
STEP 1
The first thing I did was to take the measurements. After seeing the references with the help of a pencil, ruler and scissors I made a mold from recycled paper for the necklace holder and the bracelet holder. The necklace holder is 14 cm high by 5 cm wide, while the bracelet holder is 7 cm wide at the top and bottom, 5.5 cm in the middle and 6 cm high.
| |
|---|
| |
|---|
STEP 2
With the measurements ready I started the design. I used canva to design the shapes. I came up with at least 3 types of designs for each accessory holder combining the colors I had been asked for and different floral doodles with fine lines. At the end, I sent the designs to the client and she decided on a model with a white background, flowers in tan yellow and purple logo.
| |
|---|
STEP 3
With the design ready, I sent it to be printed on photographic paper. I wanted to do a test laminating the photo paper with transparent contact paper (cold laminated), for this I cut out one of the necklace holders with the help of the guillotine. I cut the contact paper a little bit bigger and with the help of a tissue I laminated the photo paper. As I liked the result, I decided to laminate them all.
| |
|---|
This time, I laminated all the sheets and cut with the help of the guillotine. To cut the rounded area and the lines of the necklaces I used a scissors.
| |
|---|
| |
|---|
STEP 4
With the accessories holders cut out, we did a test with the accessories and ready for sale.
| |
|---|
| |
|---|
I liked the final result and the customer loved it. We got 6 of each and I hope they can repeat the order. I didn't have faith in cold lamination, but it gave the perfect touch to each accessory holder, plus it will allow the color to stay and be more resistant. I love this kind of orders, see you in the next one.
Thank you for reading me
With love, G..
FUENTE
Fotos: iphone 11
Traducción: Deepl
SOURCE
Photos: iphone 11
Translation: Deepl

Que bonitos y es que no es solo lo bonitos e útiles, sino que con esto le das fuerza a la marca, les das identidad. Buen trabajo
Hola Génesis. Que lindo que queda este detalle, cuando compramos un accesorio sin dudas lo hace ver más lindo y elegante. ¡Te quedó genial! Gracias por compartir 💕