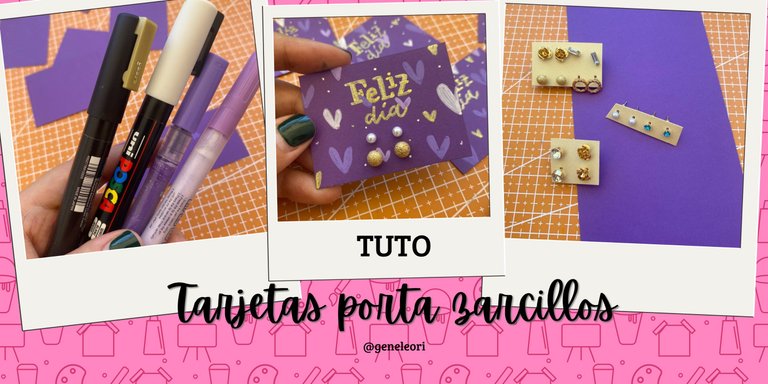
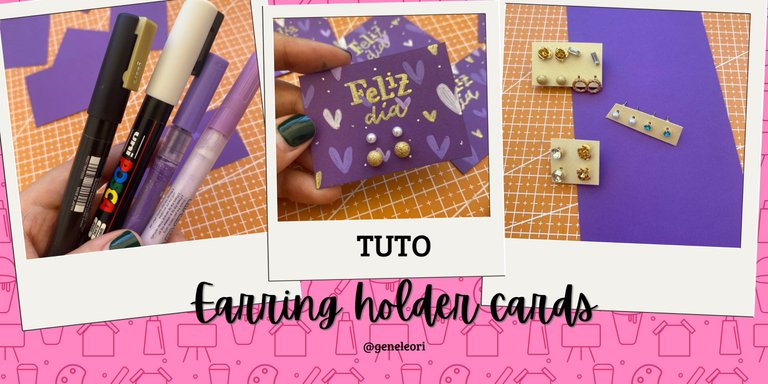
Earring holder cards: tuto / Tarjetas porta zarcillos (esp-eng)
¡Hola hivers!💜
Espero que se encuentren bien y felices. El domingo fue el día de las madres y a última hora decidí regalar algunos pares de zarcillos, pero como buena hada artesana que soy no podía entregarlos así de sencillo así que me puse a buscar cartulinas que tuviera e hice estos porta zarcillos que te mostraré:

MATERIALES
Cartulina
Lápiz
Regla
Tijeras
Marcador de pintura acrílica
Aguja gruesa
Goma
PASO A PASO
 |  |
|---|
PASO 1
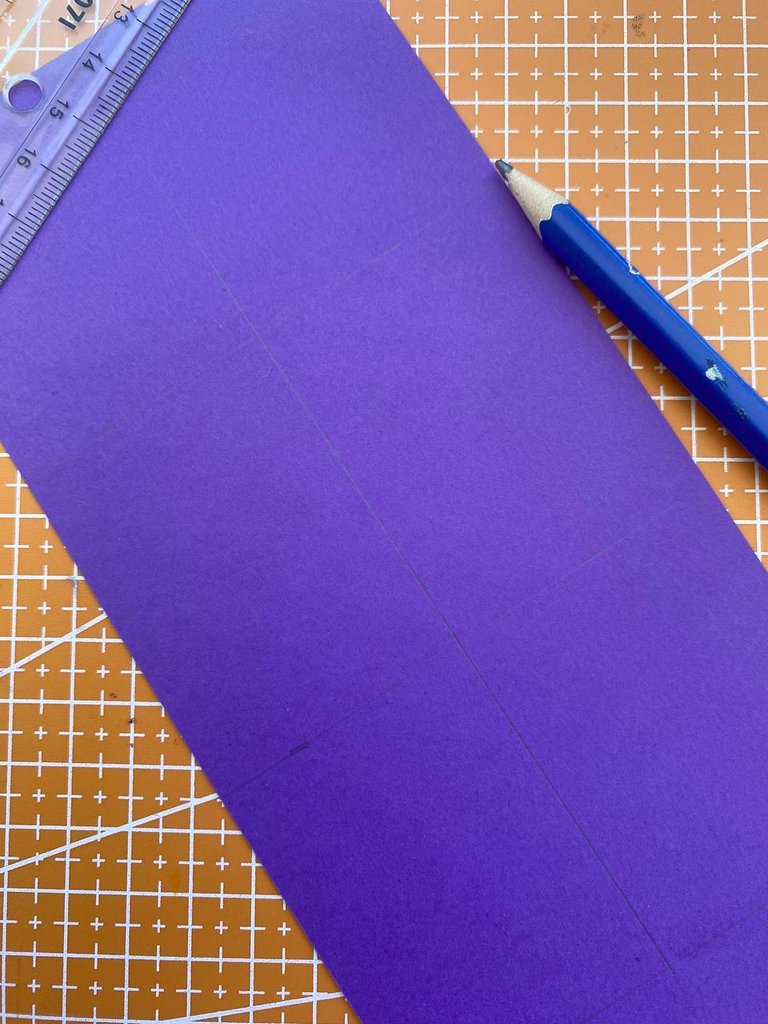
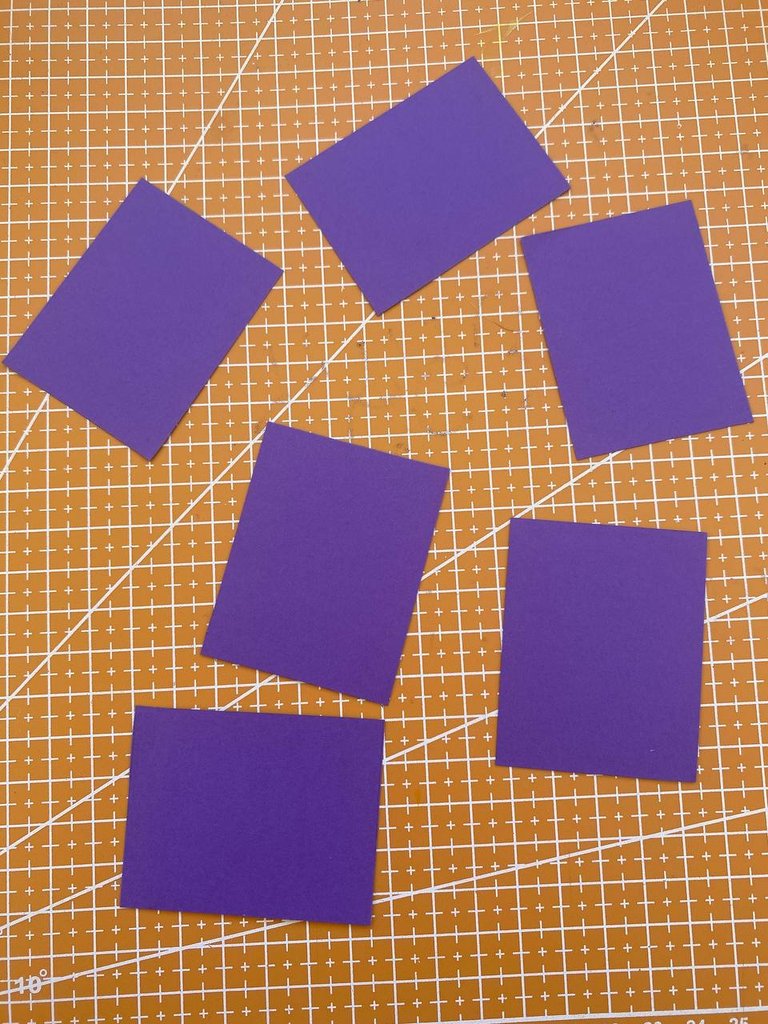
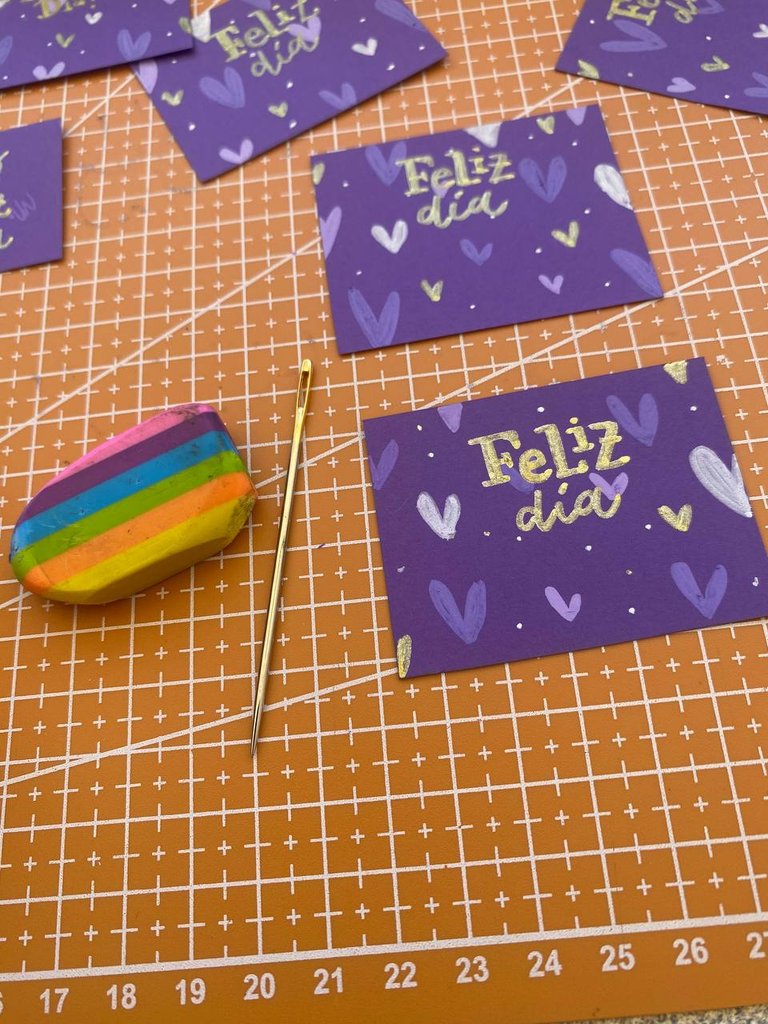
Primero, decidí la medida de las tarjetas. Encontré una cartulina morado oscuro y saqué que cada tarjeta mediría 6 cm por 4,5 cm. Con ayuda del lápiz y la regla marque más tarjetas. Después las recorte con ayuda de la tijera.
 |  |
|---|
PASO 2
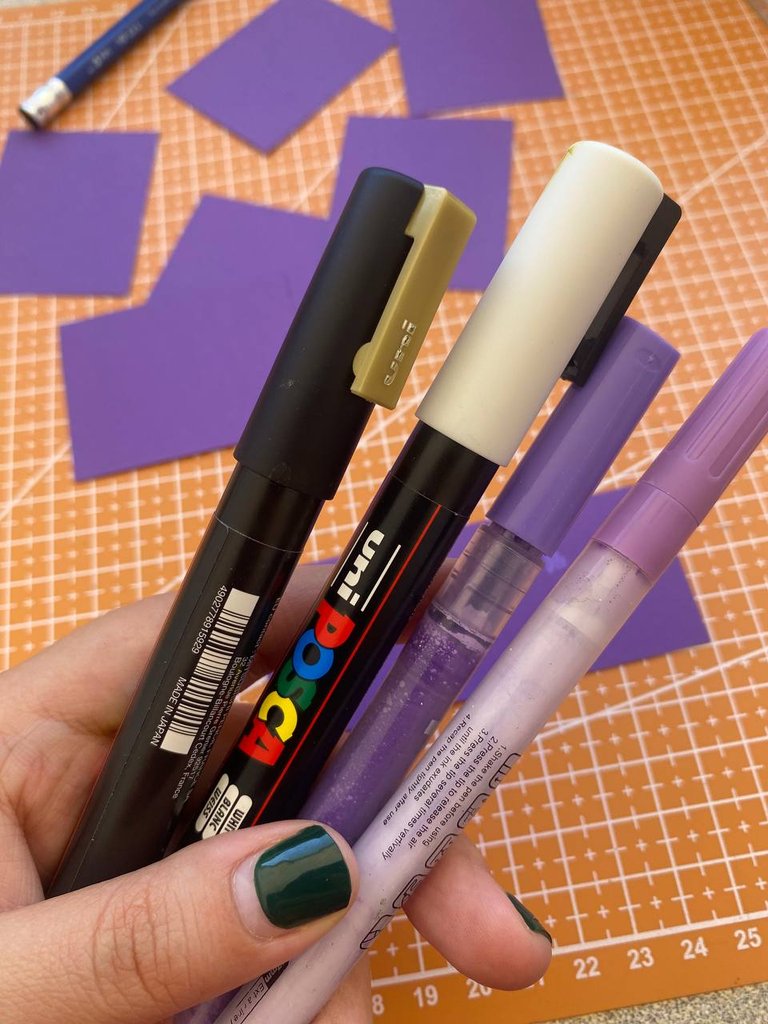
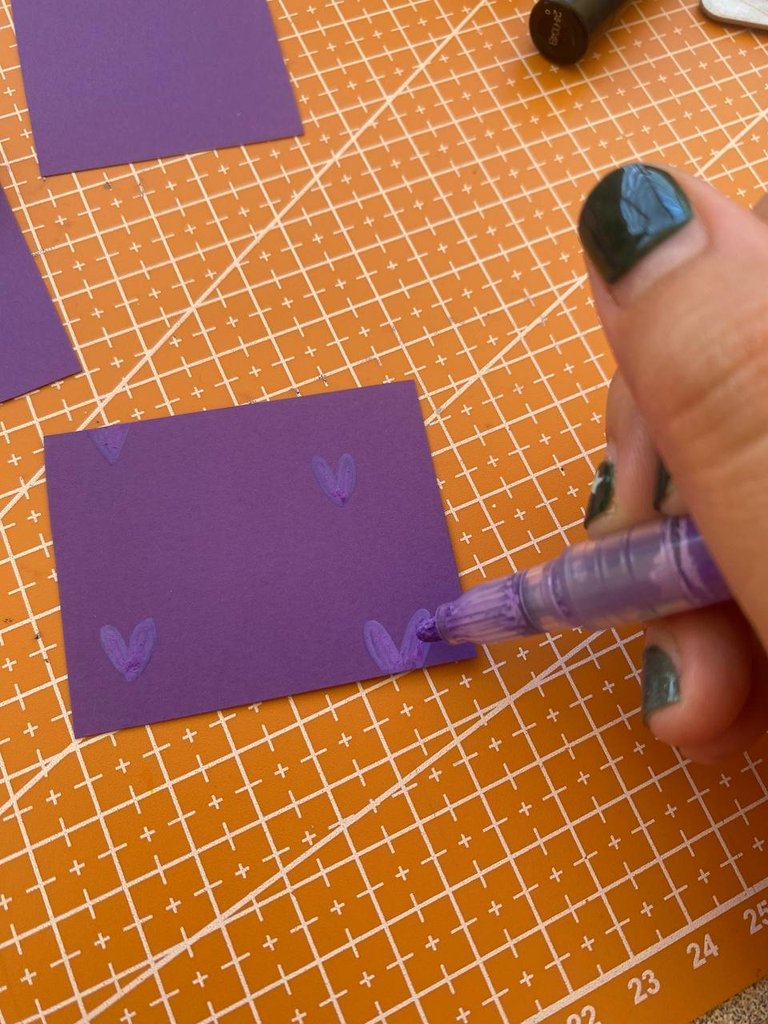
Con las tarjetas recortadas me tocaba hacerles algún diseño. Así que ubique 4 marcadores de pintura acrílica: morado claro, morado medio, dorado y blanco.
Primero usé el morado medio y empecé a hacer corazones de forma dispersa por cada tarjeta. La idea era hacer un patrón de corazones. Aunque era un tono muy cercano al fondo, me daba el efecto como si fuera una sombra de corazón.
 |  |
|---|
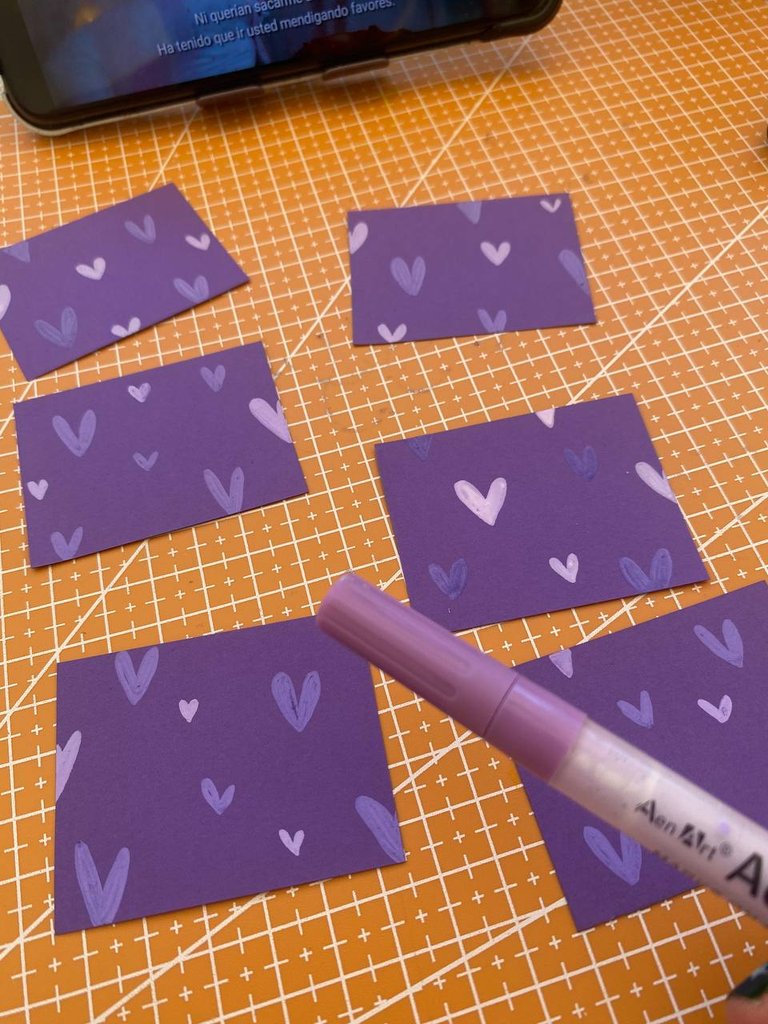
Luego use el morado claro para hacer más corazones y generar contraste. De último el marcador blanco para añadir un poco más de luz y con esto logré un patrón de corazones.
Tip: una opción para hacer patrones es dibujar los patrones antes de recortar, esto permite crear un patrón único a lo largo de la cartulina. Era mi idea inicial pero me emocione y lo recorte antes de.
 |  |
|---|
PASO 3
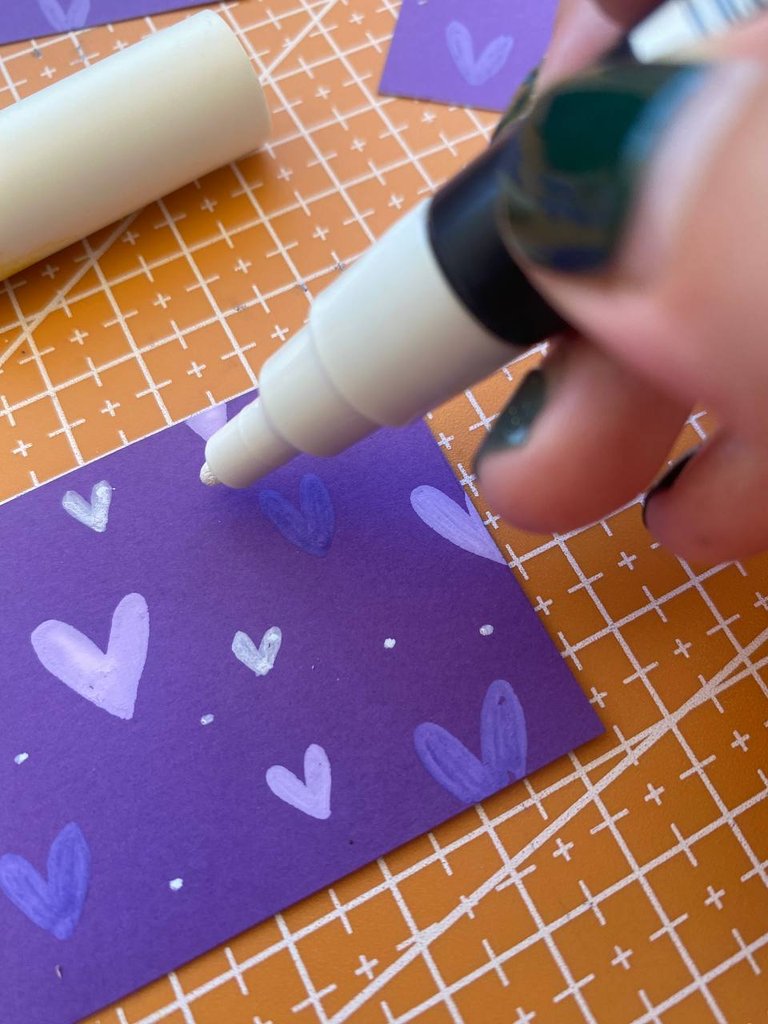
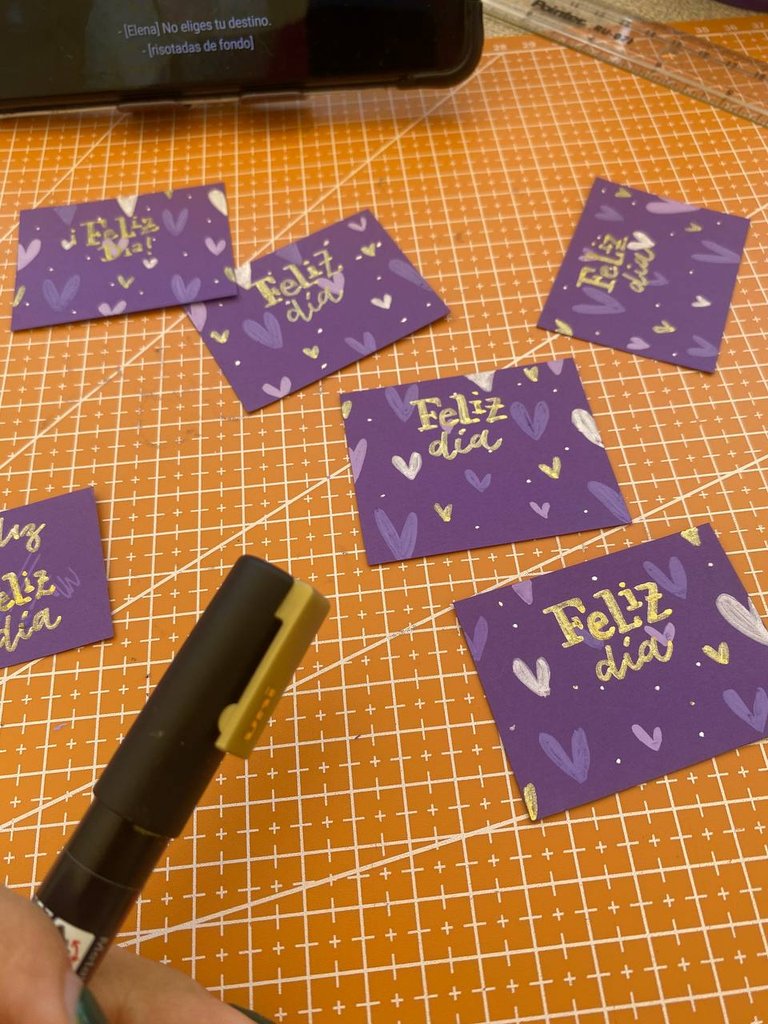
Ya con el fondo listo, quería agregar la frase: “feliz día”. Lo hice en un estilo serif y cursivo con marcador dorado. También añadí algunos puntos y mini corazones de color dorado.
 |  |
|---|
PASO 4
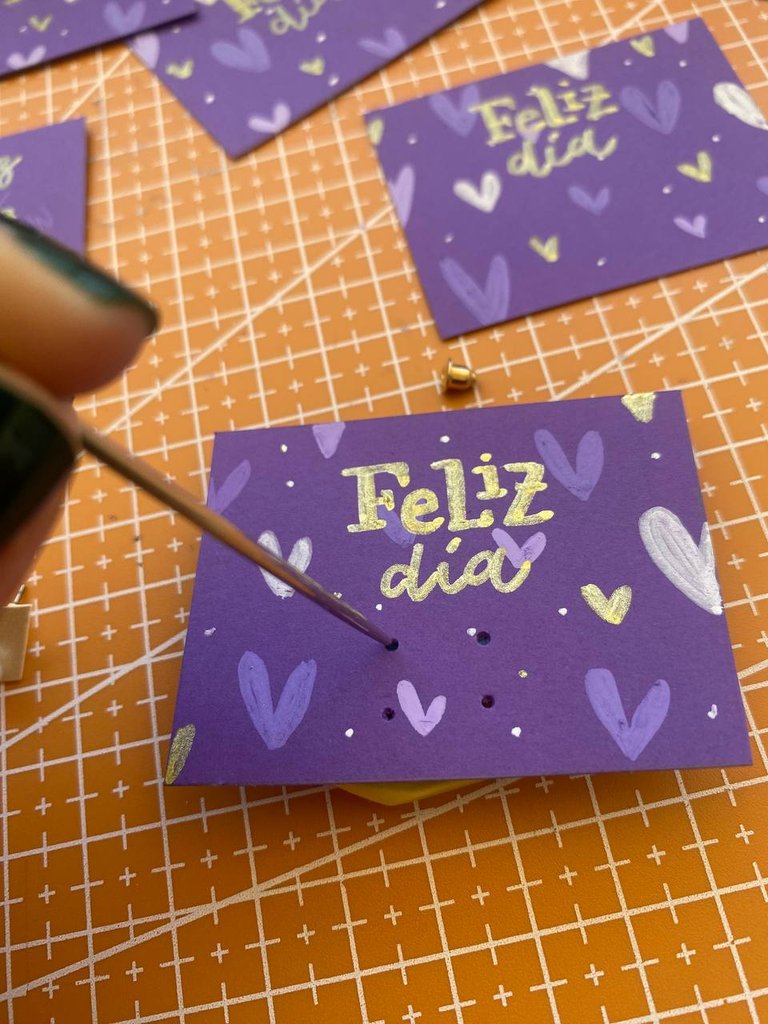
Con la decoración lista, toca abrir los huequitos para los zarcillos. Para esto use una aguja gruesa (esta es para encuadernación) y una goma de borrar. De base la goma, encima la tarjeta y con ayuda de la aguja perfore intentando que los dos huecos quedarán centrados con el título.
PASO 5
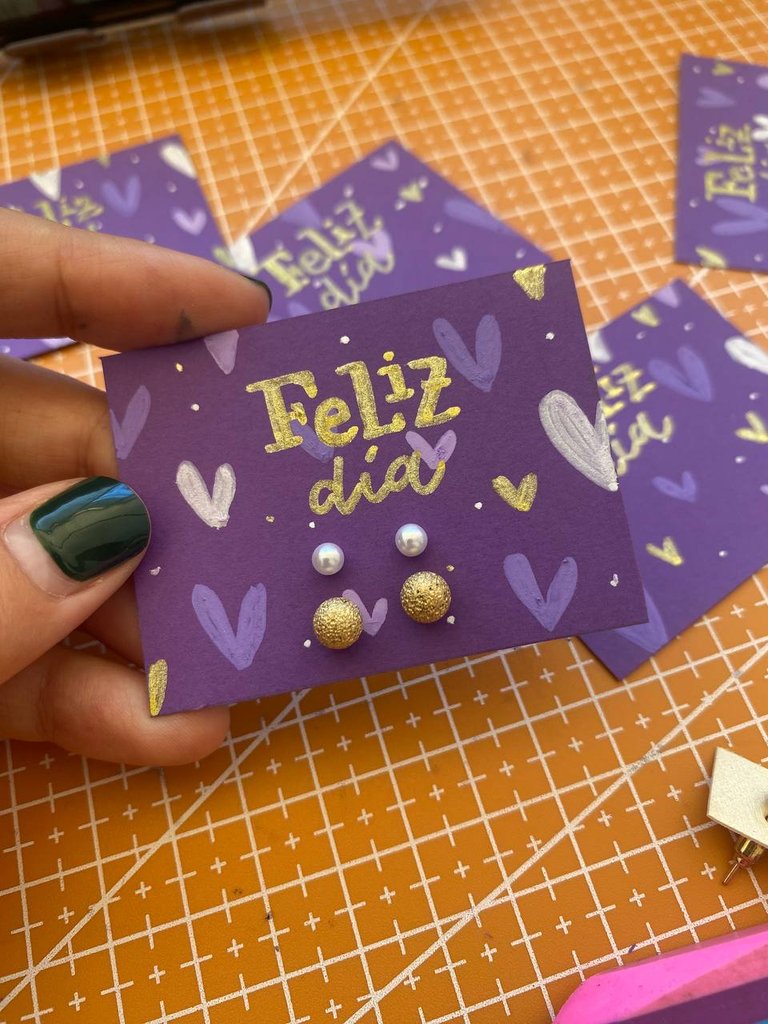
¡Tarjetas porta zarcillos listas!

Es una forma rápida y sencilla de hacer unas tarjetas porta zarcillos sencillas y con materiales que tienes en casa. Yo que soy fan de estos detalles hecho a mano, me encantan. Sin duda podría adaptarse para collares y pulseras. Es sin duda un regalo que dice: “hice esto con amor para ti”.
Gracias por leerme
Con cariño, G.
Hi hivers! 💜
I hope you are well and happy. Sunday was Mother's Day and at the last minute I decided to give some pairs of tendrils as a gift, but as a good craft fairy I couldn't just hand them out so I started looking for cardboard I had and I made these tendril holders that I will show you:
MATERIALS
Cardboard
Pencil
Ruler
Scissors
Acrylic paint marker
Thick needle
Glue
STEP BY STEP
| |
|---|
STEP 1
First, I decided on the size of the cards. I found a dark purple cardstock and worked out that each card would measure 6 cm by 4.5 cm. With the help of the pencil and the ruler I marked more cards. Then I cut them out with the scissors.
| |
|---|
STEP 2
With the cards cut out, it was time to make a design on them. So I placed 4 acrylic paint markers: light purple, medium purple, gold and white.
First I used the medium purple and started making hearts in a scattered pattern on each card. The idea was to make a pattern of hearts. Even though it was a very close shade to the background, it gave me the effect as if it was a heart shade.
| |
|---|
Then I used the light purple to make more hearts and generate contrast. Lastly I used the white marker to add a little more light and with this I achieved a heart pattern.
Tip: an option to make patterns is to draw the patterns before cutting them out, this allows you to create a unique pattern along the cardboard. This was my initial idea but I got excited and cut it out before.
| |
|---|
STEP 3
With the background ready, I wanted to add the phrase: “happy day”. I did it in a serif and cursive style with gold marker. I also added some gold colored dots and mini hearts.
| |
|---|
STEP 4
With the decoration ready, it's time to open the holes for the tendrils. For this I used a thick needle (this one is for bookbinding) and an eraser. Base the eraser, place the card on top and with the help of the needle pierce trying to center the two holes with the title.
STEP 5*
Ready to use tendrils holder cards!
It's a quick and easy way to make some simple earrings cards with materials that you have at home. I am a fan of these handmade details, I love them. It could certainly be adapted for necklaces and bracelets. It is definitely a gift that says: “I made this with love for you”.
Thank you for reading me
With love, G..
FUENTE
Fotos: iphone 11
Traducción: Deepl
SOURCE
Photos: iphone 11
Translation: Deepl

Preciosa la tarjeta que nos dejas, es un excelente detalle para dar un obsequio como unos bellos pendientes.
Gracias por dejarnos esta bonita idea.
!discovery 35
Gracias a ti por apreciarla y tu comentario💜
This post was shared and voted inside the discord by the curators team of discovery-it
Join our Community and follow our Curation Trail
Discovery-it is also a Witness, vote for us here
Delegate to us for passive income. Check our 80% fee-back Program
¡Felicidades! Esta publicación obtuvo upvote y fue compartido por @la-colmena, un proyecto de Curación Manual para la comunidad hispana de Hive que cuenta con el respaldo de @curie.
Si te gusta el trabajo que hacemos, te invitamos a darle tu voto a este comentario y a votar como testigo por La Colmena.
Si quieres saber más sobre nuestro proyecto, te invitamos a acompañarnos en nuestro servidor de Discord.
Congratulations @geneleori! You have completed the following achievement on the Hive blockchain And have been rewarded with New badge(s)
Your next target is to reach 800 replies.
You can view your badges on your board and compare yourself to others in the Ranking
If you no longer want to receive notifications, reply to this comment with the word
STOP