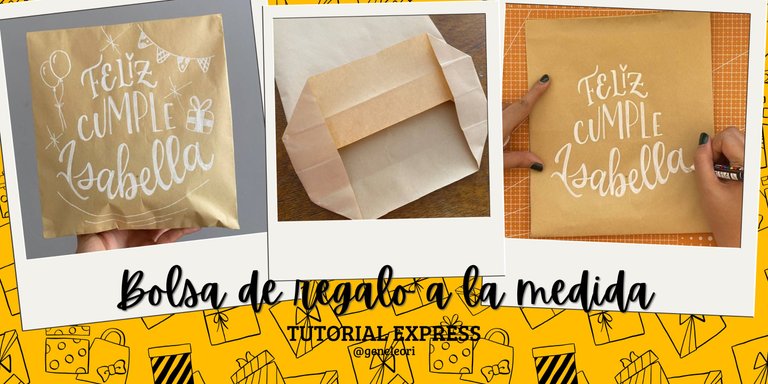
Customized gift bag #DIY / Bolsa de regalo a la medida (ESP-ENG)
¡Hola hivers!💜
Espero que se encuentren bien y felices. Si han visto mis post anteriores saben que soy amante de hacer mis propias bolsas de regalo y ahora que tengo un muy buen marcador de pintura acrílica blanco, pues me declaro mas adicta todavía. Amo el efecto del blanco sobre el papel kraft, hace que se vea tan bonito y tan minimalista. Así que les cuento como hice esta bolsa de regalo a la medida:

MATERIALES
Papel kraft
Lápiz
Goma
Tijeras
Pegamento
Marcador de pintura acrílica
PASO A PASO
 |  |
|---|
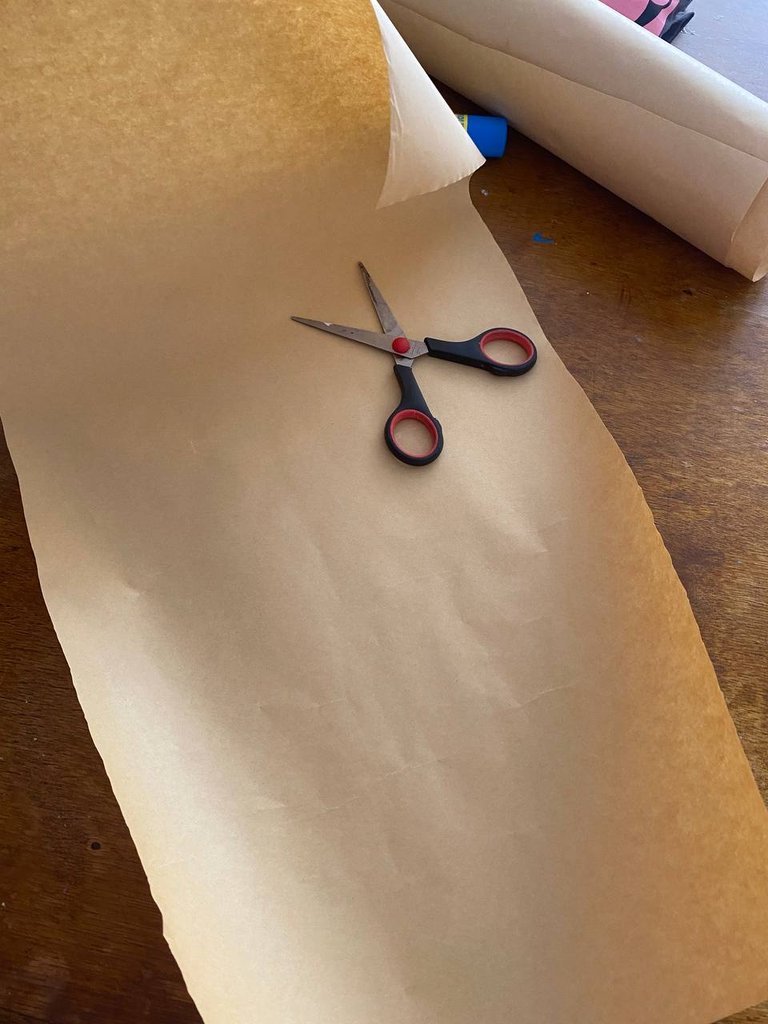
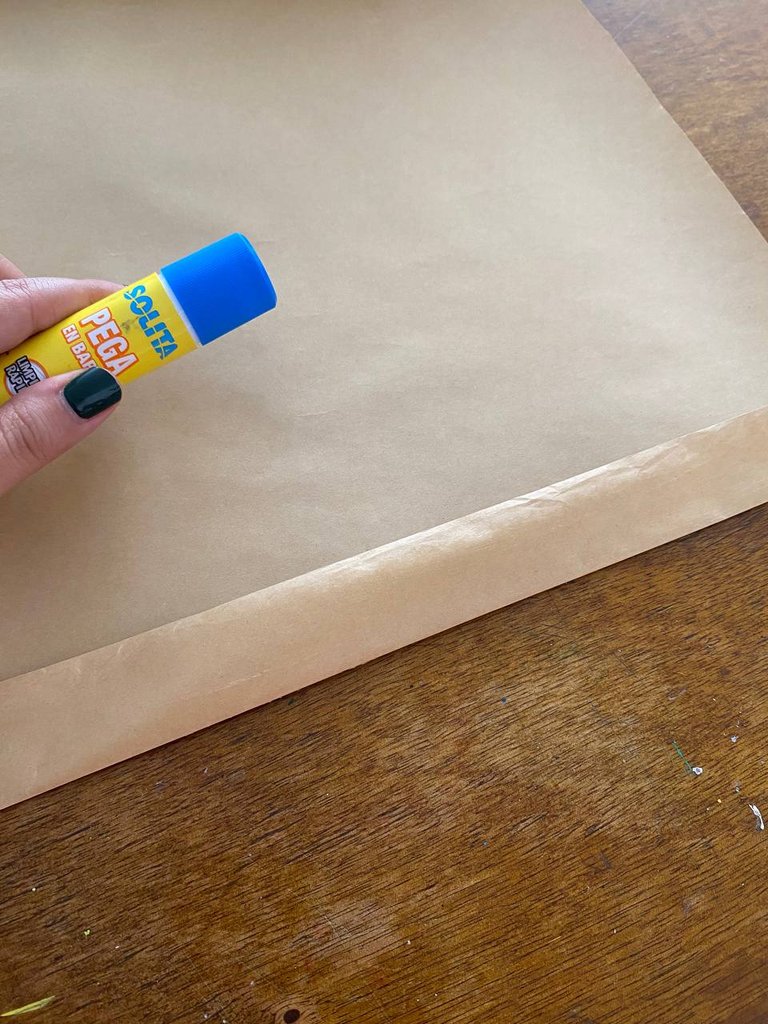
PASO 1
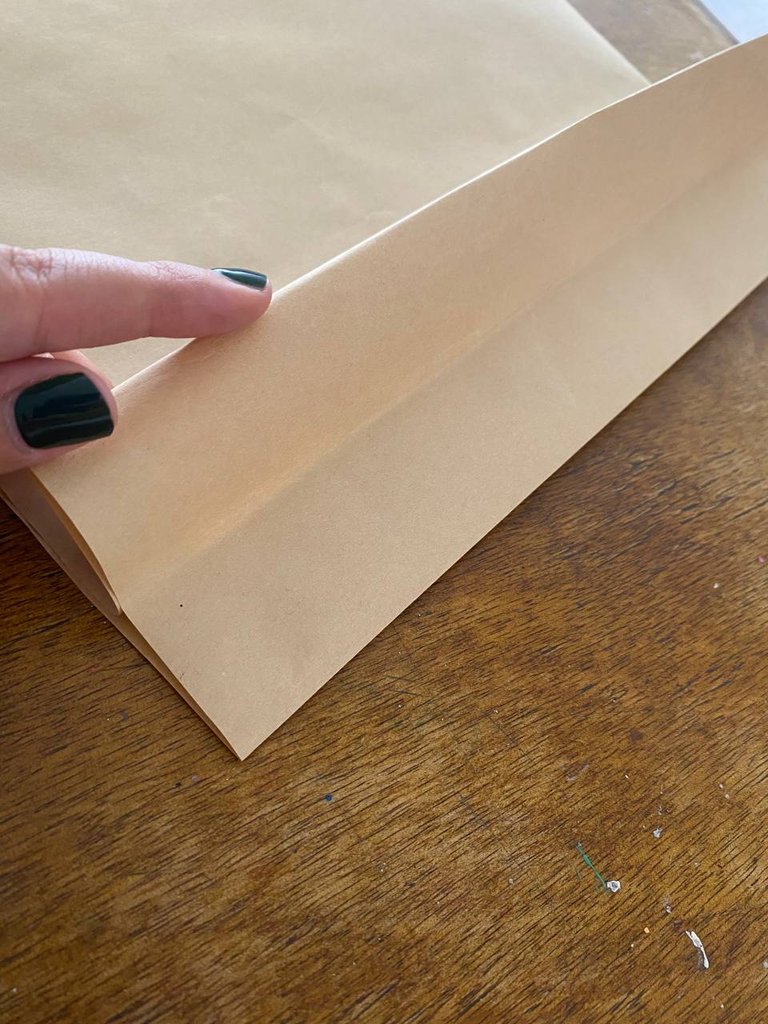
Primero, medi el regalo (que era un pijama), así que necesitaba una bolsa grande y también con bastante profundidad. Así que medí unos 60 cm de ancho por 30 cm de alto. Hice un pliegue de unos 2 cm en uno de los extremos, le unte pegamento en barra y procedí a plegar la bolsa por la mitad, quedando así una bolsa de unos 29 cm de ancho.

 |  |
|---|
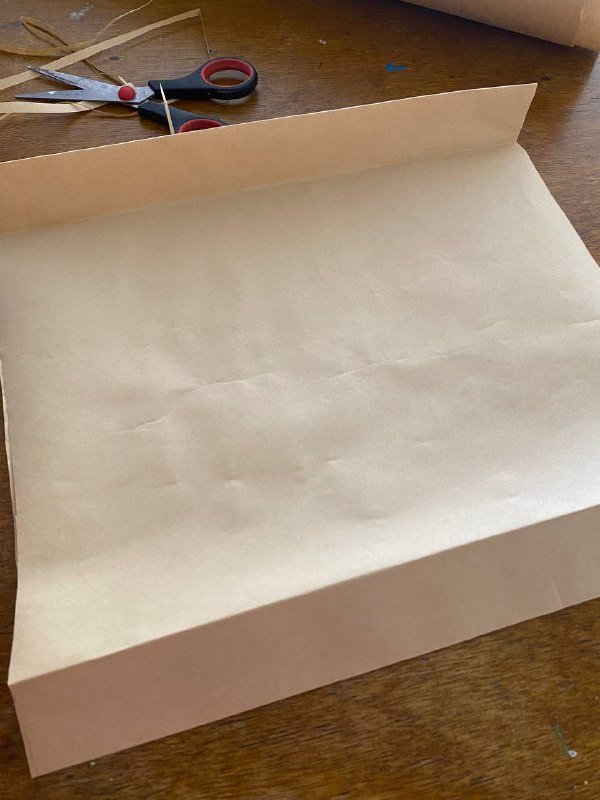
PASO 2
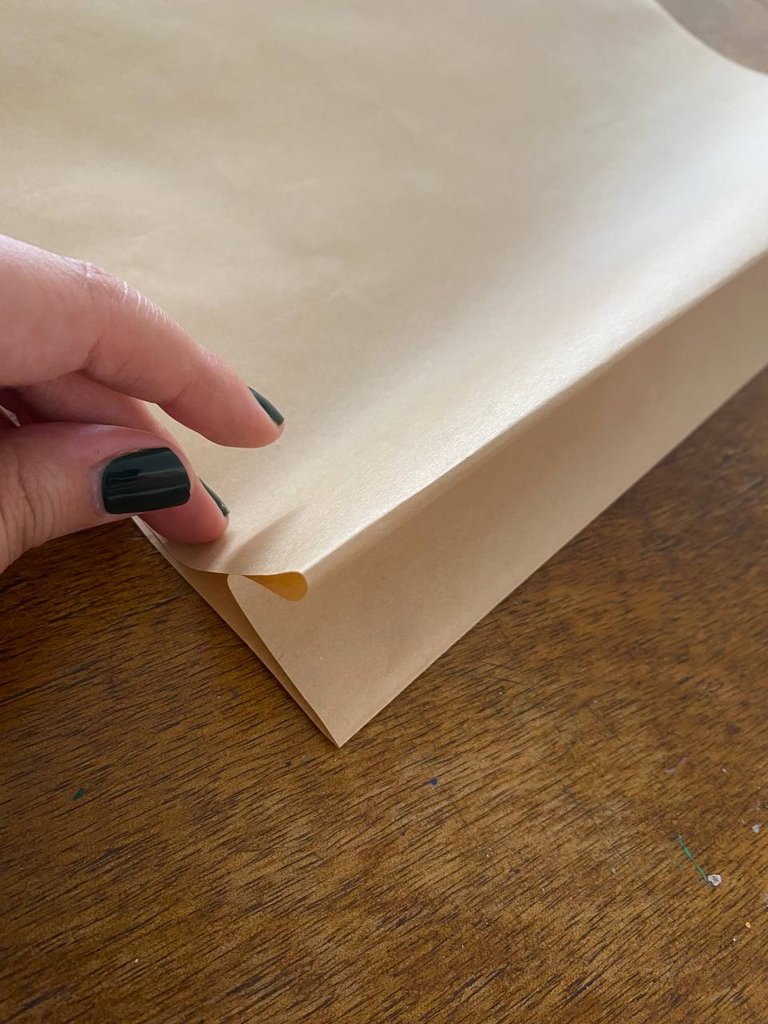
Luego de que secó un poco, hice otro doblez pero en cada lado de unos 3 cm de ancho. Este doblez en cada lado es lo que permite darle a nuestra bolsa profundidad. Luego de que estén doblados, la punta que sobresale irá hacia dentro de la bolsa. Esto hará que nuestra bolsa disminuya de tamaño, pero tenga la profundidad perfecta.
 |  |
|---|
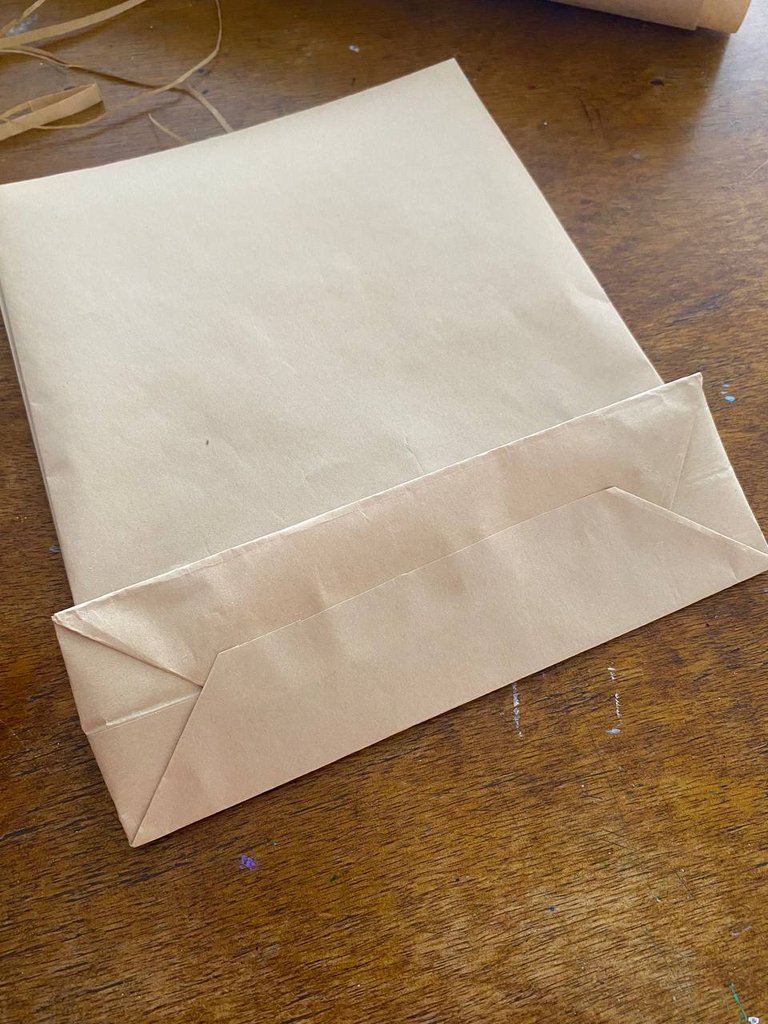
PASO 3
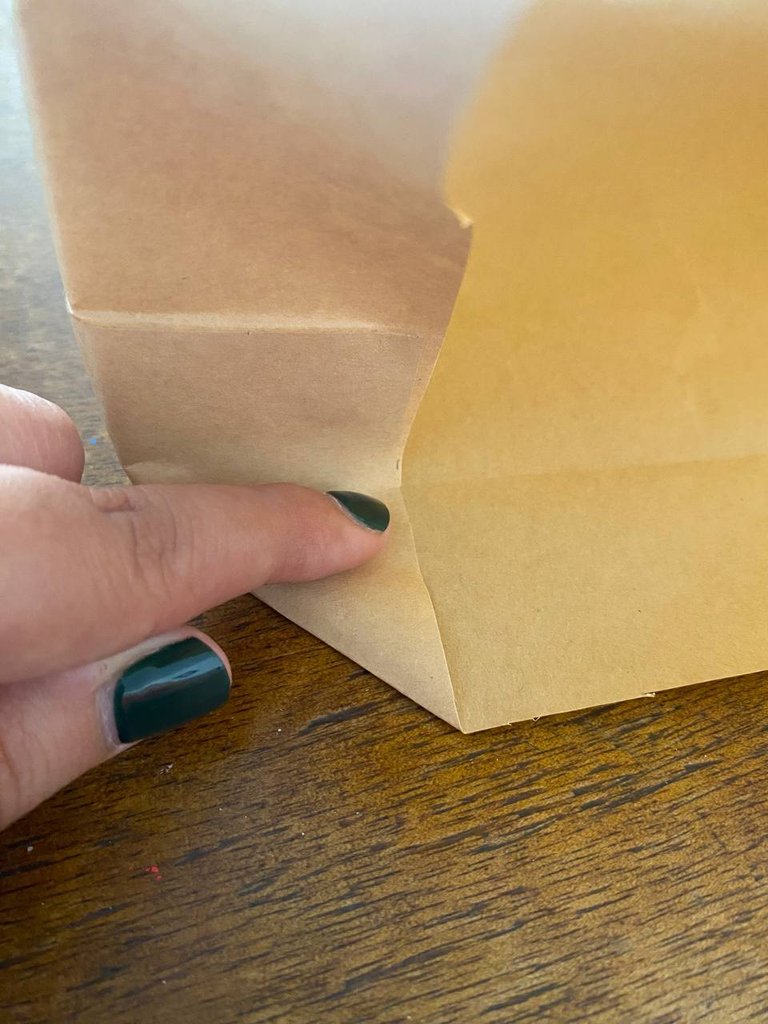
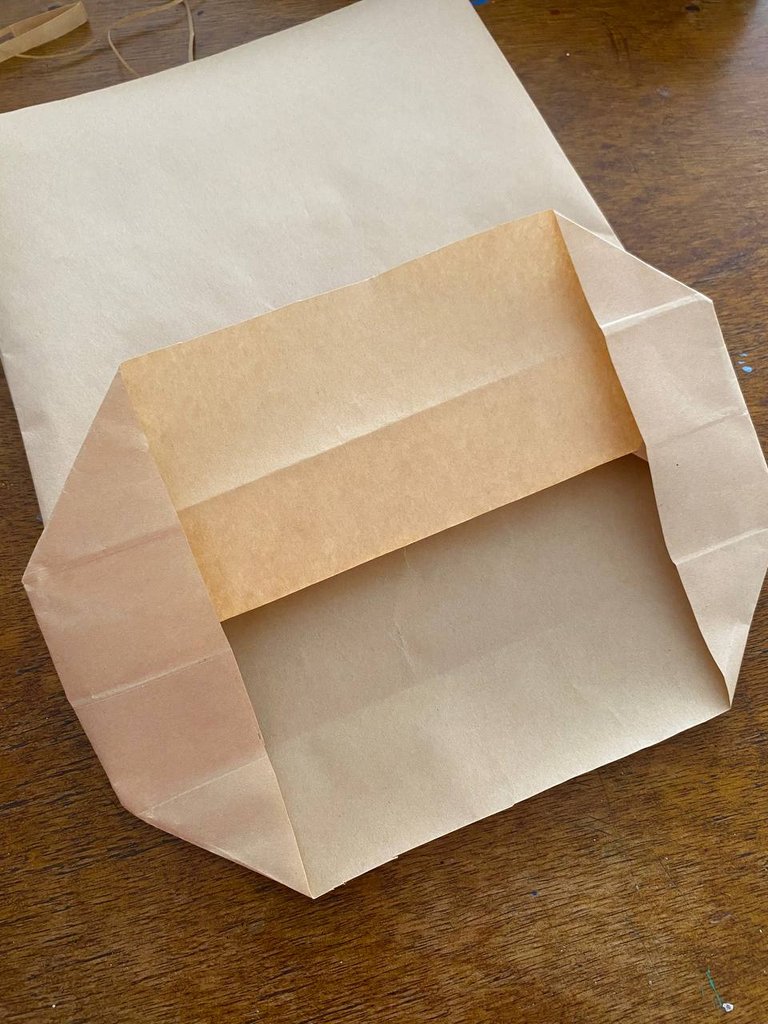
Para la base de la bolsa debemos hacer un doblez de unos 3 cm de alto. A partir de ahi, doblaremos cada punta buscando que coincida con la marca interna de este doblez. Suena complicado pero en realidad es bastante sencillo. Ya solo queda doblar hacia arriba nuevamente para que se formen los dos picos que deberemos cerrar con pegamento.
 |  |
|---|
PASO 4
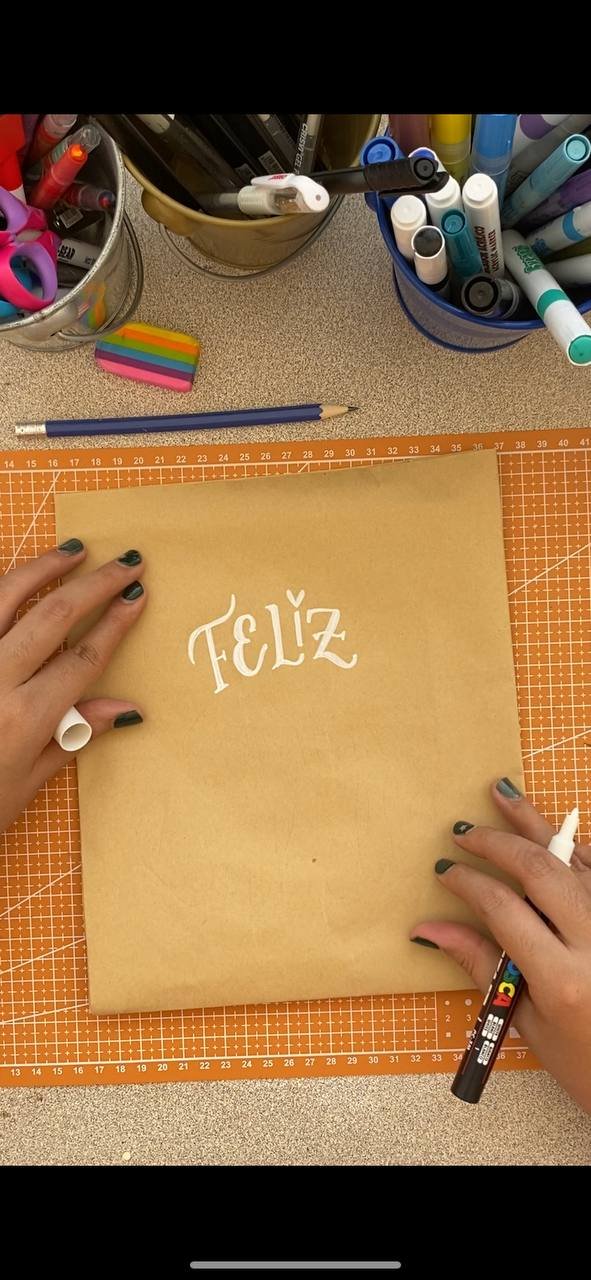
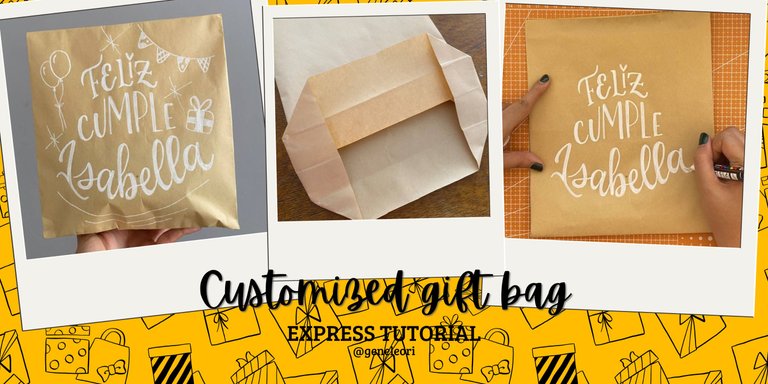
¡Hora de decorar! Hice un pequeño boceto que decía: “Feliz Cumple Isabella”, quería que fuera una bolsa divertida. Con ayuda de un lápiz lo traslade a la bolsa y borre un poco para poder guiarme. Use una mezcla entre un estilo serif y sans serif muy divertido para “Feliz”, usando una forma de arco.
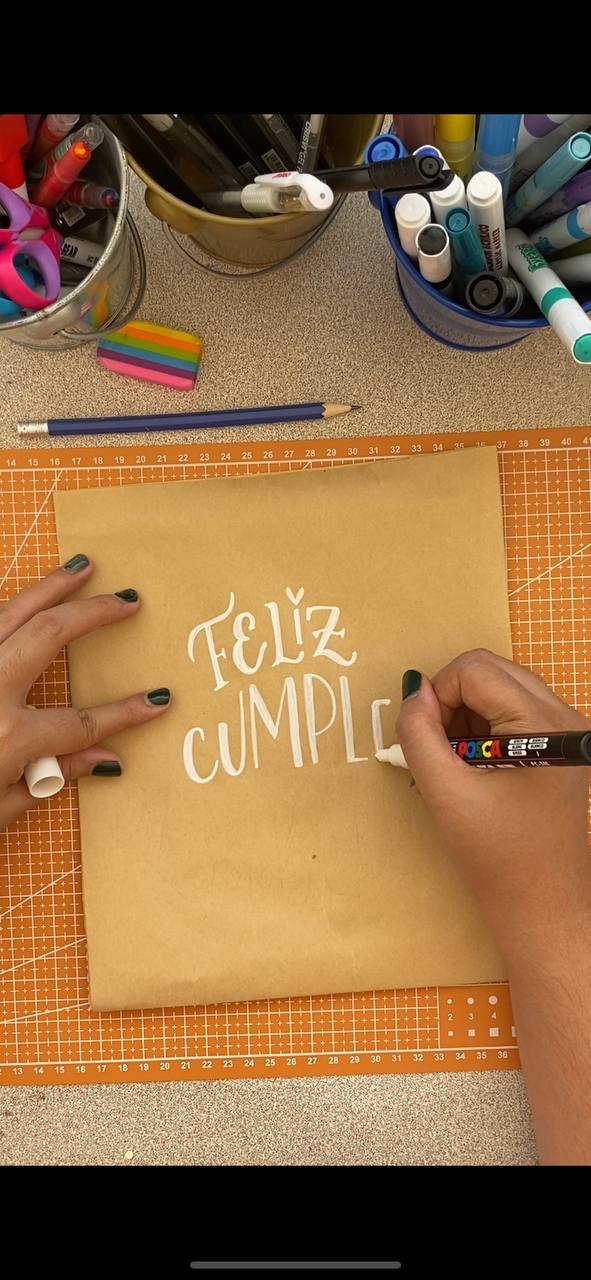
Para “Cumple” busque que encajara con la forma de arco usando letras sans serif, eso permite que se vean más frescas y divertidas.
Para “isabella” use un arco invertido en un estilo cursivo más grande para que destacara.

Añadi doodles con motivo de cumpleaños como banderines, globos y regalos.

PASO 5
¡Bolsa de regalo lista!

Este es un tutorial muy sencillo para tener una bolsa de regalo express y con cosas que puedes encontrar en casa. No necesariamente necesitas papel kraft, puedes usar papel blanco, papel de periodico (usando marcador negro para los detalles) o hasta hacer una mezcla de papeles, eso le da un toque original a los empaques de tus regalos.
Gracias por leerme
Con cariño, G.
Hi hivers! 💜
I hope you are well and happy. If you have seen my previous posts you know that I am a lover of making my own gift bags and now that I have a very good white acrylic paint marker, I am even more addicted. I love the effect of white on kraft paper, it makes it look so pretty and so minimalistic. So I'll tell you how I made this custom gift bag:
MATERIALS
Kraft paper
Pencil
Eraser
Scissors
Glue
Acrylic paint marker
STEP BY STEP
| |
|---|
STEP 1
First, I measured the gift (which was a pair of pajamas), so I needed a big bag and also with enough depth. So I measured about 60 cm wide by 30 cm high. I made a fold of about 2 cm at one end, smeared glue stick on it and proceeded to fold the bag in half, leaving a bag about 29 cm wide.
| |
|---|
STEP 2
After it dried a little, I made another fold but on each side of about 3 cm wide. This fold on each side is what allows us to give our bag depth. After they are folded, the tip that sticks out will go inside the bag. This will make our bag smaller in size, but still have the perfect depth.
| |
|---|
STEP 3
For the base of the bag we must make a fold about 3 cm high. From there, we will fold each tip looking to match the inside mark of this fold. It sounds complicated but it is actually quite simple. Now all that remains is to fold upwards again to form the two peaks that we must close with glue.
| |
|---|
STEP 4
Time to decorate! I made a little sketch that said: “Happy Birthday Isabella”, I wanted it to be a fun bag. With the help of a pencil I transferred it to the bag and erased a little bit to guide me. I used a mix between a serif and sans serif style for “Happy”, using an arc shape.
For “Birthday” I looked to match the arch shape by using sans serif letters, that allows it to look more fresh and fun.
For “isabella” I used an inverted arch in a larger cursive style to make it stand out.
I added birthday-themed doodles like banners, balloons and gifts.
STEP 5
Gift bag ready!
This is a very simple tutorial to have an express gift bag with things you can find at home. You don't necessarily need kraft paper, you can use white paper, newspaper (using black marker for the details) or even make a mix of papers, that gives an original touch to your gift packaging.
Thank you for reading me
With love, G..
FUENTE
Fotos: iphone 11
Traducción: Deepl
SOURCE
Photos: iphone 11
Translation: Deepl

This is looking so nice, the write up on it makes it look great and I love how the outcome is, you have done so well with this.
Thank you!💜
Hermosas las letras, me encantaron jajaja, sin duda un lindo regalo, saludos.
Graciaaas!💜💜
A very nice personalized bag, simple, easy to make, but very pretty to give a special touch.A very nice personalized bag, simple, easy to make, but very pretty to give a special touch.
selected by @dayadam
That's right, it's a bag that can be easily customized💜💜
Un trabajo sencillo, pero muy lindo para dar un obsequio especial.
!discovery 35
Graciaaas!💜💜
This post was shared and voted inside the discord by the curators team of discovery-it
Join our Community and follow our Curation Trail
Discovery-it is also a Witness, vote for us here
Delegate to us for passive income. Check our 80% fee-back Program
¡Felicidades! Esta publicación obtuvo upvote y fue compartido por @la-colmena, un proyecto de Curación Manual para la comunidad hispana de Hive que cuenta con el respaldo de @curie.
Si te gusta el trabajo que hacemos, te invitamos a darle tu voto a este comentario y a votar como testigo por La Colmena.
Si quieres saber más sobre nuestro proyecto, te invitamos a acompañarnos en nuestro servidor de Discord.
Congratulations @geneleori! You have completed the following achievement on the Hive blockchain And have been rewarded with New badge(s)
Your next target is to reach 30000 upvotes.
You can view your badges on your board and compare yourself to others in the Ranking
If you no longer want to receive notifications, reply to this comment with the word
STOPCheck out our last posts: