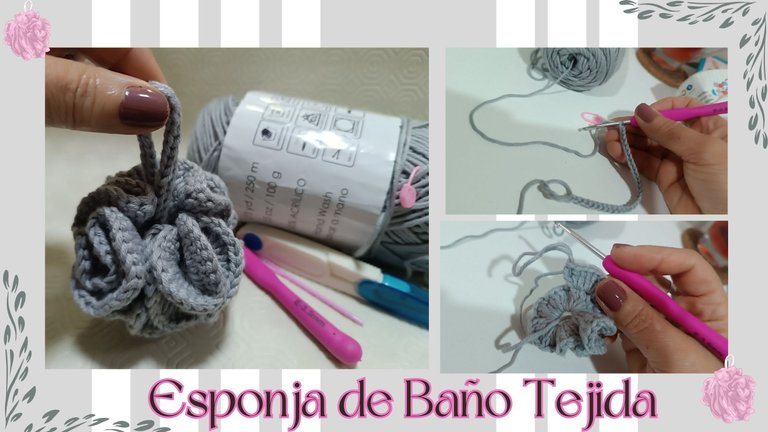
Crocheted bath sponge🧽🧶💖

Happy day, my dear knitting friends! I hope you are all well, in good health, and feeling great.💫
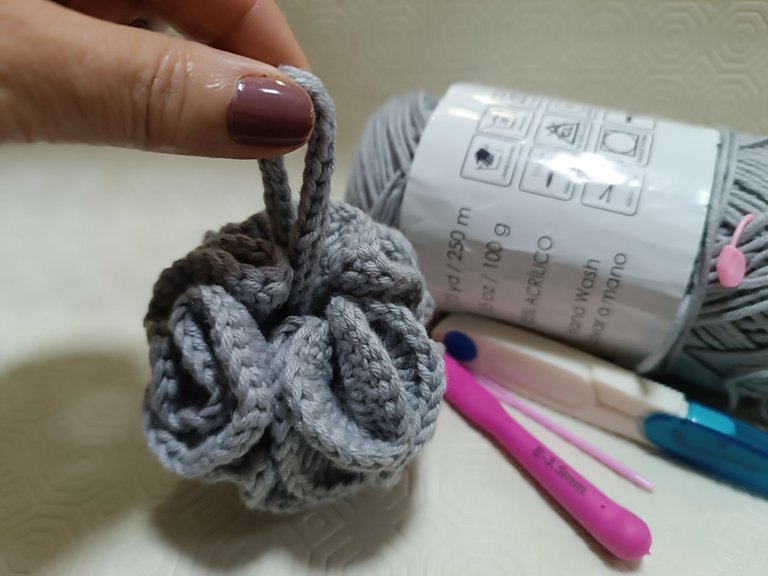
Friends, today I want to tell you about a small but very useful project that I loved knitting: a bath sponge made with Copito gray 100% acrylic yarn. Ever since I got it, I thought it would be perfect for this project because it's a soft yarn, but with a texture that helps remove dirt from the skin, eliminating dead cells and other impurities, all in a delicate and subtle way. Best of all, it knits up very quickly; in just four rounds, it's ready.🧽🧵
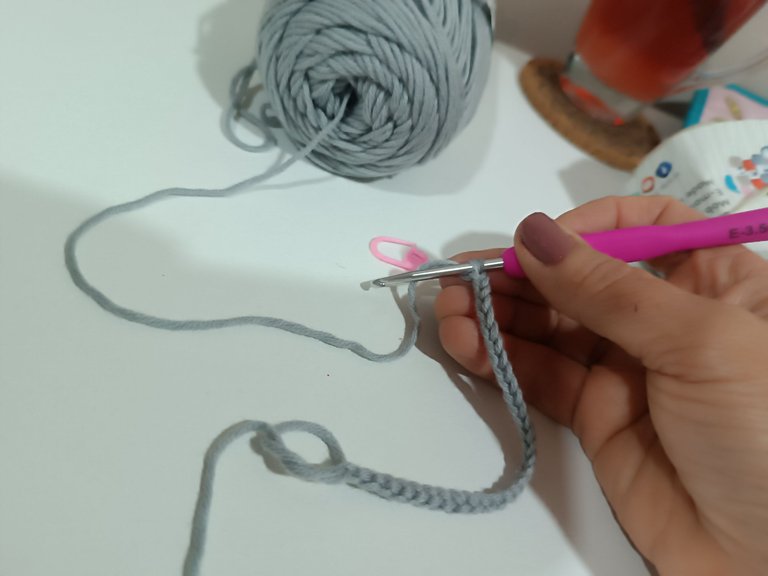
I'll tell you step by step how I did it: I started with a magic ring and immediately cast on 30 chains, which become the strap for hanging the sponge. I think that strap is essential, because it's always handy to be able to hang it up in the bathroom and let it dry thoroughly after use. Then I attached that strip to the magic ring with a slip stitch, a detail I really liked because it secures the join well.💕
¡Feliz día, mis queridas amigas de las agujas! Espero que estén bien, con mucha salud y bienestar.💫
Amigas, hoy quiero contarles de un proyecto pequeñito, pero muy útil que me encantó tejer: una esponja de baño hecha con el hilo Copito gris 100% acrílico. Desde que lo tengo, pensé que era perfecto para este proyecto porque es un hilo suavecito, pero con esa textura que ayuda a retirar la suciedad de la piel, eliminando células muertas y otras impurezas, todo de una manera delicada y sutil. Lo mejor de todo es que se teje rapidísimo, en apenas cuatro vueltas ya la tienes lista.🧽🧵
Les cuento el paso a paso tal como lo hice: empecé con un Anillo Mágico y de inmediato monté 30 cadenitas, que se convierten en la tira para colgar la esponja. Esa tirita me parece fundamental, porque siempre es práctico poder colgarla en el baño y que se seque bien después de usarla. Luego uní esa tira al anillo mágico con un punto deslizado hacia atrás,un detalle que me gustó mucho porque asegura bien la unión.💕

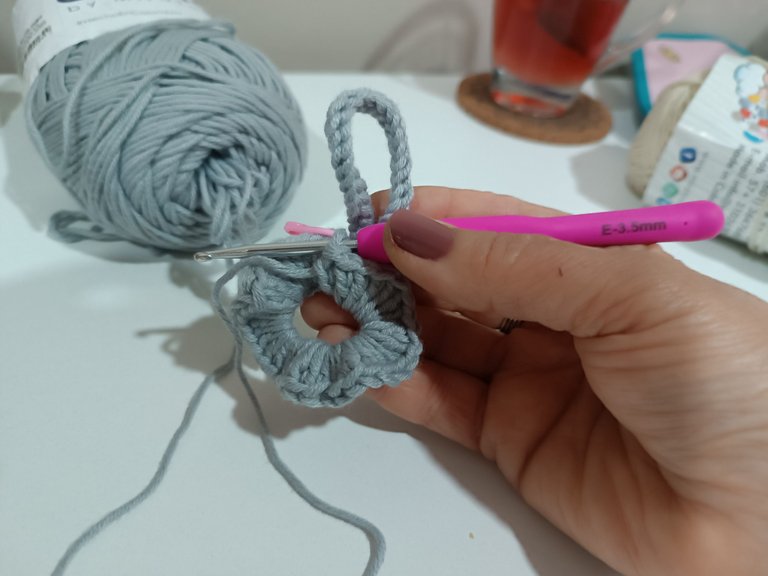
Then, I crocheted a slip stitch in each chain of the strip, and again joined it to the magic ring with a slip stitch. And that's it! The strip was now firm and ready to hold the sponge.💖🧶
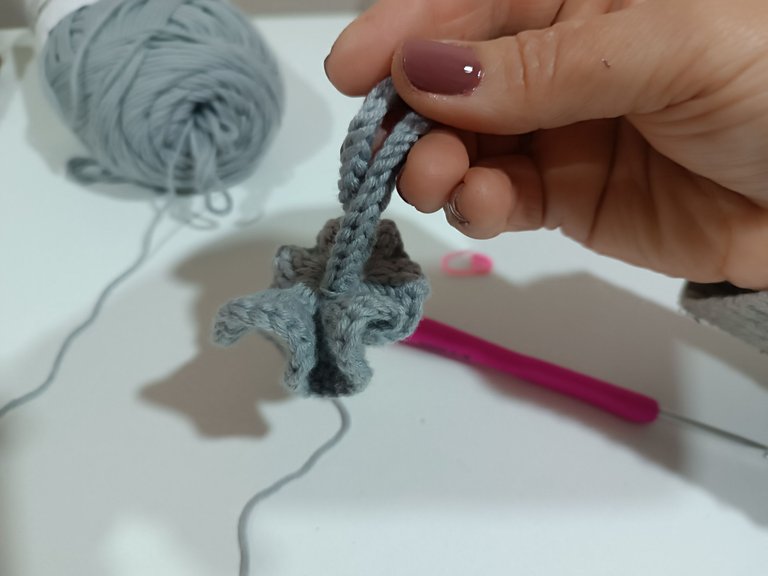
The first round in the magic ring was 40 double crochets. Here, the base of the sponge begins to form. And in rounds 2 and 3, I crocheted 3 double crochets in each double crochet of the previous round. This causes the fabric to begin to gather and take on the volume that gives it the pom-pom shape so characteristic of these bath sponges. At the end of each round, I joined with a slip stitch, taking care to keep the shape closed.🧶
Después, tejí un punto deslizado en cada cadena de la tira, y otra vez uní al anillo mágico con un punto deslizado. ¡Y listo! Ya la tira estaba firme y lista para sostener la esponja.💖🧶
La primera vuelta en el anillo mágico fue de 40 puntos altos. Aquí ya empieza a formarse la base de esponja. Y en las vueltas 2 y 3 tejí 3 puntos altos en cada punto alto de la vuelta anterior. Eso hace que el tejido empiece a fruncirse y tome ese volumen que le da la forma de pompón, tan propia de estas esponjas de baño. Al final de cada vuelta uní con un punto deslizado, cuidando de mantener la forma cerradita.🧶

I loved the result: a beautiful, light, soft, and very practical sponge. I really enjoyed knitting it because it's a quick, useful, and beautiful project. I'm already thinking about making several more in different colors to sell in my display case and to give as gifts. I'm sure anyone would love to receive a little gift like this, handmade with so much love.💖🧶
El resultado me encantó: una esponja hermosa, ligera, suave y muy práctica. La verdad es que me divertí mucho tejiéndola porque es un proyecto rápido, útil y además precioso. Ya estoy pensando en hacer varias más en diferentes colores para poner a la venta en mi vitrina y para regalar. Estoy segura de que a cualquiera le encantaría recibir un detallito así, hecho a mano y con tanto cariño.💖🧶


**
Health and well-being for all!
¡Salud y bienestar para todos!
**
Las fotos que ilustran esta publicación son de mi archivo personal, tomadas con mi celular Redmi9. El banner y el separador son mis diseños en Canva.
The photos illustrating this post are from my personal archive, taken with my Redmi9 cell phone. The banner and the divider are my designs in Canva.
It is beautiful, elegant, and charming. It looks pretty cool. Good to see how you made this. Great job!
selected by @rezoanulvibes
Thanks you!
Amazing work
Thanks you very much!
Una idea genial. Saludos amiga.