A Charming Makeup Look Inspired by Rosetta from Tinker Bell [ENG-ESP]
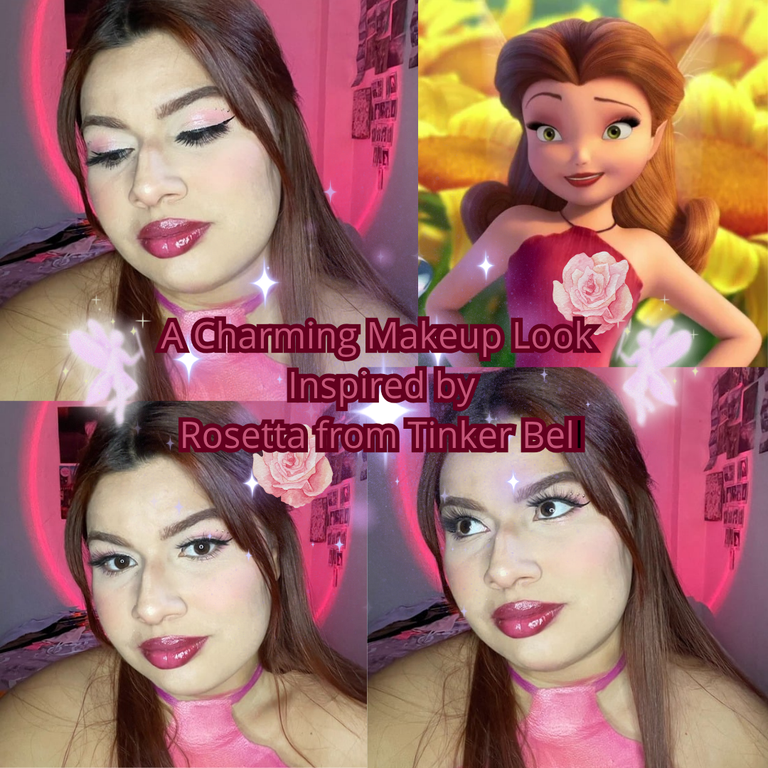
Hello, Hive community! I'm here again with another makeup look created by me. 💕 I've always loved the fairies from Tinker Bell, and one of my favorites is Rosetta. Her sweetness, elegance, and love for flowers make her unique, and I wanted to capture her essence in this special makeup look
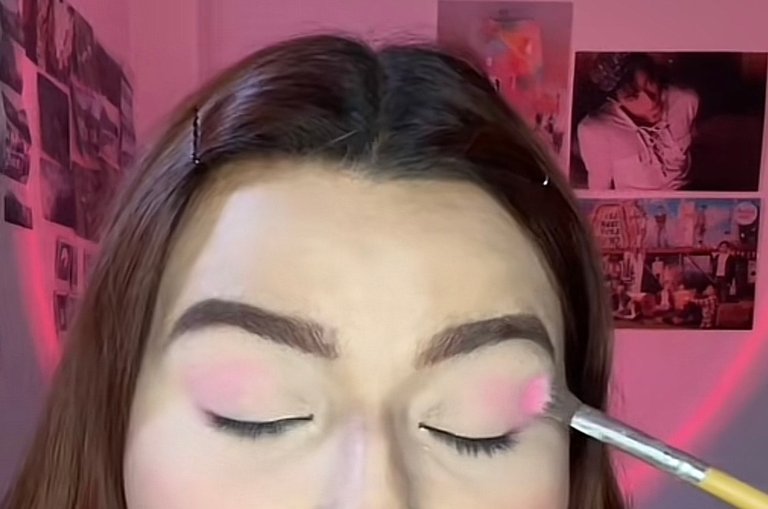
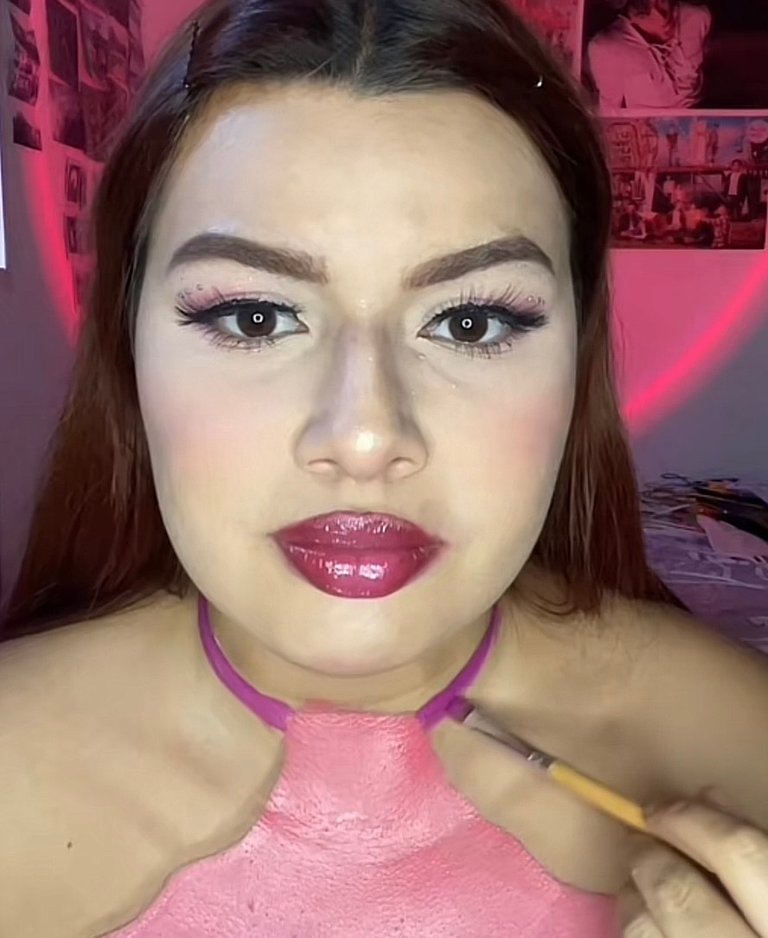
Step 1: Prepping the Skin Before starting the magic, I prepped my skin as usual. I moisturized my face to ensure the makeup lasted all day. Then, I moved on to my brows, defining them with brown eyeshadow to frame my gaze. I applied a medium-coverage foundation for a fresh, natural finish, blending it well with a sponge. I concealed dark circles and small imperfections with a concealer, making sure to brighten the under-eye area for a more awake look. Then, I set everything with translucent powder. To add dimension to my face, I lightly contoured my cheekbones, jawline, and nose with a bronzer. But the most important part of this look was the blush. Since Rosetta is the garden fairy, her face has a beautiful, rosy flush. I applied a vibrant pink blush on my cheeks and blended it toward my temples for a more ethereal effect.
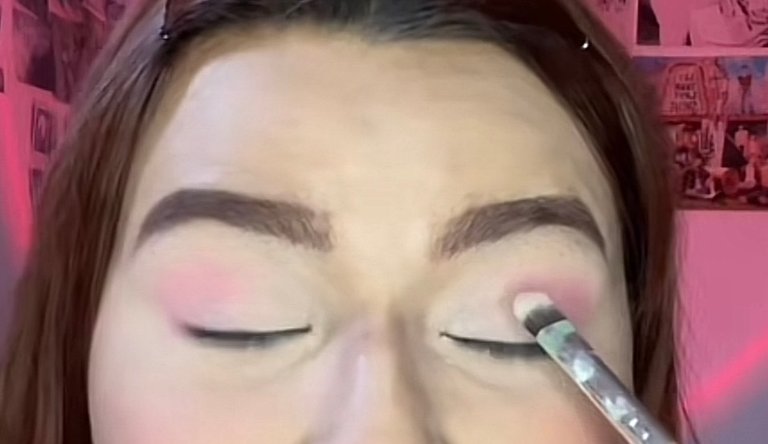
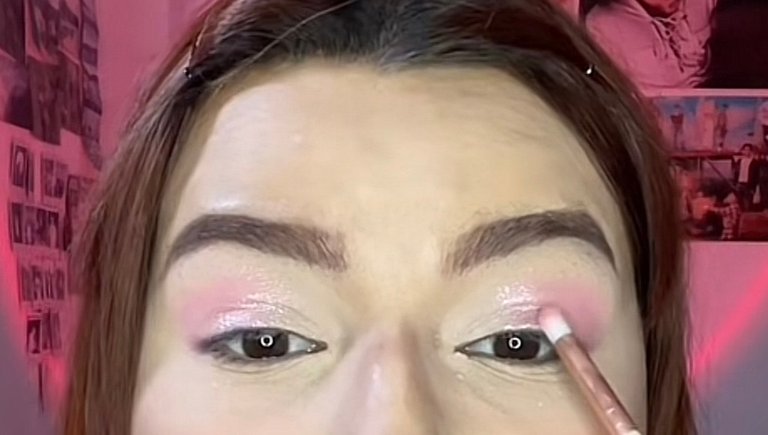
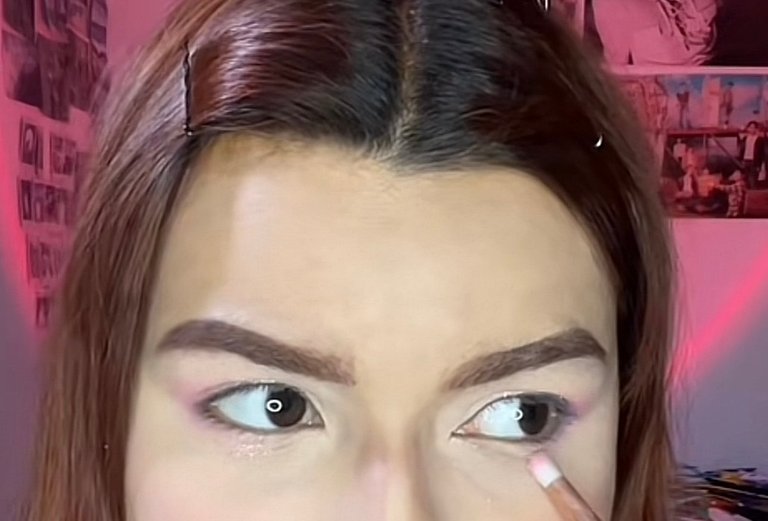
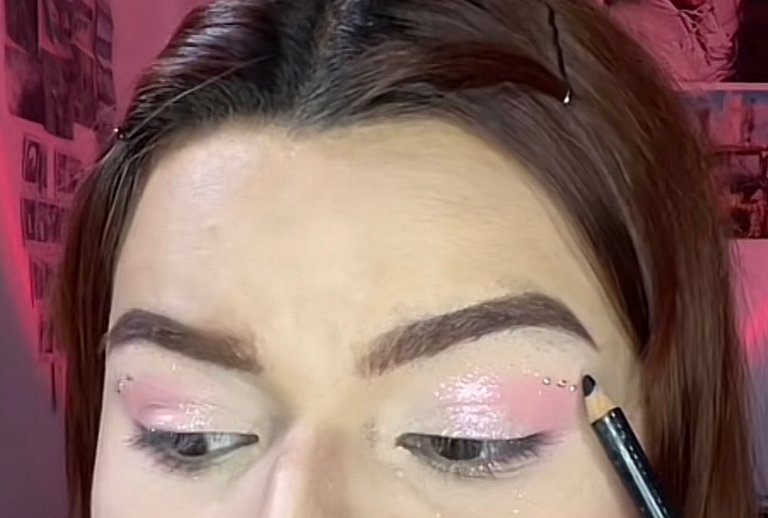
Step 2: The Magic in the Eyes Now comes the most exciting part of the makeup—the eyes! - I started by applying a soft pink eyeshadow to the outer V of my eye, blending it well for a natural transition. - Then, I applied a shade close to my skin tone in the crease for added depth. - For the center of the lid, I chose a shimmery pink eyeshadow to add a touch of light and fantasy. - On the lower lash line, I used the same combination of intense pink and shimmer to create a harmonious effect. - To make the look even more fairy-like, I added rhinestones to the outer corner of my eyes, creating small sparkles that elevated the makeup. - I lined my eyes with black eyeliner, creating a subtle cat-eye to make my gaze more expressive. - To finish, I applied false lashes for a more dramatic effect and mascara on my lower lashes.
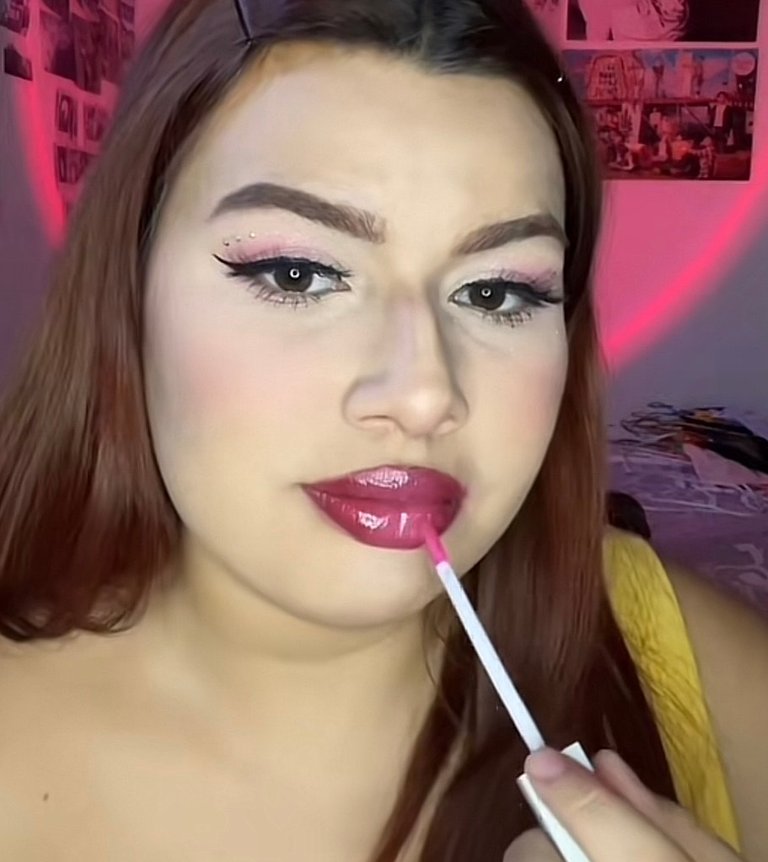
Step 3: Fairy Lips For the lips, I wanted to match Rosetta’s exact shade, so I mixed a red lipstick with a pink one until I got the perfect color. To give them a shinier and fuller look, I added a bit of gloss to the center.
 |  |  |
|---|---|---|
 |  |  |

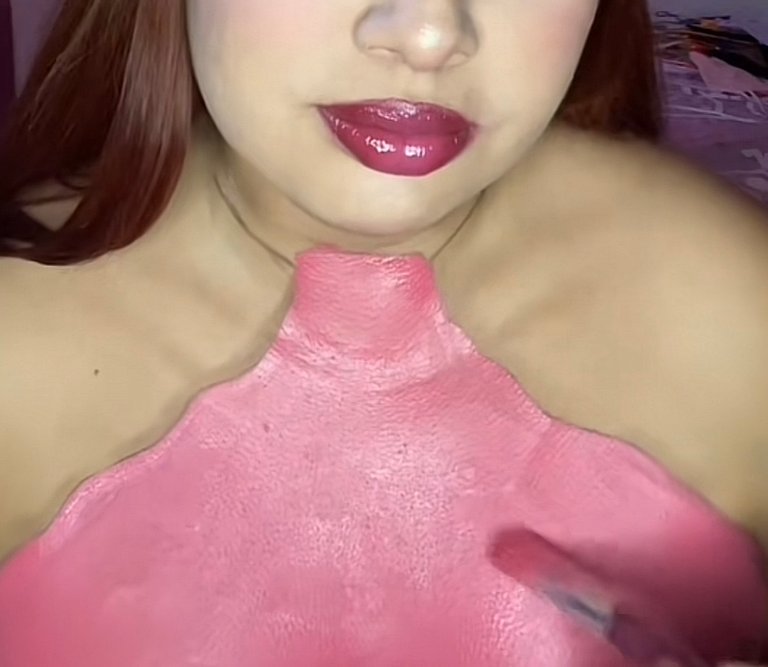
Step 4: The Fairy Dress To complete the look, I painted Rosetta’s signature dress on my chest, making sure to include details that made it look more realistic. I blended the colors and added some shading to enhance the illusion.
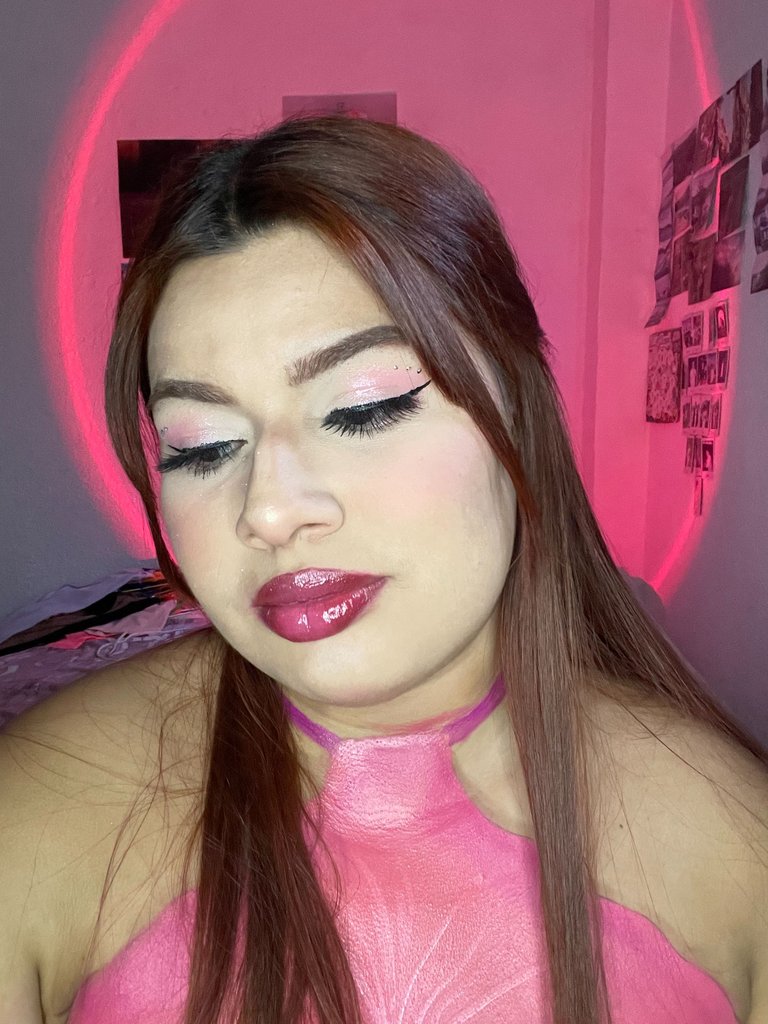
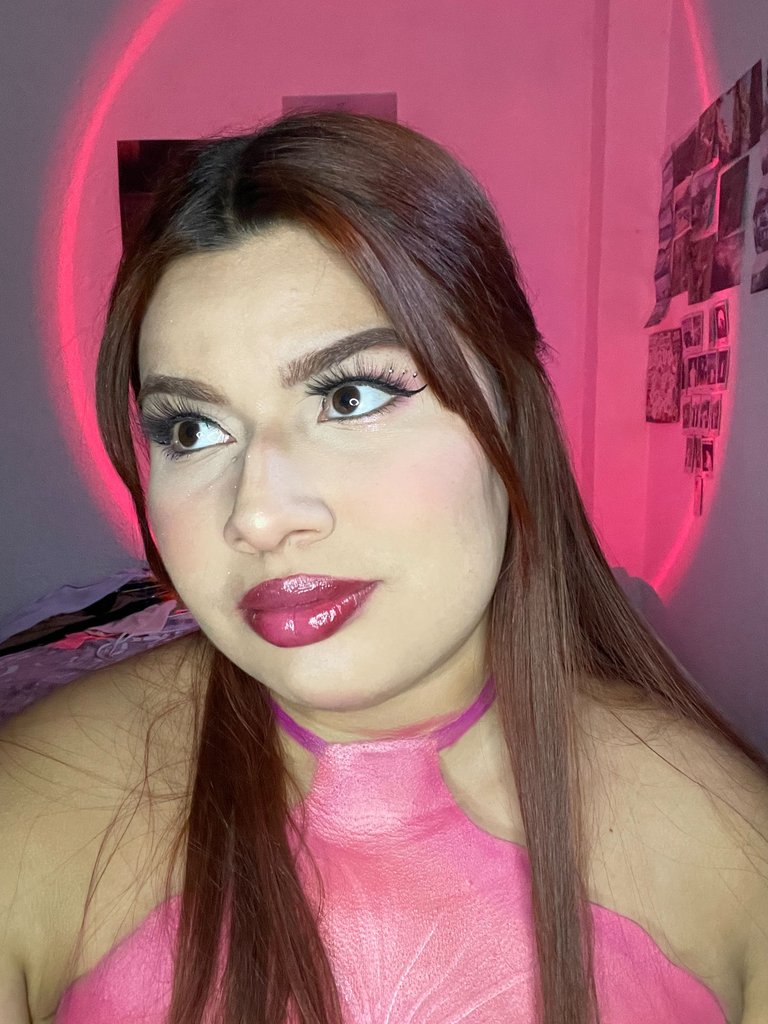
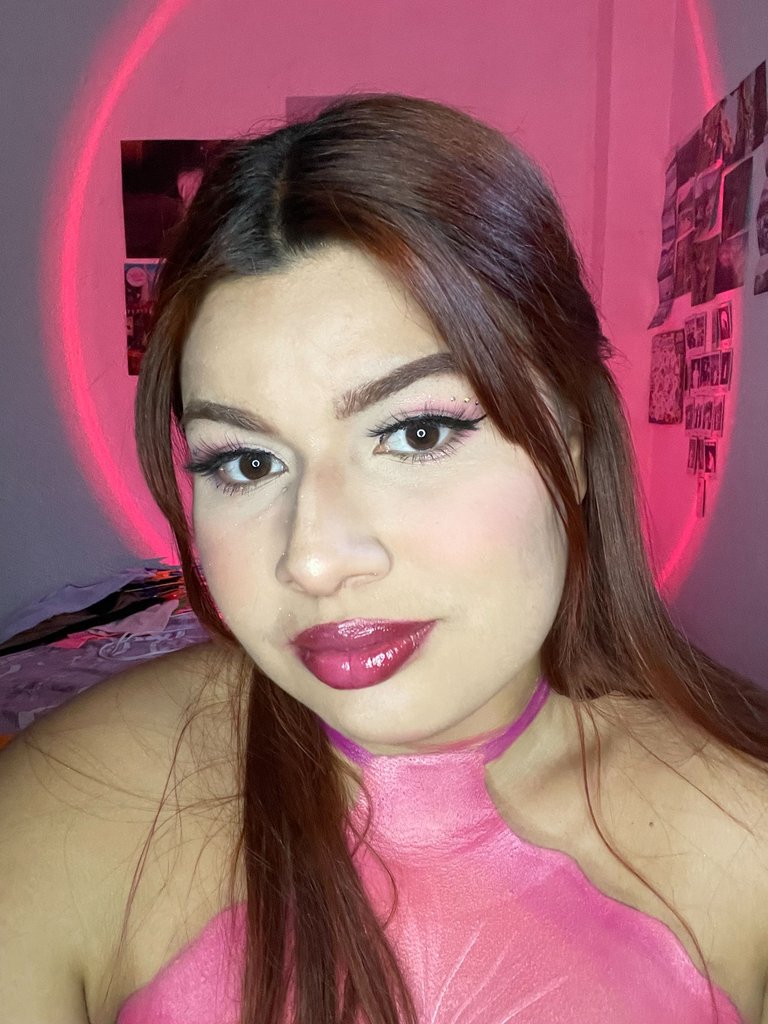
Final Touches & Reflection This makeup look was a magical experience! I loved playing with pink shades and rhinestones to add that whimsical touch that defines Rosetta. If you're a fan of Tinker Bell and her friends, I highly recommend trying this look—it's a fun way to connect with your favorite fairy! ✨
 |  |  |
|---|---|---|
 |  |

Un Maquillaje Encantador Inspirado en Rosetta de Tinker Bell
Holis comunidad de Hive, por aquí trayendo otro maquillaje realizado por mi. 💕 Siempre he amado a las hadas de Tinker Bell, y una de ellas es Rosetta. Su dulzura, su elegancia y su amor por las flores la hacen única, y quise capturar su esencia en un maquillaje especial.
Paso 1: Preparando la piel Antes de comenzar con la magia, preparé mi piel como siempre. Hidraté mi rostro para asegurarme de que el maquillaje durara todo el día. Luego, pasé an mis cejas, definiéndolas con una sombra marrón para enmarcar la mirada. Apliqué una base de cobertura media para un acabado fresco y natural, difuminándola bien con una esponja. Corregí las ojeras y algunas imperfecciones con corrector, asegurándome de iluminar un poco la zona debajo de los ojos para un efecto más despierto. Después sellé todo con polvos traslúcidos. Para darle dimensión al rostro, hice un ligero contorno con polvo bronceador en los pómulos, mandíbula y nariz. Pero lo más importante para este look era el rubor. Como Rosetta es la hada de las flores, su rostro tiene un rubor encantador y rosado. Utilicé un tono rosa vibrante en mis mejillas y lo difuminé hacia las sienes para un efecto más etéreo.
Paso 2: La magia en los ojos Aquí viene la parte más emocionante del maquillaje: los ojos. Comencé aplicando una sombra rosa suave en la UV externa del ojo y difuminándola bien para crear una transición natural. Luego, en la cuenca del ojo, coloqué un tono parecido a mi color de piel. Para el centro del párpado, elegí una sombra con destellos brillantes en tono rosa. Esto le dio un toque de luz y fantasía al look. En el párpado inferior, apliqué la misma combinación de sombra rosa intensa y brillos para un efecto armonioso. Para darle un toque especial y más hadístico, coloqué piedrería en la parte exterior del ojo, agregando pequeños destellos de luz que elevan el maquillaje a otro nivel. Delineé mis ojos con un delineador negro, creando un sutil cat eye para hacer que la mirada se viera más expresiva. Finalicé los ojos colocando pestañas postizas para un efecto más llamativo y apliqué rímel en las pestañas inferiores.
Paso 3: Labios de hada Para los labios, quería encontrar el tono exacto de Rosetta, así que mezclé un labial rojo con uno rosado hasta lograr el color perfecto. Para darles un toque más brillante y voluminoso, añadí un poco de gloss en el centro.
| | |
|---|---|---|
| | |
Paso 4: Vestido de hada Para completar el look, dibujé en mi pecho el icónico vestido de Rosetta, asegurándome de incluir detalles para que se viera más realista. Difuminé los colores y agregué algunas sombras para que la ilusión fuera más convincente. Toques finales y reflexión Este maquillaje fue una experiencia mágica. Me encantó jugar con los tonos rosados y la pedrería para darle ese toque de fantasía que caracteriza a Rosetta. Si eres fan de Tinker Bell y sus amigas, te recomiendo intentar este look, ¡es una forma divertida de conectarte con tu hada favorita! ✨.
| | |
|---|---|---|
| |

Banner - separadores
CANVA
Photos Taken with my iphone 12
Me encantó el maquillaje, captaste la esencia de roseta. 🌷
Grashias 💕
Congratulations @ariwang! You have completed the following achievement on the Hive blockchain And have been rewarded with New badge(s)
Your next target is to reach 900 upvotes.
You can view your badges on your board and compare yourself to others in the Ranking
If you no longer want to receive notifications, reply to this comment with the word
STOPCheck out our last posts:
muy hermoso maquillaje
!LOL
Posted using Hive Images
lolztoken.com
He was just going through a stage.
Credit: reddit
@ariwang, I sent you an $LOLZ on behalf of hivephoto
(8/10)